Auto mode, Boost mode, Hot surface indicator – KITCHENAID 30 Inch Slide-In Induction Range Owners Guide User Manual
Page 22: Bridge, Control lock, Ceramic glass
Use the following chart as a guide when setting heat levels.
Setting
Recommended Use
9 to Boost
�
Bring liquid to a boil.
9
�
Start cooking food.
7 to 8
�
Quickly brown or sear food.
6 to 7
�
Hold a rapid boil.
5 to 6
�
Fry poultry or meat.
�
Cook soups, sauces, and gravies.
4 to 5
�
Maintain a slow boil.
�
Stew or steam food.
3 to 5
�
Simmer.
1 to 2
�
Keep cooked food warm.
�
Melt chocolate or butter.
Simmer
�
Maintain a slow boil.
Auto Mode
To Use:
To Turn On:
1.
Check that a surface cooking area has been selected.
2.
Touch Auto to toggle and select between Melt, Simmer, and
Boil functions. “-” next to the selected function will light up.
When melting foods, such as chocolate or butter, the surface
cooking area can be set to the Melt function for minimum
power level. Similarly simmer and boil functions can also be
used as required.
To Turn Off:
Touch the surface cooking area Off keypad.
Boost Mode
For maximum power level operation, all cooktop touch-activated
electronic controls can be set to the Performance Boost function
when bringing liquids to a fast and rapid boil. Select the desired
surface cooking area, and then touch “Boost” on the heat level
slider to immediately reach the highest setting.
NOTE:
This mode can be used on one left hand side cooking area
and one right hand side cooking area simultaneously or can be
used on any one cooking area. Cooking area/areas can operate in
this mode maximum for 10 minutes.
Hot Surface Indicator
An “H” will appear in the heat setting display of a surface cooking
area that is too hot to touch, after that surface cooking area is
turned off.
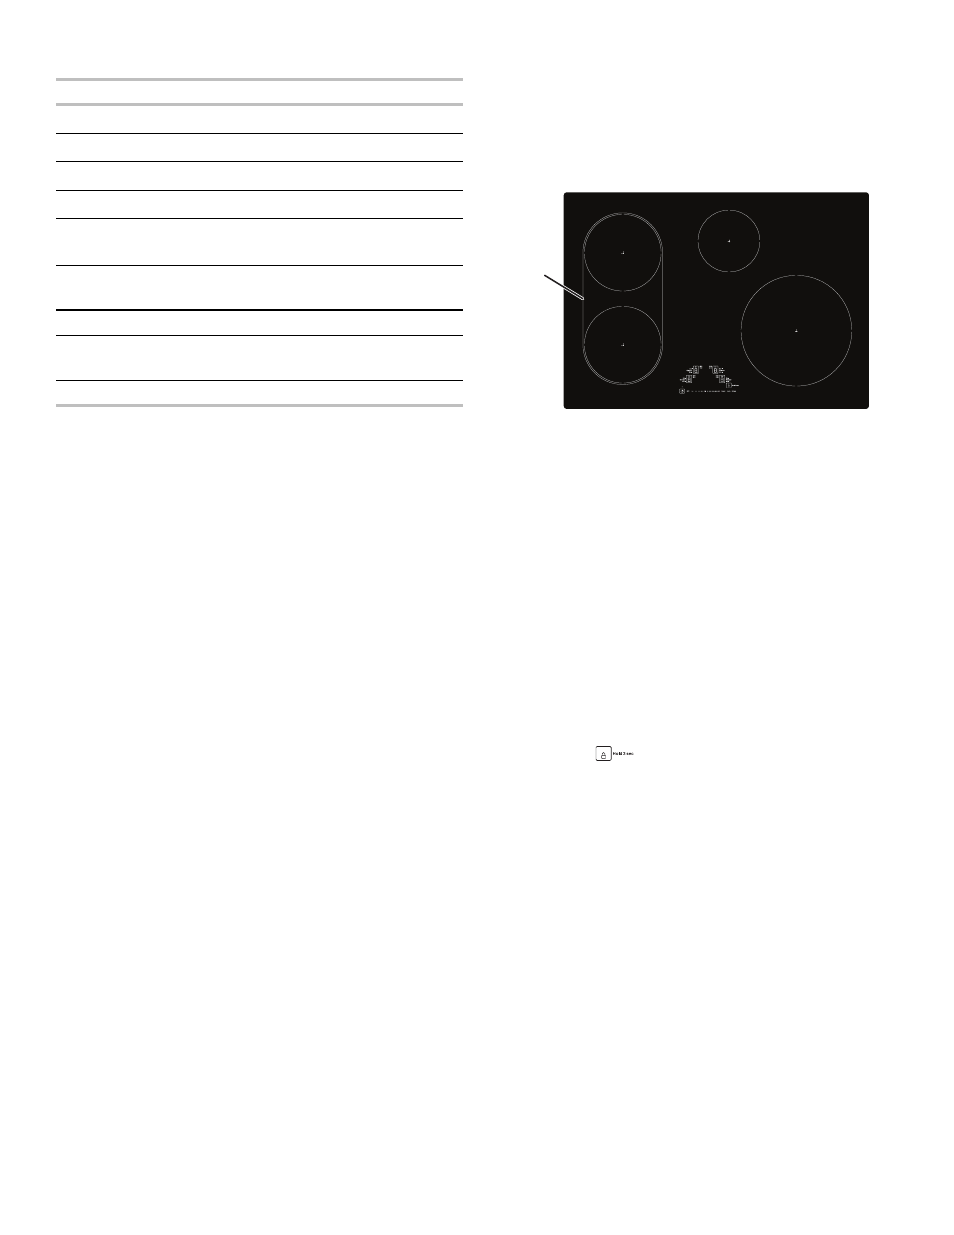
Bridge
The Bridge function allows you to use 2 cooking zones as an
extra-large cooking zone. Use the bridge area to create an oblong
heated area to cook with large or oblong cookware.
To Turn On the Bridge:
1.
Place large or oblong cookware on the bridge area.
A
A.
Bridge
area
2.
Touch POWER. The cooktop will turn on.
3.
Touch Bridge.
The heat setting levels for the 2 left surface cooking areas will
default to “0” and can be set from a minimum of “1” to a
maximum of “9.”
4.
Slide a finger on the heat level slider to change the power
level up or down.
The selected heat level will show in the heat level display for
each surface cooking area using the bridge.
To Turn Off the Bridge:
1.
Touch Bridge.
The surface cooking areas will resume operation as 2
separate areas.
NOTE:
Performance
Boost
cannot
be
used
on
the
same
elements
in
combination
with
the
Bridge
function.
Control Lock
Touch
and
hold
the
control
lock
keypad
for
3
seconds
to
lock
the
cooktop
controls.
Touch
and
hold
the
control
lock
keypad
again
for
3
seconds
to
unlock
the
cooktop
controls.
Ceramic Glass
Clean
the
cooktop
after
each
use
to
help
avoid
scratches,
pitting,
abrasions,
and
to
condition
the
glass
surface.
Ceramic
glass
cooktop
cleaner
and
a
cooktop
scraper
are
also
recommended
for
stubborn
soils.
Do
not
use
abrasive
cleaners,
cleaning
pads,
or
harsh
chemicals
for
cleaning.
The
Cooktop
Care
Kit
Part
Number
31605
contains
all
of
the
items
needed
to
clean
and
condition
your
ceramic
glass
cooktop.
Refer
to
the
“Range
Maintenance
and
Care”
section
in
the
Owner’s
Manual
for
additional
information.
IMPORTANT:
To
avoid
permanent
damage
to
the
cooktop
surface
and
to
make
soils
easier
to
remove,
clean
the
cooktop
after
each
use
to
remove
all
soils.
�
Avoid storing jars or cans above the cooktop. Dropping a
heavy or hard object onto the cooktop could crack the cooktop.
�
To avoid damage to the cooktop, do not leave a hot lid on the
cooktop. As the cooktop cools, air can become trapped
between the lid and the cooktop and the ceramic glass could
break when the lid is removed.
22