Step 4: connecting to telephone line(p. 104) – Canon imageCLASS MF264dw II Multifunction Monochrome Laser Printer User Manual
Page 113
●
You can also configure the setting to receive faxes automatically after the machine rings for a certain
period of time. [Switch to Auto RX](P. 502)
4
Press [Apply].
➠
The [Connect Telephone Line] screen is displayed.
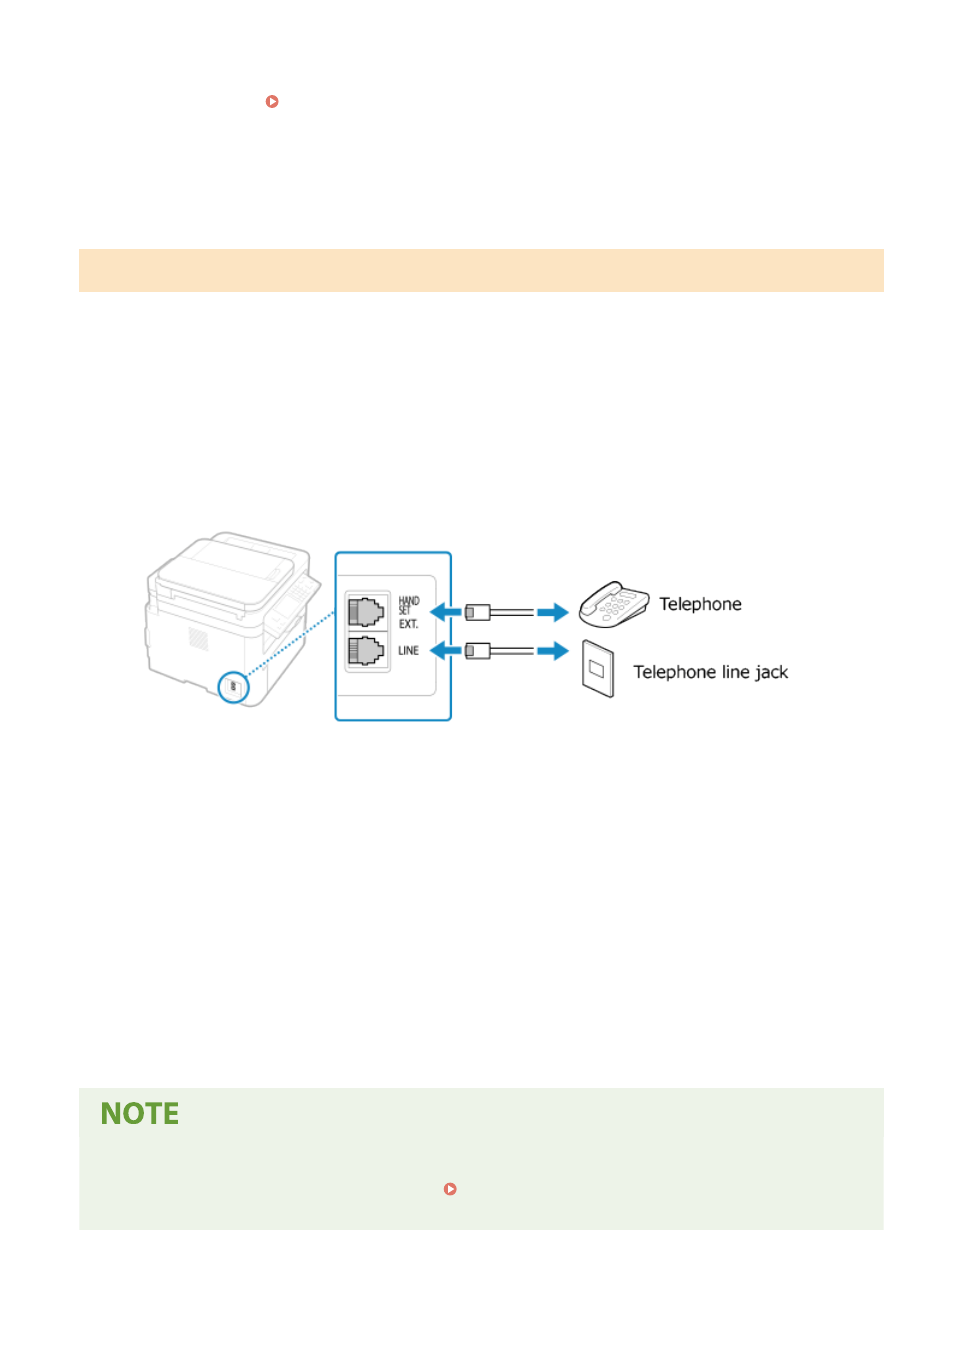
Step 4: Connecting to Telephone Line
Use the supplied telephone cord to connect the machine to the telephone line.
When using a telephone, connect it to the machine.
1
Press [Next].
➠
The [Connect to socket on back of device.] screen is displayed.
2
Connect the supplied telephone cord to the telephone line jack (LINE) on the
machine and the telephone line connector on the wall.
Connect a telephone to the external telephone jack (EXT.) on the machine.
●
When connecting a telephone with fax function, be sure to disable the fax auto receive setting on the
telephone.
●
Depending on the type of telephone connected to it, the machine may not be able to send or receive faxes
properly.
3
Press [Next].
➠
The screen confirming that you want to exit the Fax Setup Guide is displayed.
4
Press [Yes].
➠
The settings configured in the Fax Setup Guide are applied, and the type of telephone line is configured
automatically.
If the Type of Telephone Line Is Not Configured Automatically
●
Configure the type of telephone line manually. [Select Line Type](P. 495)
* If you do not know the type of your telephone line, contact your telephone company.
Setting Up
104