3 connecting the remote, 0 installation – Magnum Energy ME-MR Remote User Manual
Page 10
4
©2013 Magnum Energy, Inc.
2.0 Installation
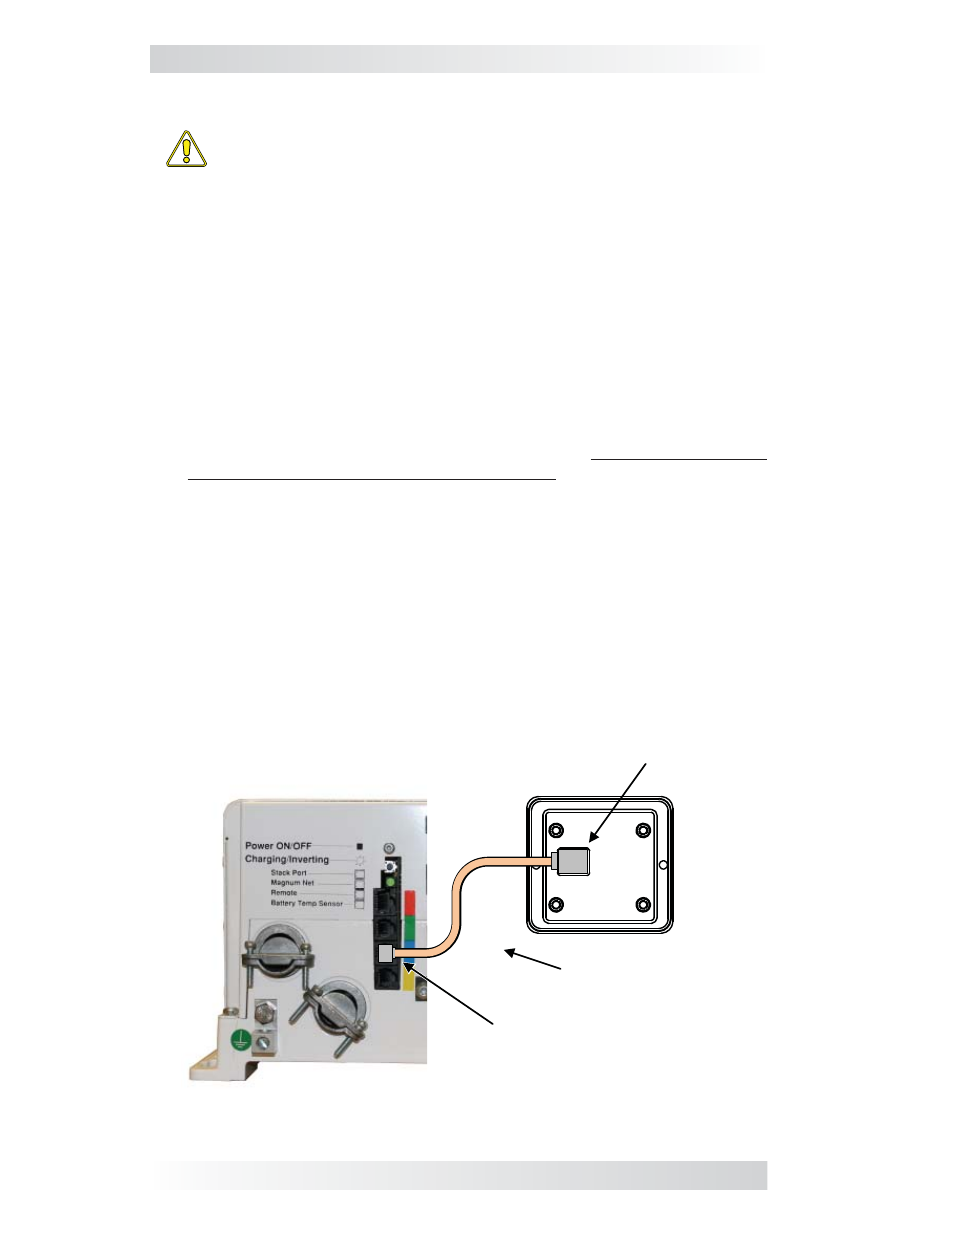
Figure 2-3, Remote Control Connections
BACK
RJ11 Connection
Magnum Inverter
Remote Cable
Remote Port (blue)
2.2.3 Connecting the Remote
CAUTION: When connecting battery power to the inverter, all battery
negative connections must be connected prior to the battery posi-
tive connections. When removing battery power from the inverter,
the battery positive should be removed before any battery negative
connections are disconnected. This prevents any communication
chips/lines from becoming the DC return path to the battery—causing
permanent damage to all connected accessories.
Summation: Ensure all battery negative circuits are always con-
nected before connecting or disconnecting battery positive.
1. Route the remote cable between the remote and the inverter/charger. This
25’ cable is a 4-wire telephony standard with RJ11 connectors on each
end. A standard telephone cable (with 4 conductors) may be substituted
if the provided remote cable cannot be used.
2. Connect the remote cable to the inverter/charger’s Remote port (blue
label). Refer to Figure 2-3.
3. Connect the inverter to the batteries, but ensure the inverter is off and
that no AC power is connected to the inverter.
4. While monitoring the front of the remote, connect the other end of the re-
mote cable into the RJ11 jack on the back side of the remote (Figure 2-3).
5. Immediately upon connecting the remote cable the LEDs will illuminate
as the unit goes through a self-test. After the initial self-test, text should
appear with a system status message indicating the current state of
the inverter/charger. If not, please refer to the Troubleshooting section.
6. Next, mount the remote to the desired surface or to the bezel (using
the two supplied #6 x
½
” Phillips fl at head screws). The remote is ready
for setup.