2 insert cables from below into the sunny central – SMA SC 500U Installation User Manual
Page 36
SMA Solar Technology AG
36
SC500U-IUS093411
Installation Guide
8. Attach the screws and washers and tighten with a torque of 31 in-lbs (3.5 Nm).
9. Insert the conduits into the openings.
10. Attach the conduits with the appropriate hubs.
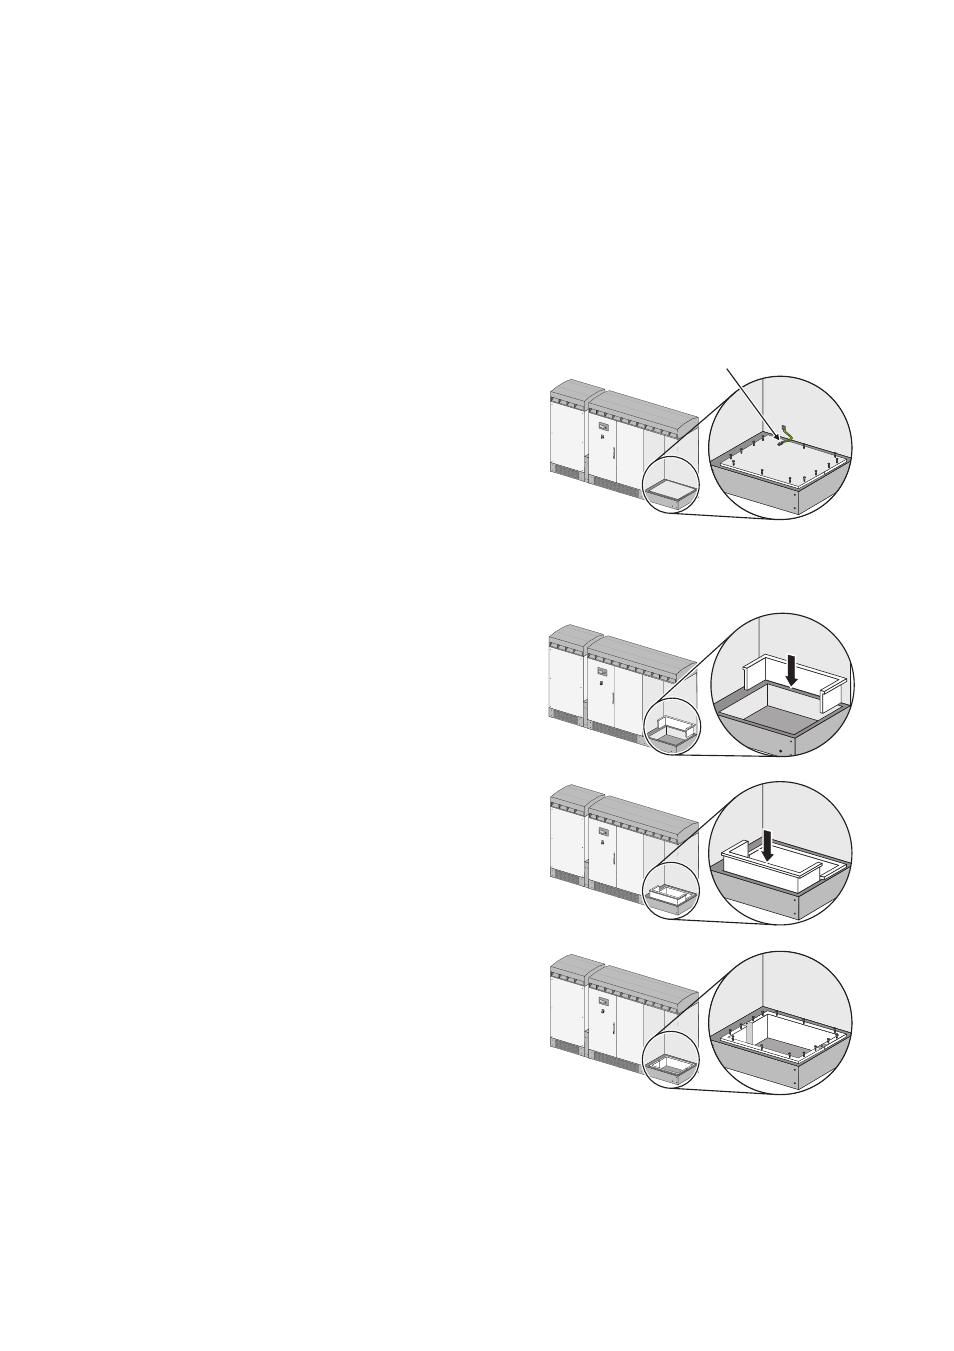
6.2 Insert cables from below into the Sunny Central
Insert the PV generator cables, the AC cables and the data cables into the Sunny Central from the
bottom through the foundation.
1. Remove the ground cable (A) from the plate at the
bottom of the Interface Cabinet.
2. Loosen the 18 screws on the plate at the bottom of
the Interface Cabinet by turning them
counterclockwise.
3. Remove the screws and the plate.
The screws will be used again.
The cable tunnel is encased in 2 u-shaped metal
plates.
4. Place a u-shaped plate in the rear portion of the
cable tunnel.
The holes in the narrow edge of the u-shaped plate
must be over the holes in the Interface Cabinet.
5. Place a u-shaped plate in the front portion of the
cable tunnel.
The holes in the narrow edge of the u-shaped plate
must be over the holes in the Interface Cabinet.
6. Place 18 screws in the holes.
7. Tighten the screws evenly.
A
Stop S
tart
Stop S
tart
Stop S
tart
Stop S
tart