Replacing a drive – Grass Valley Network Attached Storage System Serial ATA Network User Guide v.1.0.06 User Manual
Page 25
Chapter 1
Hardware
24
Digital News Production
Replacing a Drive
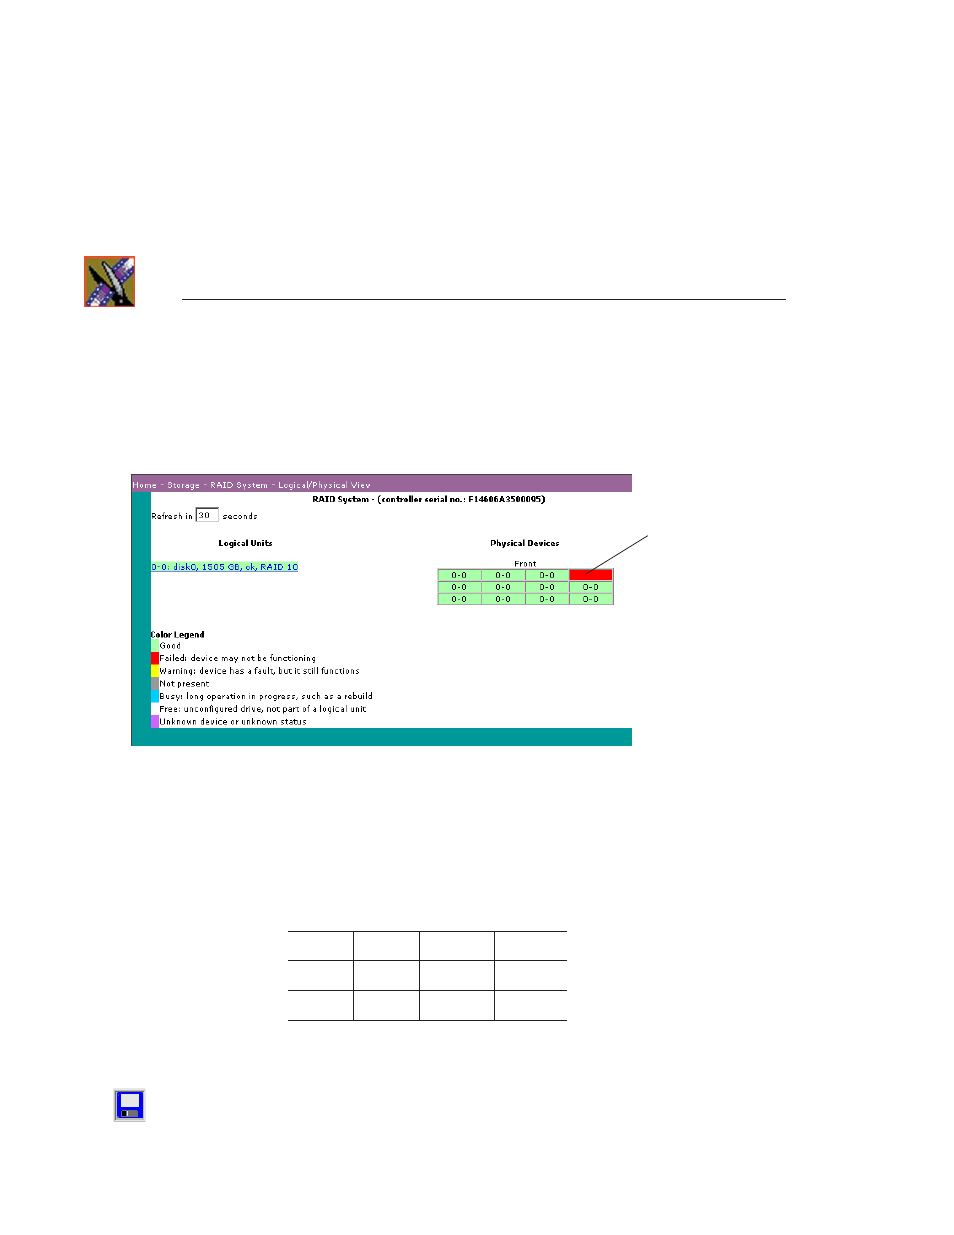
To view drive status, in the NewsShare NAS window, choose
Storage | RAID
System | Logical/Physical View
. The RAID System window appears. A bad
drive appears red.
The location of the drive on the screen (for example, upper right corner)
translates to the location of the drive in the enclosure, viewed from the front.
Position a mouse pointer over the drive icon to view a small box showing the
drive number. The drive number will always be for that slot. (I you remove
drive 3 and add a new drive, the new drive will also be drive 3.) The failed drive
shown in the window above equates to the upper right drive in the enclosure, or
Drive 9, viewed from the front. The drives read top to bottom, left to right, as
shown below:
To replace a drive:
1. Choose
Storage | RAID System | Disk Drive | Add/Remove
.
2. Select
Failed Drive
from the list of drives to remove. Click
Save
.
Drive 0
Drive 3
Drive 6
Drive 9
Drive 1
Drive 4
Drive 7
Drive 10
Drive 2
Drive 5
Drive 8
Drive 11
Bad drive
appears red