Using the schedule studio, Choosing the type of event, Message – Daktronics Venus 1500 Ver 2.x User Manual
Page 45: Brightness, Setting the start time/stop time, Using the schedule studio -3, Choosing the type of event -3, Message -3, Brightness -3, Setting the start time/stop time -3
6.3
Using the Schedule Studio
When creating or editing a schedule, there are a few things to keep in mind.
·
Messages scheduled to run during the same time frame will appear in the order they are listed
in the schedule.
·
The schedule is limited to 40 entries. This includes both messages and brightness commands.
·
When setting Start and Stop times and dates, the start time/date must be earlier in the day than
the stop time/date. If the start time/date is greater than the stop time/date, the event will never
begin.
·
The year is not adjustable. The software will automatically advance to the next year at the
appropriate time.
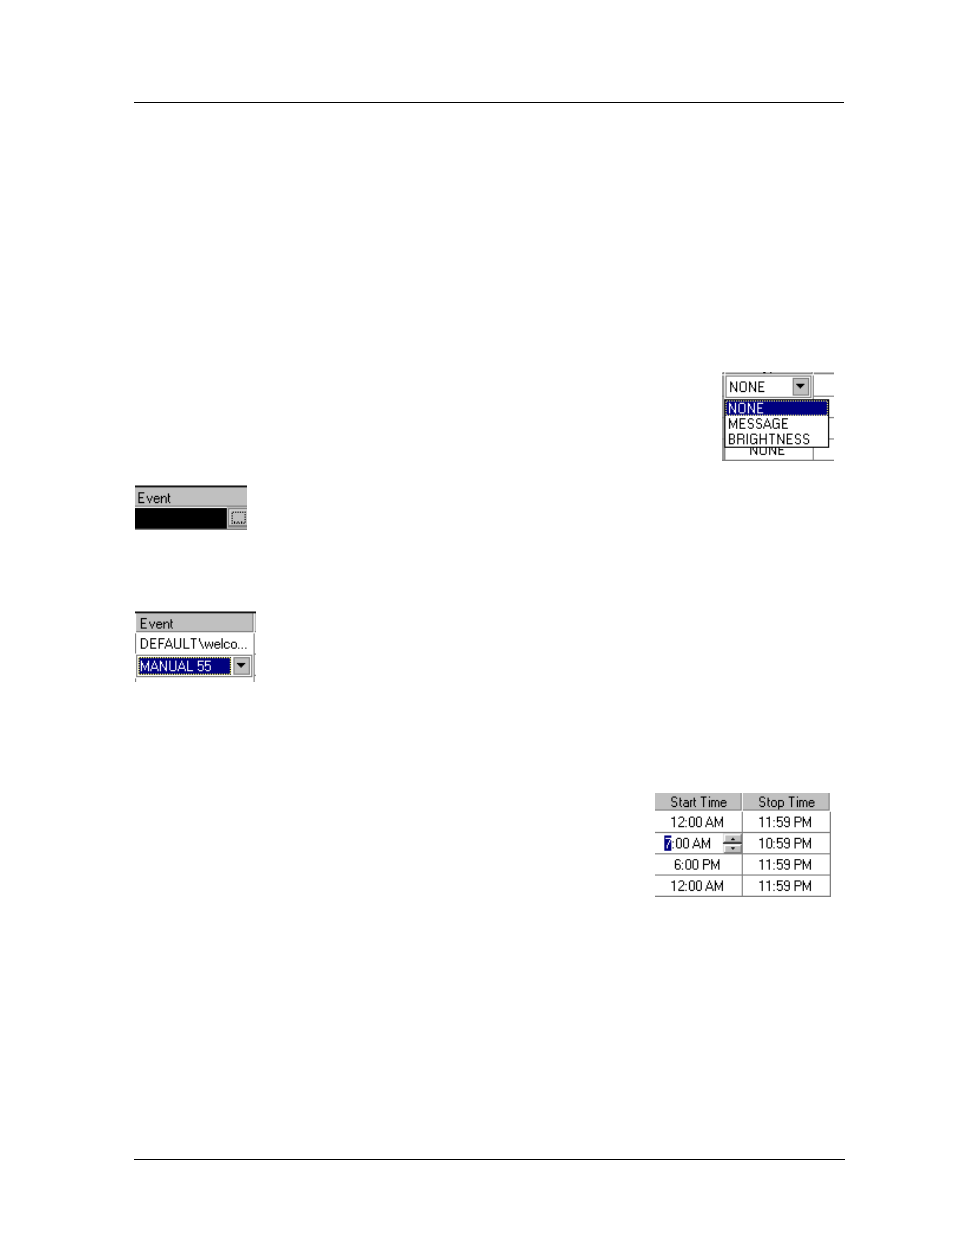
Choosing the Type of Event
To choose which message to display or to set the display brightness, double-
click on “NONE” in the desired line. Select “MESSAGE” to schedule a
message, or “BRIGHTNESS” to set display brightness.
Message
Once “MESSAGE” is selected, click once in the Event box in the same row. The
box will turn black and a small button at the right side appears. Click on the button.
This activates the Open Message dialog box. Highlight the library and then the preferred
message.
The Venus 1500 Schedule Studio
6-3
Brightness
“BRIGHTNESS” can be set to either auto or manual. Auto will adjust the
brightness of the display’s LEDs or lamps based off readings from an installed
light sensor. Manual is used to set a specific value for the brightness of the display
at a particular time. Possible values range between 0 (complete dimming) and 63 (full
brightness).
Setting the Start Time/Stop Time
Each event will begin running at the Start Time where the day of the
week is checked beginning on the First Date. Each event will stop
running at the Stop Time where the day of the week is checked
ending with the Last Date.
Highlight the digit to be changed and either enter the desired number
using the keyboard or click on the up and down arrows.
The Start Time is the first minute of the selected day when the event will run. The Stop Time is
the last minute of the day when the event will run. The event will run until the end of the minute
(i.e. a Stop Time of 11:59 will actually stop running at 11:59:59).
For example, to run a message for one minute at 12:00 noon, both the Start Time and the Stop
Time will be 12:00 PM.
L
Note: The Start Time for an event must be earlier in the day than the Stop Time. If the Start
Time is greater than the Off Time, the event will never start.