Installing ink ribbon, Figure 6 – Avery Dennison 676 User Manual
Page 22
22 •
••
• Printer Operation
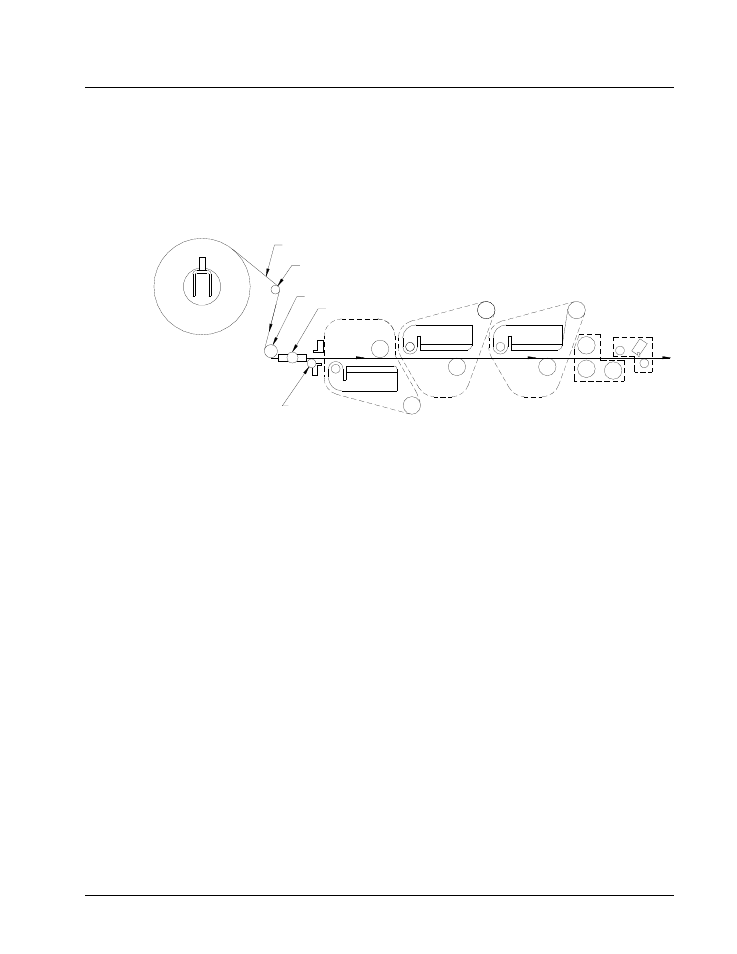
Installing Ink Ribbon
The ink ribbon comes pre-packaged in a plastic bag. For best results, leave the ink
ribbon wrapped in this bag until you are ready to use it in the printer. Use the
procedure and diagram below for loading the ink.
SENSOR /
KNOB
WEB
HEAD 1
WEB GUIDE / KNOB
DECURLER
TURN BAR
INK
HEAD 3
HEAD 2
DRIVE / AUX
KNIFE
Figure 6
1) Unwrap the ink ribbon and put it on the ink-ribbon supply arbor for the print
station to be loaded (Figure 6) by pressing it on to the arbor when the three slots
are lined up.
2) Make sure the ink ribbon comes off the roll in the direction shown and is threaded
as illustrated (Figure 6).
NOTE: A new ink ribbon has a leader that makes it easier to use when threading the
ribbon through the print area.
3) Place an empty ink-ribbon take-up core on the ink-ribbon take-up arbor for the
print station to be loaded. The ink take-up core must be at least as wide as the ink
supply.
4) Open the print head to the print station being loaded.
5) After starting the leader off the supply roll pull enough ink off to thread though
the print station and onto the take up core. The adhesive on the supply roll of ink
will be used to fasten the leader to the take up core.
NOTE: Make sure that the ink-ribbon take-up core and the ink-ribbon supply roll
are both against the ink backer plate so that the ink ribbon tracks straight
through the print station.