A hands-on tutorial – Turning Technologies ExamView User Manual
Page 18
ExamView Assessment Suite
18
A Hands-on Tutorial
This section provides a tutorial that will guide you step-by-step through the entire process to create a question bank using the
ExamView Test Generator. This tutorial explains how to create a variety of question types, save the bank, use a narrative,
insert art, enter question information and print a question bank.
Create a New Question Bank
1
Start the ExamView Test Generator program.
2
Select Create a new question bank from the Welcome screen.
NOTE
If you are currently working in the Test Builder, click
File and select Switch to Question Bank Editor
and then select the create a new question bank
option.
3
Name the question bank ExamView Sample Bank and click OK.
An empty question bank page appears on your screen. If you want
to edit the title, simply double-click it and change the title.
Enter True/False Questions
1
Click New at the bottom of the window.
2
Select True/False and click OK.
The question entry window for a true/false question appears. Depending on the question type, the entry screen provides
different options.
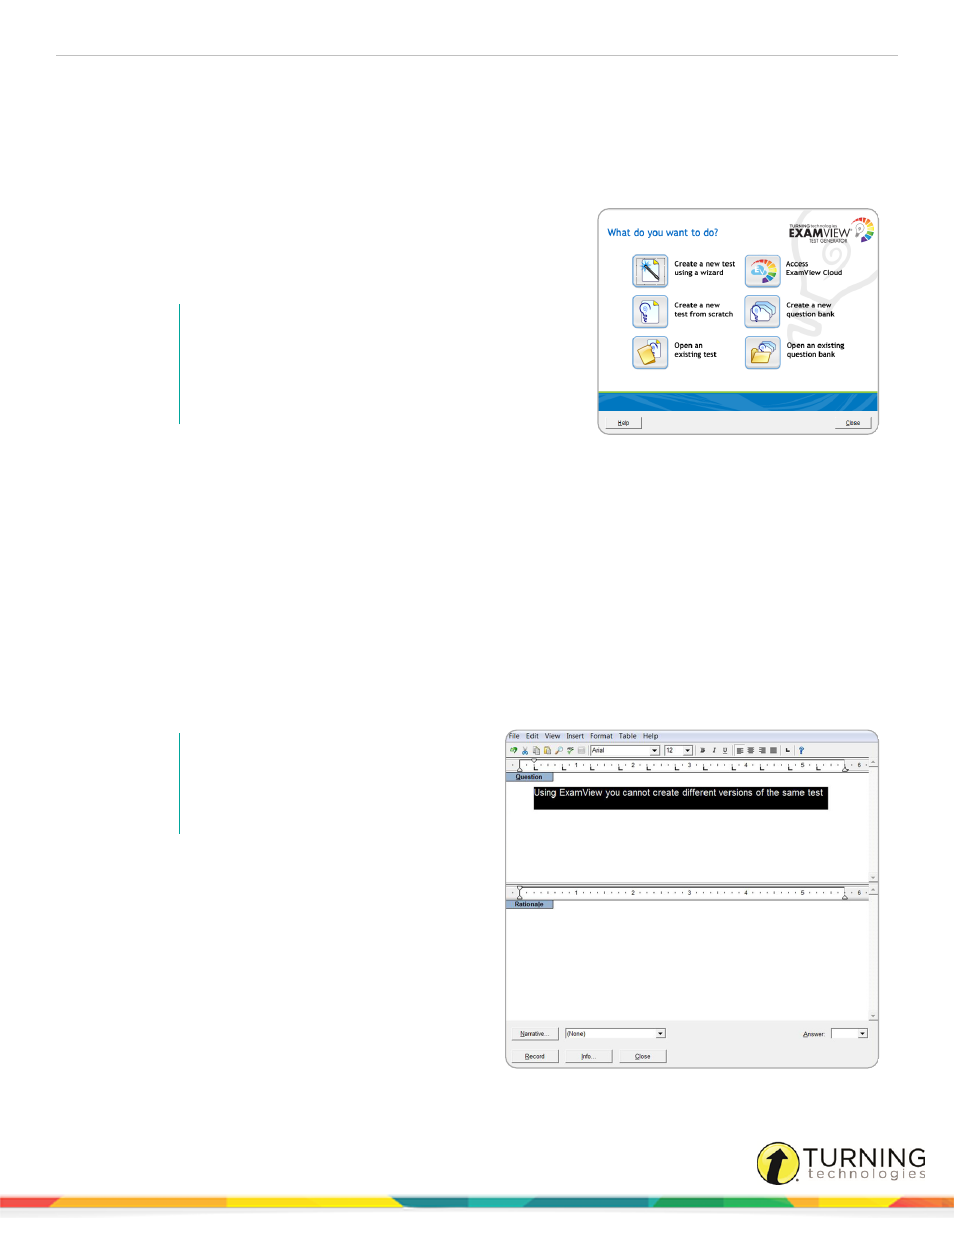
3
Type the following question in the question entry area: Using ExamView you cannot create different versions of the
same test.
4
Select False from the Answer drop-down menu in the lower right corner of the window.
NOTE
By default, all questions are assigned a
value of 1 point. You can change the
points in the Question Info window.
5
Click Info at the bottom of the window.
6
Type Easy for the Difficulty field (DIF), 221-223 for
the Reference field (REF), and click OK.
7
Click Record.
You should see the question you just entered on the
question bank page. If you do not see the question
information immediately after the question, click Edit
from the menu bar and select Preferences. Click the
Layout toolbar button, and then the Question
Information tab. Select the options to show
Difficulty and Reference.
turningtechnologies.com/user-guides