Locking the receiver channel – Turning Technologies TurningPoint Cloud User Manual
Page 14
TurningPoint Cloud
14
another. The ResponseCards need to be set to the same channel as the receiver when polling.
1
Plug in the receiver, open TurningPoint Cloud and sign in to your Turning Account.
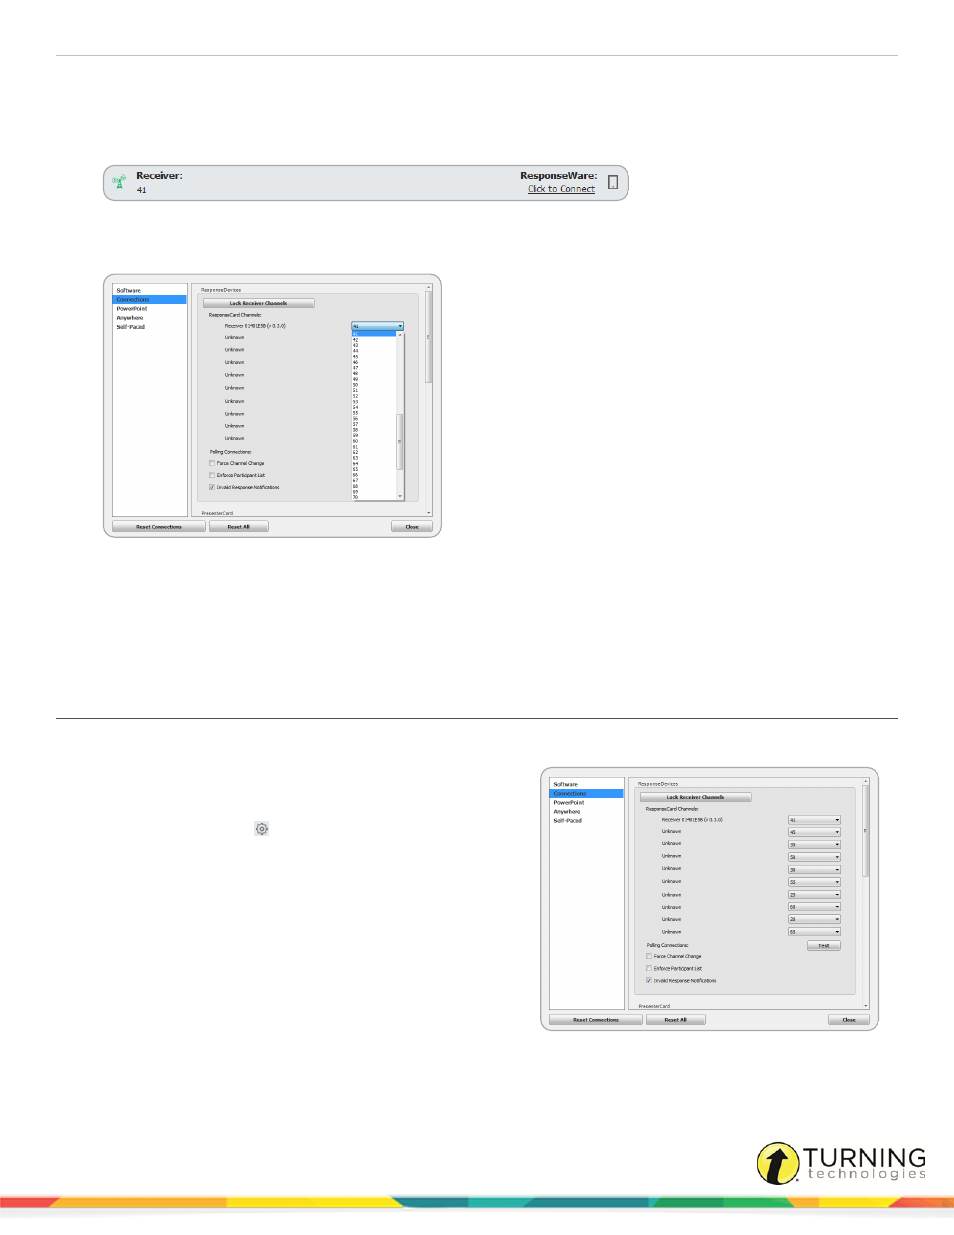
2
Click the channel number below Receiver.
The Preferences window opens.
3
Select the channel number from the drop-down menu under ResponseCard Channels.
4
Click Close to return to the TurningPoint Cloud Dashboard.
Next Steps
Once the receiver has been setup, it is possible to begin
Testing the Polling Connections
on page 17. To test the polling
connections, the ResponseCards need to be set to the same channel as the receiver.
Locking the Receiver Channel
Administrators have the ability to lock the channel to prevent users from changing channels in shared environments.
1
Open TurningPoint Cloud as the Administrator.
2
Sign in to your Turning Account.
3
Click the Preferences
icon in the bottom right corner.
4
Select Connections from the left panel.
5
Below the Response Devices section, select the desired
channel and, optionally, select Force Channel Change.
The Force Channel Change option, if selected, allows the
receiver channel to be maintained once selected.
6
Click Lock Receiver Channels.
turningtechnologies.com/user-guides