Taser Evidence-Sync User Manual
Page 70
Page 70 of 86
• Depending on your access settings, some of the options described here might not be
available to you.
1. Connect the camera to your computer with the 2.5 mm to USB cable.
2. Click
Start and select All Programs.
3. Click
SYNC and select SYNC.
4. Type your login information and click
Login.
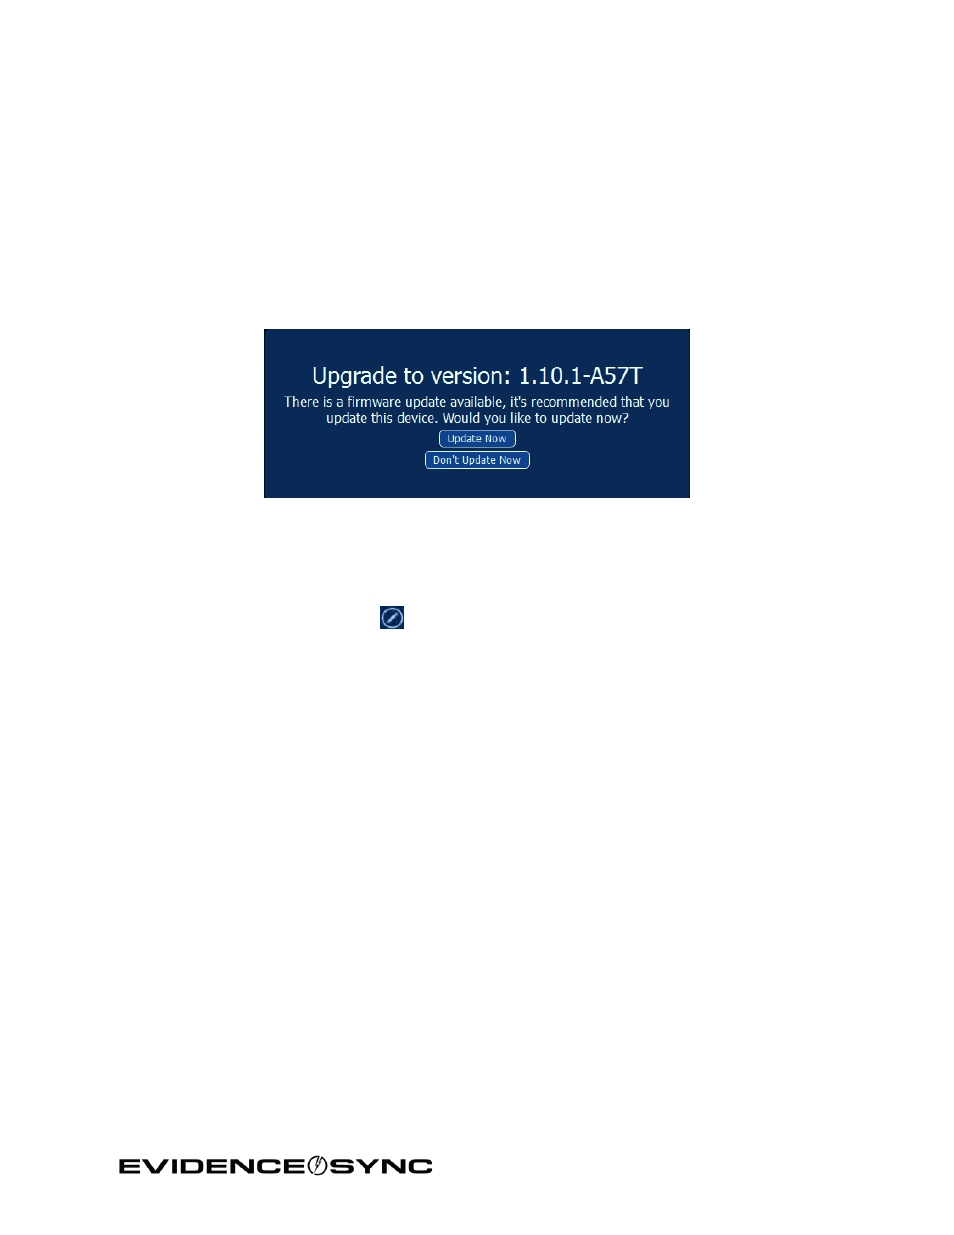
If you receive a message that your firmware needs an update (Figure 92), follow the
onscreen instructions.
Figure 92
5. Click the
Device Settings tab.
6. Configure the device as appropriate:
By default, the
Device Name is the same as the serial number, but you can change it
after clicking the
Edit
button (Figure 93) (Figure 94).
You also can change the person to whom the recorder is assigned by updating the
Assignee box.
The device can be set to operate in the online or offline modes.
By default, the AXON flex camera is intended to be worn on the right side. If you intend
to wear your camera on the left side, select the
Mounted on left option or the video
might be recorded upside-down. This setting is not available for the AXON body camera.
Some jurisdictions require the AXON camera to be video-only (no sound recorded). If
your organization operates in such a jurisdiction, select the
Muted option.
AXON cameras are shipped with the Balanced video quality option to give you the best
combination of image quality and recording time. Agency Administrators can change the
setting to Better Quality or Faster Upload.
AXON cameras have a 30-second buffer in which the 30 seconds of footage recorded
before you press the EVENT button is saved. This feature is intended to capture
important events that occurred before you were able to press the button. If necessary,
this feature can be turned off.