Applications zig-zag seam finishes, Lingerie seams – SINGER 3103 User Manual
Page 43
Attention! The text in this document has been recognized automatically. To view the original document, you can use the "Original mode".
Applications
Zig-Zag Seam Finishes
Seam edges support the garment and should be
given a durable finish if the fabric is likely to
ravel. There are two methods of finishing seams
is
such
fabrics
trimming
seam
edge
or
overedging.
Pattern: Zig-Zag.
Needle Position:.
Stitch Width: ’■
Stitch Length: 1 to 3 to suit fabric.
General Purpose Needle Plate
General Purpose Foot.
Method 1 — Trimmed Seam Finish
•
Adjust stitch width and length to give you
the nrx)st open stitch that will secure the
fabric edge; avoid harsh overstitching.
•
Stitch near the edge of seam allowance and
trim seam edges evenly after stitching.
Method 2 - Overedge Seam Finish
•
Adjust needle thread tension, stitch width
and stitch length to suit fabric.
•
Trim seam edges evenly.
•
Place trimmed seam under the foot and
overedge the seam allowance as illustrated.
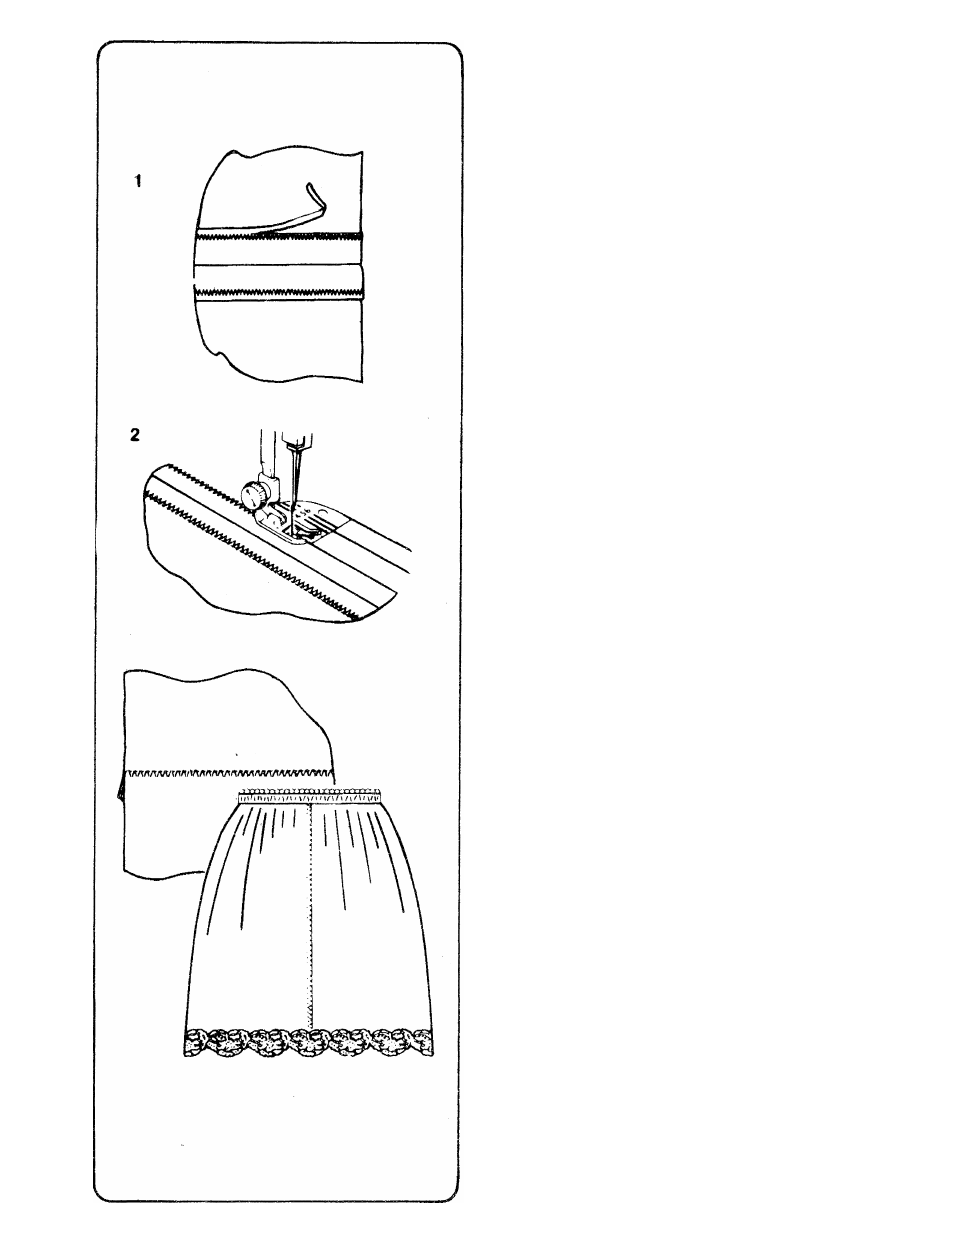
Lingerie Seams
To make a lingerie seam durable and flexible
use the plain xig-zag stitch at a narrow width
setting. This seam treatment is particularly
suitable for bias seams.
•
Straight stitch the seam line on wrong side
of fabric.
9
Press both seam allowances in the same
direction.
•
From the right side, topstitch with narrow
zig-zag
stitching,
letting
the
needle
alternately enter the seam line and seam
thickness,
(Stitch
width
narrow:
stitch
length 1 to 1.5).