Top Flite TOPA0120 User Manual
Page 42
clearance. The TE of the flap must match the wing
TE. NOTE: The flap should lay flat against the
trailing edge of the wing.
❑
4. When the fit is good, install the pivot hinges
(GPMQ4002). Drill 1/8” holes at the hinge
locations. Use a sharp #11 knife to cut a notch in
the leading edge of the flap at the hinge locations.
This will allow the pivot hinge pivot point to be in
the center of the radius of the flap LE (refer to
the cross-sections on the wing plan).
NOTE: The hinges are not glued in until
after the finish has been applied.
❑
5. Plug the flap with the hinges into the wing.
Check its fit and run the flap through its complete
range of motion. Make any required adjustments
until the flap swings freely through its range of
motion (remember the flap must close against the
wing TE).
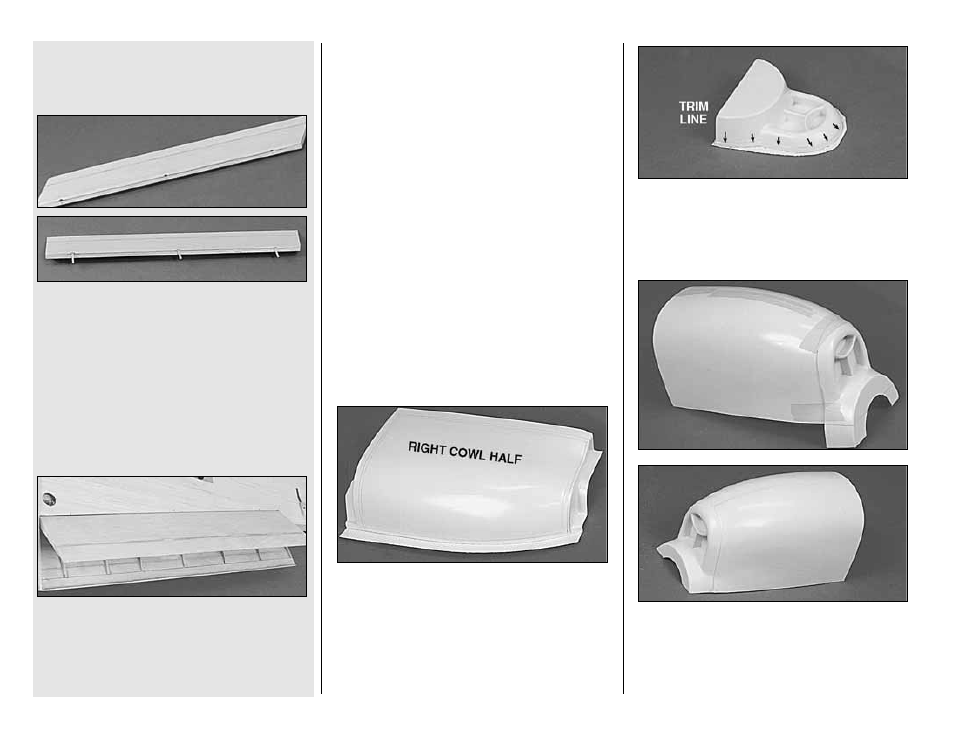
BUILD THE COWL
NOTE: The general procedure for the preparation
of vacuum-formed plastic parts is as follows...
A.
Examine the part carefully to find the
molded-in cut-off lines. These lines are
visible on the inside.
B.
To avoid cutting away too much material,
start by cutting away just the excess
material, but staying approximately 1/8"
away from the marked cut-off lines. A small
hobby scissors, designed for cutting plastic,
works very well for making these initial cuts.
C.
Then carefully trim the plastic down to within
1/32" of the molded-in cut-off lines. You can
use various straight and rounded sanding
blocks to true up the edges.
D.
Trial fit the parts together and sand the
edges as necessary to achieve a good fit.
❑
1. Mark the two vacuum formed Cowl Halves
approximately 1/8” from molded in trim line. Be
careful not to cut off the lap joint on the bottom of
the right cowl side. Check trim lines closely to
make sure you are allowing some excess material
outside the trim lines. Removal of the excess
plastic will allow for easier fitting and final trimming.
❑
2. Trim the Cowl Front vacuum formed part
as you did to the Cowl Halves.
❑
3. Tape the Cowl Halves and the Cowl Front
together for a test fit. Check all parts and their trim
lines for alignment. NOTE: The Cowl Halves
overlap at the bottom and the Cowl Front overlaps
both Cowl Halves.
- 42 -