Top Flite TOPA0120 User Manual
Page 26
❑
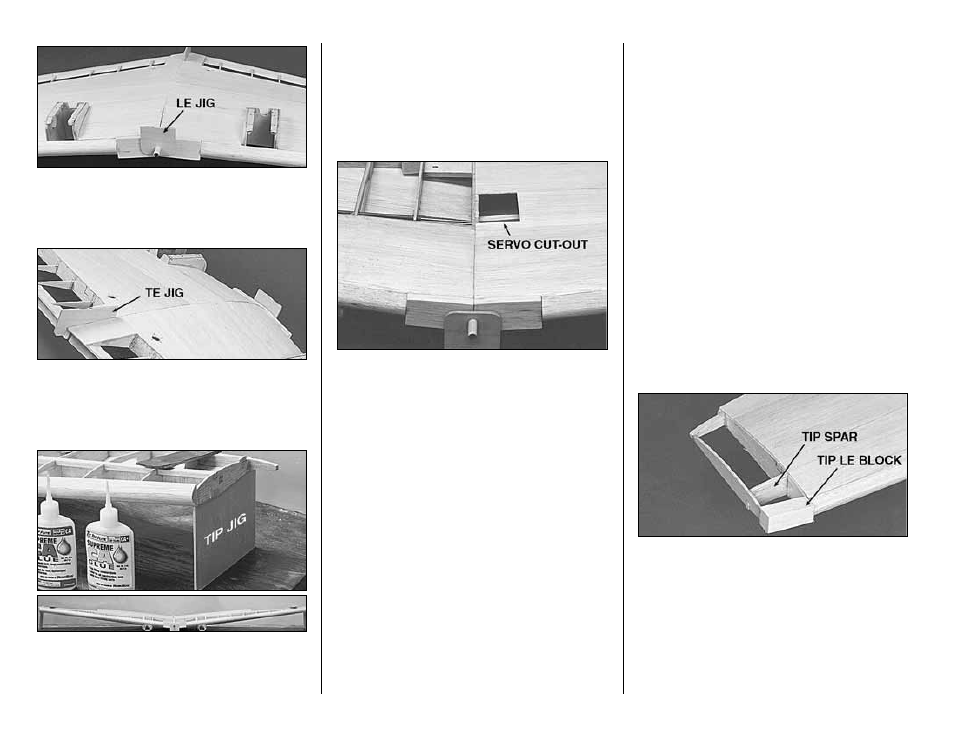
4. Slide the die-cut 1/8” Plywood LE Jig over
the dowel.
❑
5. Tack glue the die-cut 1/8” Plywood TE Jig
to the bottom of the wing at the center as shown in
the photo.
❑
6. Place a die-cut 1/8” plywood Tip Jig under
each W-12 rib. You may tape or tack glue the wing
to the jig if you wish.
❑
7. Check the fit of the forward skin to the wing
structure. Make adjustments if required.
❑
8. Apply a bead of CA+ to the wing structure
and glue the forward wing skin in position.
❑
9. Make a skin for the aft portion of the wing
from four 1/16” x 3” x 30” balsa sheets. Trim it to fit
over the remaining open structure. Make a skin for
the other panel and trace the first wing skin shape
onto it.
HINT: You may find it easier to start
cutting out the opening for the Aileron
and Drop tank (optional) servos at the
center of the wing when only one top
aft skin is glued on.
❑
10. Apply a bead of CA+ to the wing structure
and glue the aft wing skin in position. Glue both
right and left sheets in place.
❑
11. At this point, you should have the main
wing structure fully sheeted. You may now remove
the wing from the jig.
❑
12. Add a bead of CA+ to the center joint to
add more strength at this critical area.
❑
13. Cut adequate clearance holes for the wing
bolts in the top wing skin.
WING COMPLETION
❑
1. Trim the sheeting where it protrudes past
the edge of the structure. It is preferred that you
trim the tip of the wing sheeting to the center of rib
W-12. This will allow you to sheet the section
between W-12 and W-13 more easily.
❑
2. Razor plane and sand the wing Leading
Edge until it blends into the airfoil well. Final
sanding near the tip should be done later, after the
tip is installed.
❑
3. Glue the die-cut 1/8” balsa Tip Spar and
the die-cut 3/32” balsa rib W-13 to the tip of the
wing as shown in the photo.
❑
4. Glue the shaped 3/4” balsa Tip LE Block to
the front of the wing.
- 26 -