Top Flite TOPA0120 User Manual
Page 28
❑
11. Place the TE on the edge of the work
surface. Use a sanding block to feather the edge
of the birch TE to approximately 1/32” thick. HINT:
The TE will change color from light to dark to light
when properly sanded.
❑
12. Lay the flap on a flat surface and glue a
1/32” x 3/16” x 18” Plywood Cap Strip to the top
of each of the two stringers and to the LE (refer to
the rib W-5 cross-section on the wing plan).
NOTE: Hold the cap strips flat with a straightedge
until glue cures. The Cap Strips make the flaps
resistant to warping.
❑
13. Glue the die-cut 1/8” balsa Flap Hinge
Doublers to the flaps at the locations shown on
plans.
❑
14. Glue the die-cut 1/8” plywood Flap Horn
Plates to the flaps at the locations shown on plans.
Note: These are located in different bays on the
right and left flaps.
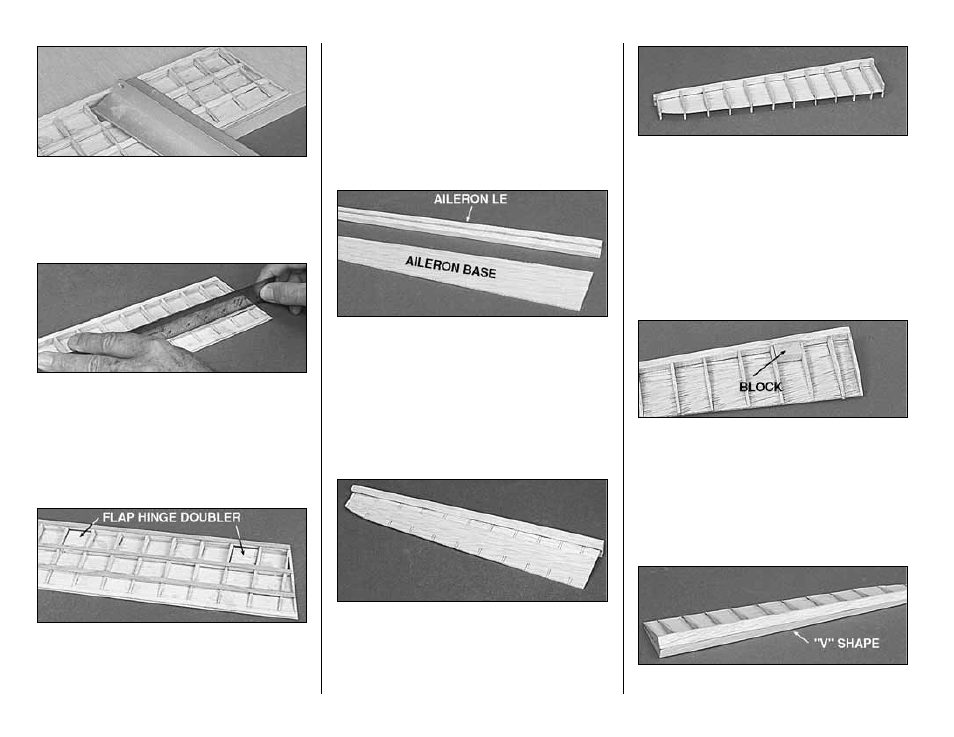
BUILD THE AILERONS
❑
1. Draw a center line on the die-cut 1/4” balsa
Aileron LE and a line on each side 1/16” from the
center line. Also draw a center line on the other
side of the Aileron LE; this will help you “V” the
leading edge later.
❑ ❑
2. Place the die-cut 3/32” balsa Aileron
Base on the plans and mark the “Rib Locations."
❑ ❑
3. Place the Aileron Base between the
lines you drew on the LE center line and glue with
CA. NOTE: The Aileron LE is die-cut longer than
the Aileron Base to allow final trimming on both
ends.
❑ ❑
4. Cut “Ribs” from the 3/32” x 3/8” x 36”
balsa sticks. Glue the Ribs to both sides of the
Aileron Base between the marks.
❑ ❑
5. Refer to the plans for aileron cross-
section shape. Use a razor plane and a sanding
block to shape the ailerons. Test fit the Aileron to
the wing for final shaping.
❑ ❑
6. Refer to the plans for the Aileron
Control Horn Block locations on the bottom of
the ailerons. Glue the 3/8” x 1/2” x 7/8” hard balsa
Aileron Control Horn Blocks in place.
❑ ❑
7. Shape the Aileron Control Horn Blocks
to match the aileron contour.
❑ ❑
8. Shape the Aileron LE in a “V” shape to
- 28 -