Top Flite TOPA0120 User Manual
Page 40
❑
5. Loosen the wing bolts and slide the Wing
Fillet Bases between the fuselage and the wing on
both sides of the fuselage. Align the fillets to the
1/8” marks and tighten the wing bolts firmly.
NOTE: The wing fillets must be built with the wing
bolted in place to obtain the correct wing dihedral
angle.
❑
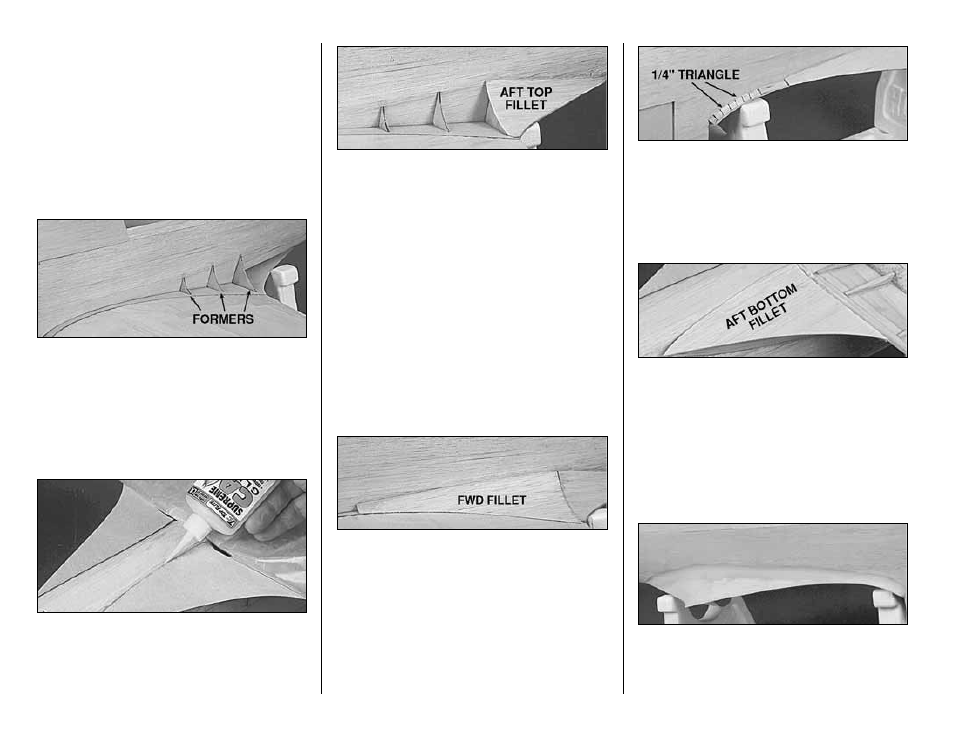
6. Position the die-cut 1/8” plywood Wing
Fillet Formers at the locations shown on the
plans. There are three formers per side. Glue the
formers in place.
❑
7. Glue the wing fillet to the wing saddle area
of the fuselage. The part of the wing fillet that is
behind the wing is easier to glue with the model
inverted.
❑
8. Use the pattern furnished on the plans to
cut the two Aft Top Fillets from 1/16” balsa sheet.
Test fit them between the fuselage side and the
wing fillet base. Check the cross-sections on the
plans for the proper fillet curve.
❑
9. Sand the Aft Top Fillets for proper fit and
feather the edges to match the fuselage sides and
the wing fillet bases. Glue the fillet in place and
make sure the fillet is conformed to the fillet
formers and matches the wing fillet base edge.
❑
10. Use the pattern furnished on plans to cut
the two Forward Fillets from 1/16” balsa sheet.
Test fit the Forward Fillets to the wing and the fillet
base.
❑
11. Match the Fwd Fillet to the Aft Fillet and
glue in place. Make sure the two fillet ends match
for a smooth transition.
❑
12. Cut short sections of 1/4” balsa triangle to
use as fill for the remaining area on wing fillet
base. Glue the triangle sections in place.
❑
13. Use the pattern furnished on plans to cut
the two Aft Bottom Fillets from 1/16” balsa sheet.
Glue the Aft Bottom Fillets to the 1/32” plywood
Fillet Base and to the bottom of the fuselage as
shown in the photo.
❑
14. Fill all seams and contour the fillet as
shown in the photos. NOTE: Hobbico Hobbylite
filler was used on the model in the photo.
- 40 -