Top Flite TOPA0120 User Manual
Page 27
❑
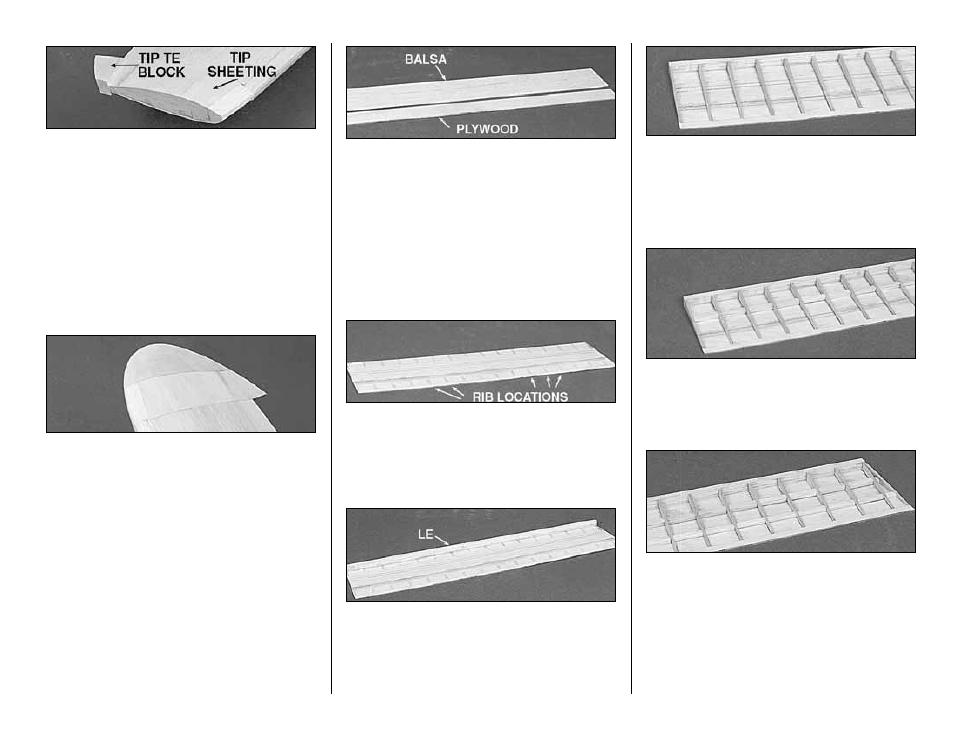
5. Apply 1/16” balsa sheeting to the tip
section.
❑
6. Glue the shaped 5/8” balsa Tip TE Block to
the aft part of the wing tip.
❑
7. Square off the tip of the wing with a T-bar.
❑
8. Glue the shaped 1” balsa Wing Tip to the
tip of the wing as shown on the plans.
❑
9. Shape the tip of the wing with a razor plane
and a sanding block. Do not final shape the aft
portion of the tip until after the ailerons are built.
This will allow you to properly blend them together.
BUILD THE FLAPS
❑
1. Place the Flap section of the plans on a flat
work surface and cover it with waxed paper.
❑
2. Position a 1/16” x 3” x 30” balsa sheet over
the proper location on the plan. Mark the length
and width on the balsa sheet.
❑
3. Cut the Aft Flap Section from 1/16” x 1” x
18-1/2" plywood. Match the Aft section edge to the
balsa forward section edge. Sand the edges for a
clean match.
❑
4. Glue the sections together and mark the
final size from the plans. Cut the flap sheet down
to the proper size.
❑
5. Mark the “Rib and Spar Locations” on the
sheeting from the plans. NOTE: The ribs do not
extend to the aft edge of the plywood.
❑
6. Cut the Flap LE from the 3/16” x 5/16” x 36”
balsa stick. Place the LE and sheeting over the
plans to check proper length and angles. Glue the
LE on top of the sheeting aligned with the forward
edge.
❑
7. Cut 2-3/4" flap ribs from the 3/32” x 3/8” x
30” balsa sticks. Glue the Ribs to the sheeting at
the locations you marked earlier. NOTE: The Ribs
may be angle cut before gluing or sanded to shape
after gluing.
❑
8. Fit and glue the Fwd Flap Stringers. They
are pre-cut 3/16” x 3/16” x 15/16” balsa sticks.
❑
9. Fit and glue the Aft Flap Stringers. They
are pre-cut 1/8” x 3/16” x 15/16” balsa sticks.
❑
10. Use a sanding block to shape the ribs. The
sanded surface of the ribs and all stringer surfaces
will be flat when shaping is complete.
- 27 -