Top Flite TOPA0120 User Manual
Page 41
BUILD THE WING BELLY PAN
❑
1. Check the plans for the locations of die-cut
1/8” plywood Belly Formers B-1, B-2, B-3, B-4
and B-5. Mark locations on the bottom of the wing.
❑
2. Position the formers at the locations marked
on the wing. TIP: Use a 3/16" square balsa
stringer to assist in alignment of the formers to the
centerline of the fuselage.
❑
3. Glue the 3/16” square stringer to all
formers. Cut the stringer off flush with the front of
Former B-1 and the back of Former B-5.
If you are installing a drop tank, make provisions to
install the drop tank now. Refer to the fuselage
side view on the plans for more details of the drop
tank and cable release installation. (The drop tank
kit includes instructions for tank assembly.)
❑
A. Reinforce the 3/16” stringer as shown.
Make a slot for the forward tab on the release
mechanism (the aft tab must be cut off).
❑
B. Route a thin cable to the tank release
servo. Tin the cable with silver solder at the
release end and put a Z-bend in it. See the
fuselage plan.
❑
C. Test fit the Release to the bottom of the
belly pan and drill holes for the #2 mounting
screws. Remove the release. It should be
reinstalled during final gear-up.
❑
4. Use the pattern provided on the plans for
cutting the sheeting from 1/16” balsa sheet.
❑
5. Test fit the balsa sheeting at the center of
the stringer and check the edge mating to the wing.
Wet the sheeting with a wet paper towel to assist in
forming the sheeting. Glue the sheeting in place.
NOTE: The seam at the wing and belly
sheeting will require filler to provide a
smooth transition from the belly pan to
the wing.
❑
6. Glue the shaped 1/4" balsa Front Belly
Pan Block to Former B-1. NOTE: The front block
must be flush with the LE of the wing. Shape the
Front Belly Block to match sheeting of the Belly
Pan. Filler may be used to blend the front Belly
Block into the wing LE. Sand the edges of the
Front Belly Block to form a radius of approximately
3/16" to provide good cooling airflow.
❑
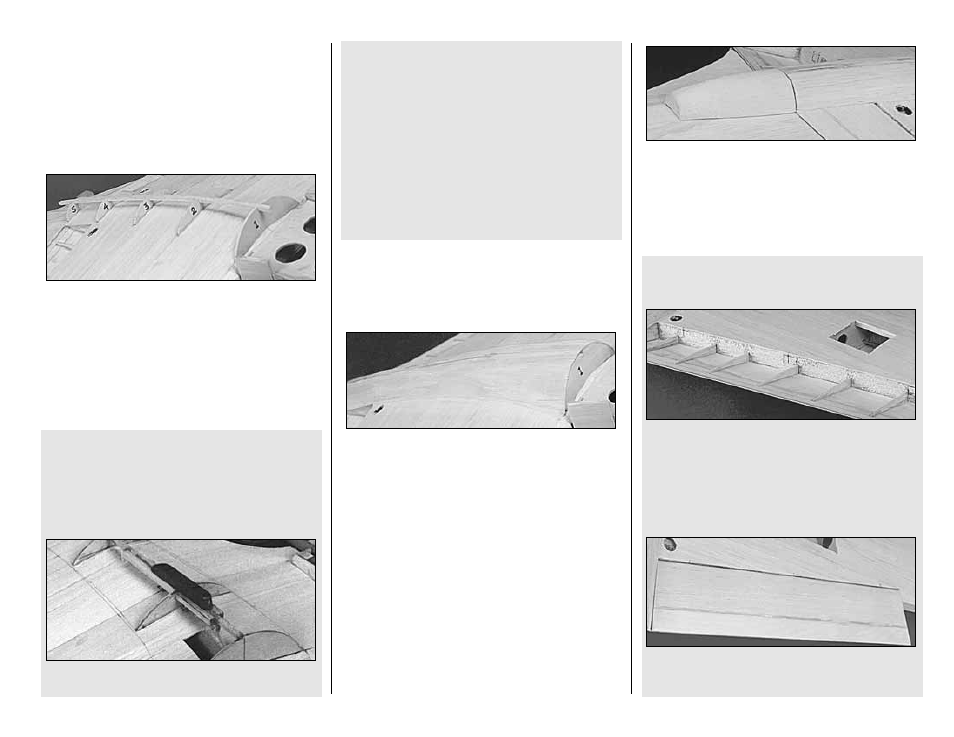
7. Shape the Aft Belly Block and glue in place.
Final sand the Aft Belly Block to blend into the
contours of the Wing Belly Pan. NOTE: Mark
contour on the front of the Aft Belly Block, using
the Former B-5 as a guide.
FIT THE FLAPS
Do these steps for operating Flaps
❑
1. Mark the locations of the pivot hinges on the
wing and flap. Check the wing plans (including the
cross-section) for locations.
❑
2. Use a T-bar to sand the edges of the
sheeting flush with the Aft TE at flap.
❑
3. Test fit the flap in the wing opening. Check
the ends of the flap for approximately 1/16"
- 41 -