Top Flite TOPA0120 User Manual
Page 37
with a #10 (13/64") drill bit through the wing mount
blocks. Tap the holes with a 1/4"-20 tap.
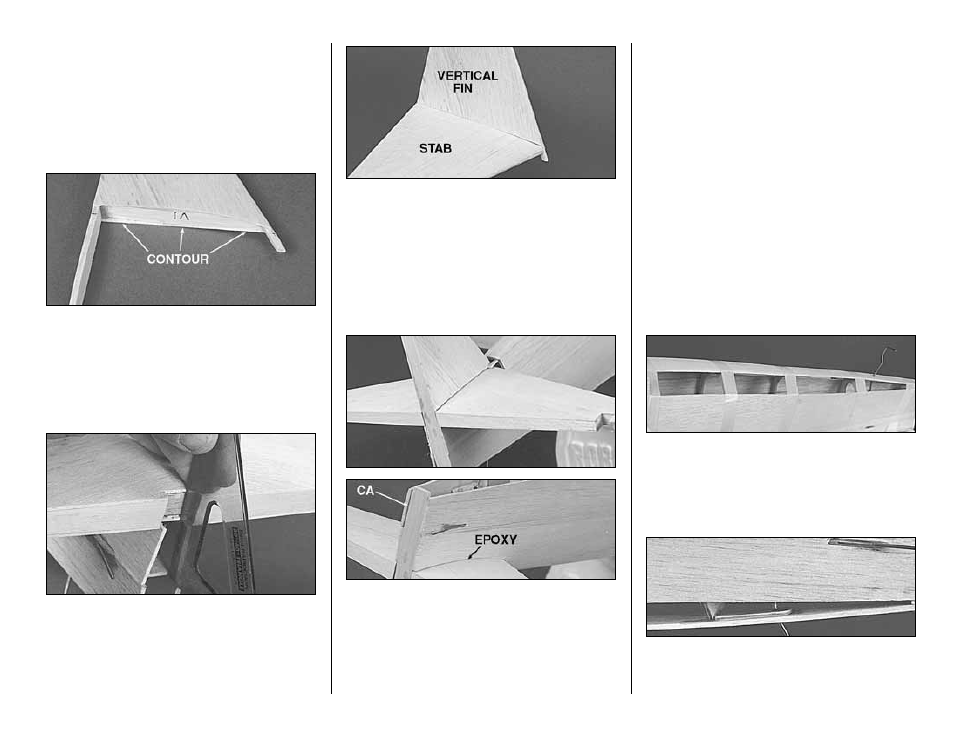
ATTACH THE STAB AND FIN
❑
1. Contour the fin sheeting that protrudes past
V-1 to fit against the top of the horizontal stabilizer.
Use the photo and the plans as references.
❑
2. Test fit the fin and stab to the fuselage. The
notch in the trailing edge of the stab should align
with the plywood Stab Supports as shown in the
photo. Make slight adjustments to the fuselage as
required for a good fit.
❑
3. Glue the fin to the stab with 30-minute
epoxy. Make sure they are properly aligned and
perpendicular to each other. Allow the epoxy to
cure.
❑
4. Glue the Stab/Fin assembly to the fuselage.
View the plane from the top and the rear. Make
sure the stab and fin are properly aligned with the
wing and fuse. Use epoxy in the stab saddle area.
CA may be used to glue the fin post to the
fuselage sides.
❑
5. Inspect the joint of the stabilizer and the
plywood stab supports through the open bottom of
the fuselage. If the joint does not appear to be well
glued, apply a small fillet of 30-minute epoxy to the
joint.
BUILD FUSELAGE BOTTOM
❑
1. Use the pattern on the plans to assist you in
cutting out the Aft Fuselage Bottom from the 1/8”
x 2-1/4” x 24” balsa sheet.
❑
2. Drill a 1/8” hole in the die-cut 1/8” plywood
Tail Wheel Support at the punch mark location.
Place the Tail Wheel Support over the tail wheel
wire. Leave the support loose at this time.
❑
3. Align the Aft Fuselage Bottom on the
formers F-5, F-6, F-7, F-8 and the Fin TE. Wet the
outside surface of the sheeting. Use tape to hold
the sheeting in place after it is formed properly.
❑
4. Glue the Aft Fuselage Bottom to formers.
Use epoxy to glue the Tail Wheel Support to F-8
and the Aft Fuselage Bottom.
- 37 -