Installation, Connecting to the host computers and network – StarTech.com SV1641HDIE User Manual
Page 8
Instruction Manual
3
Installation
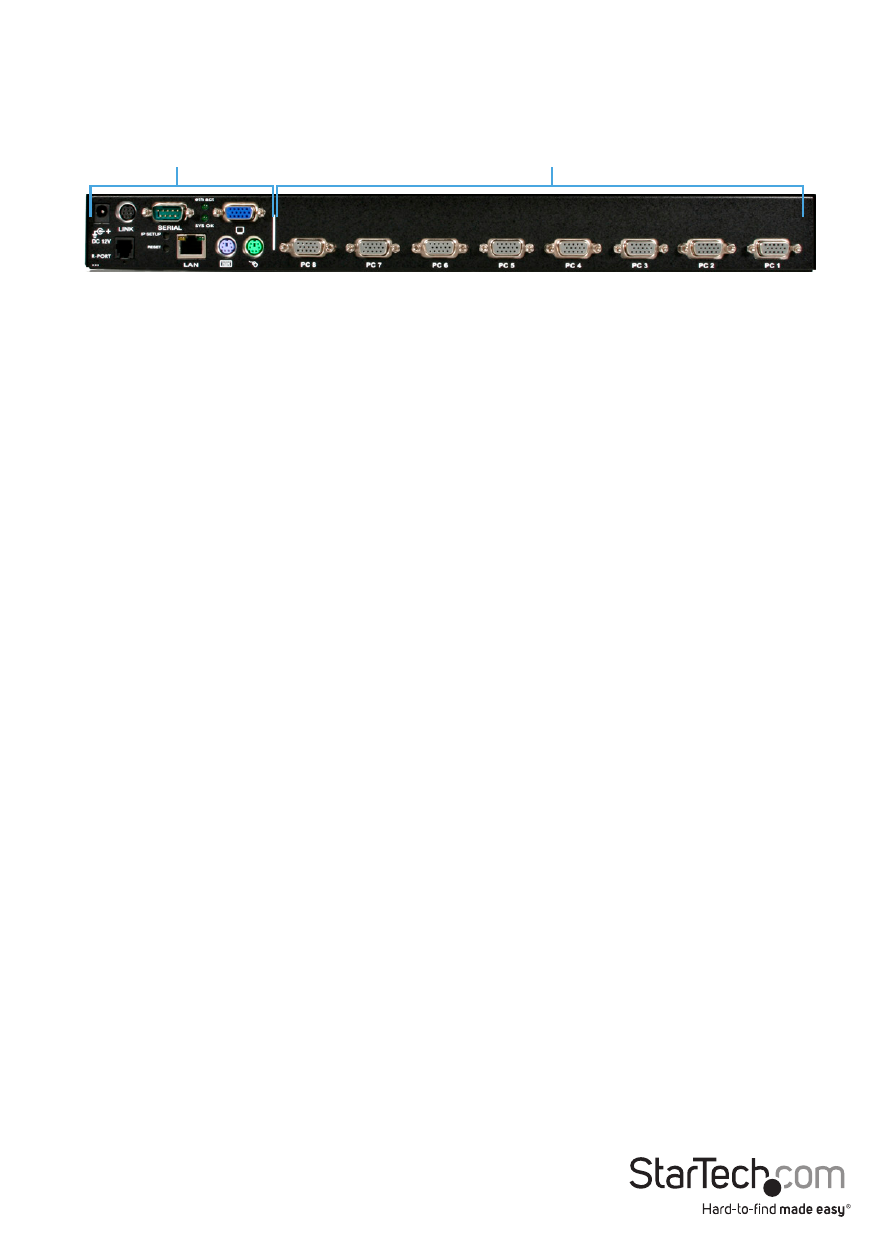
Connecting to the Host Computers and Network
1. Power down the computer to which the KVM Remote Control will be connected
(Host computer).
2. If present, disconnect the existing monitor and keyboard/mouse from the Host computer.
3. Using a StarTech.com integrated KVM cable (sold separately), locate the male VGA
(monitor) connector and connect it to the VGA-out connector on the back of the
Host computer’s video card.
4. If using a SVECONxx KVM cable, connect the PS/2 keyboard and mouse connectors
on the host computer end of the KVM cable. If using a SVECONUSxx KVM cable,
connect the single USB connector into the Host computer.
5. Insert the DE-15 connector on the opposite end of the integrated KVM cable into
one of the PC connectors on the rear panel of the KVM switch.
6. Using a Category 5 Ethernet patch cable, connect the LAN connector on the rear
panel of SVxx41HDIE to a network data jack (usually on a hub, switch, router, or
pre-wired wall jack).
IMPORTANT: If you want to continue to use the host computer locally, skip step 7 and
go directly to “Connecting a Local Keyboard, Mouse, and Monitor” after completing
step 8. Otherwise, complete steps 7 and 8 now and continue to Configuration
Methods Explained.
7. Connect the power cord (provided) to an available electrical outlet, plug the
opposite end of the power cord into the AC/DC adapter, and plug the power
connector into the DC-in port on the rear panel of the unit.
8. Power on the Host computer.
NOTE: Only integrated KVM cables branded by StarTech.com will work on all
SVxx41HDIE series KVM switches.
IMPORTANT: This KVM switch is convection-cooled. As such, please ensure the vents
on both sides are unobstructed.
Local Connectors
(Console)
PC Connectors
(Host)
*SV841HDIE Shown