Limit switches – Jaypro Sports MHWM-D-A User Manual
Page 28
© 2005 Jaypro Sports Equipment JSL-Inst001 Rev G 10-24-2006
28 of 40
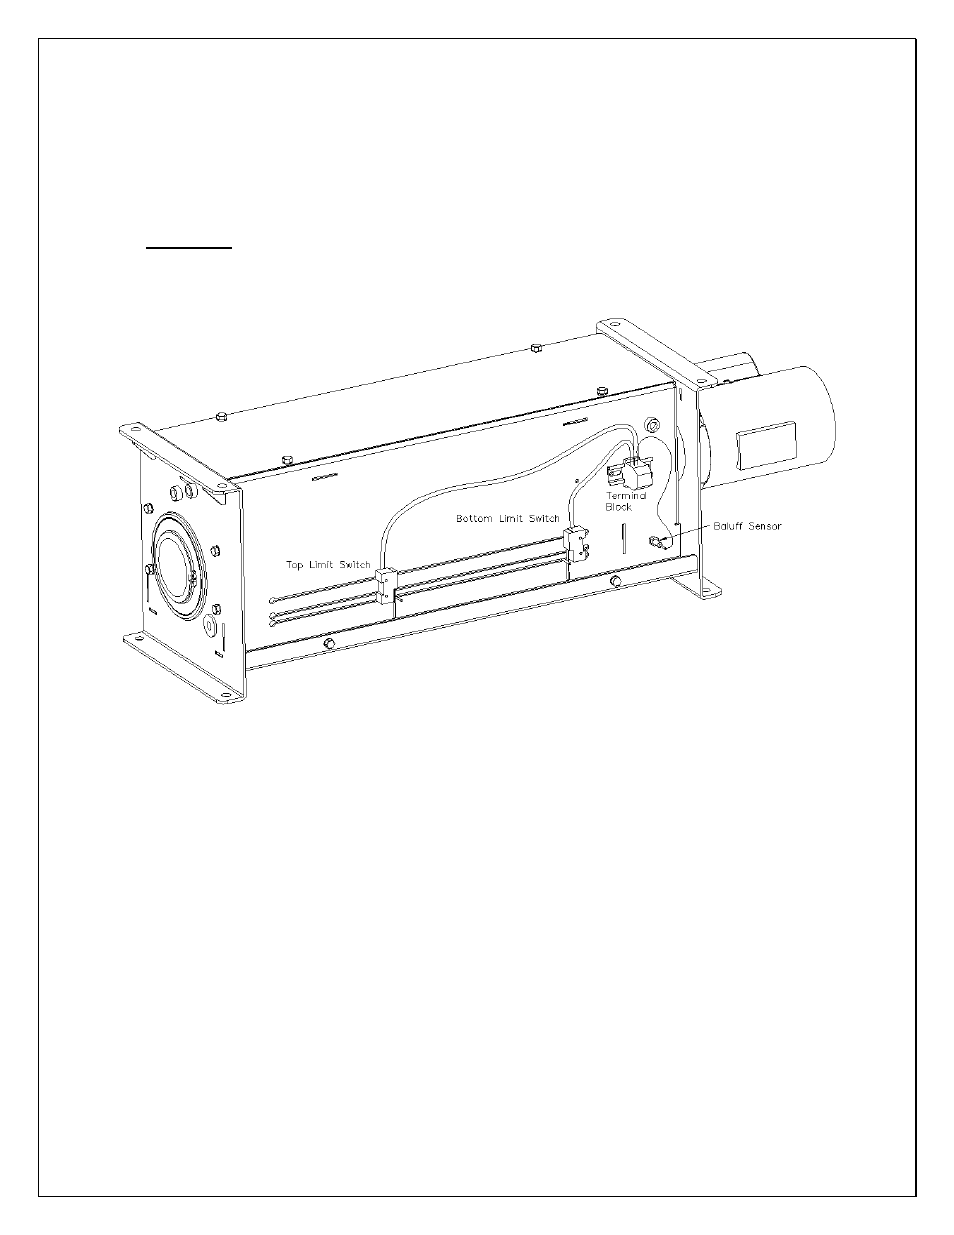
12. Limit Switches
a. With the load bar at 3’ above the floor and perfectly level, slide bottom limit switches into
position on both winches. Moving them until they are physically ‘bottomed out’ against the
travel bar will insure that both winches are set to the same place. (This is the most repeatable
method for making sure limits are activated at the same time when the unit comes back down
while using the key switch. It is important, however, to only operate the winches upward after
this point in order to prevent damage to the limit switches.)
Reminder: The wiring in the hoist motor dictates individual motor travel direction. If either or
both of the winches are operating in the opposite direction as expected, the hoist wiring will
need to be revised (see section 10.d for more information).
Figure 32: Adjusting Limit Switches Inside Winch (Limit Cover Removed)
b. Using key switch, run winches until load bar moves upward approximately 24”, then back
down to verify limit switches are set accurately and functioning properly. It is important to note
here that the load bar is high enough off the floor so that the cable never becomes slack when
lowering the unit down to unload the mats. If the cable is allowed to slacken the wraps around
the winch drum could become overlapped or tangled, and then damaged when hoist is lifted
again.
c. Run load bar until it is at highest desired position (ceiling height). This is the highest point you
ever want the load bar to safely travel to.
d. Slide upper limit switches into position on both winches. The same method may be used here
as for the lower limits. See above image for details.
e. Using key switch, run winches until load bar moves down approximately 24”, then back up to
verify limit switches are set accurately and functioning properly.