Great Planes Piper J-3 Cub 20 Kit - GPMA0158 User Manual
Page 34
D 4. Reinstall the engine on the engine mount and trial fit
the cowl over the engine. Allow approximately 1/8"
clearance all around the engine head and muffler for
cooling. Also, check that there is 1/8" clearance between
the front of the cowl and the propeller.
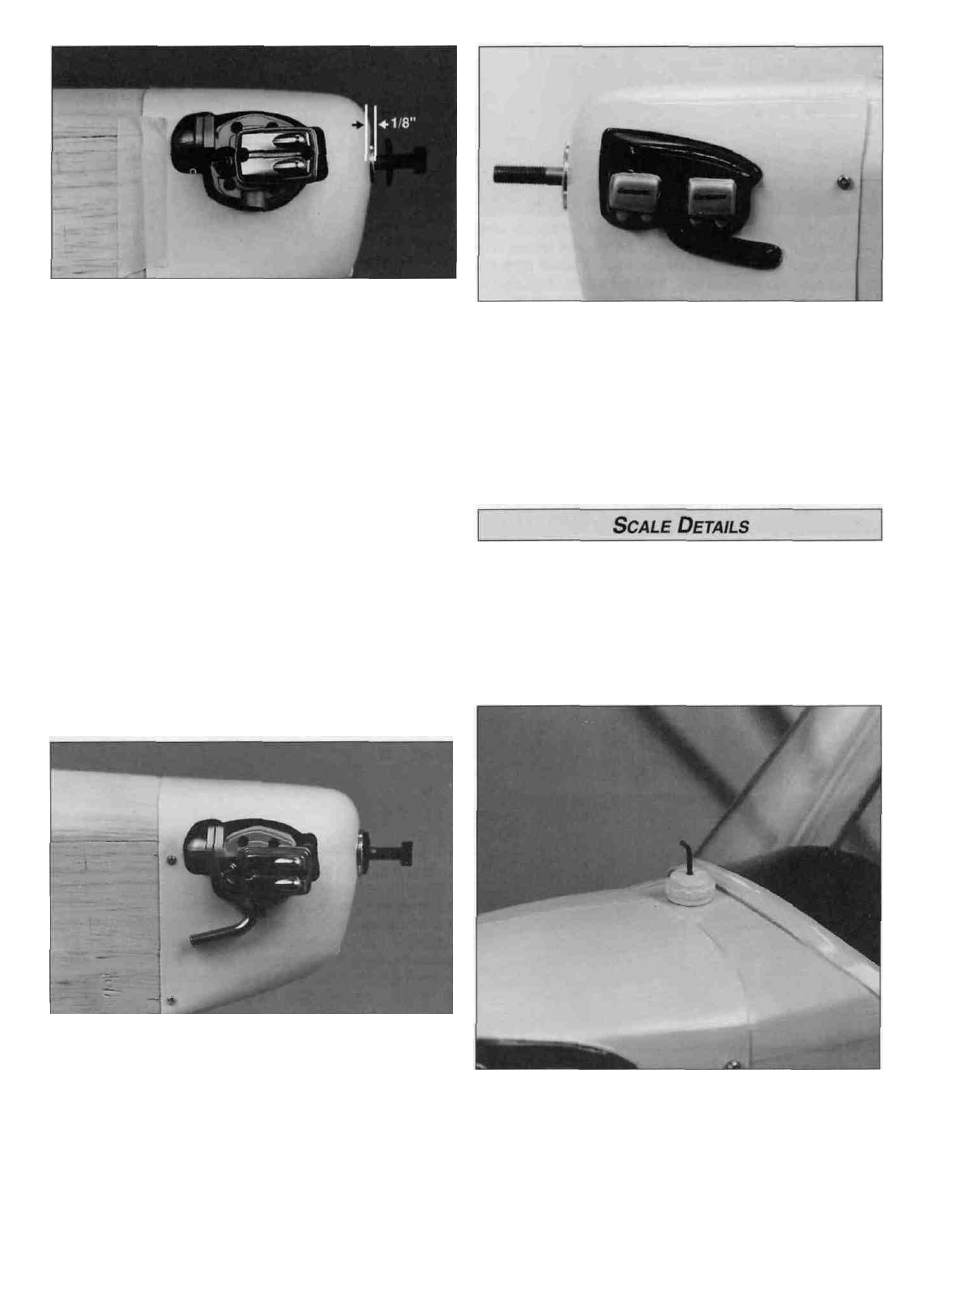
D 7. Cut out the dummy engine and exhaust pipe, then
sand their edges smooth. Test fit the dummy engine and
exhaust pipe on the cowl. The cylinder heads on the
dummy engine should line-up with the prop shaft of the real
engine. Trim and sand as required for a good fit. Glue the
dummy engine to the cowl with thick CA.
D 5. With the cowl taped securely in position, refer to the
plan for the location of the #2 x 3/8" sheet metal screws
that hold the cowl on the fuselage. Drill 1/16" holes through
the cowl and the fuselage at these locations. If the cowl
needs to be cut at the rear to allow it to slide past the head
of the engine, a fifth screw will need to be installed. One on
each side of the cut.
D 1. Cut out the two hubcaps and sand their edges smooth.
D 6. Remove the cowl and locate the four holes you just
drilled through the front of the fuselage. Glue a
1/8" x 1/2" x 1/2" plywood cowl mounting block to the
inside of the fuse sides, centered over each hole. Redrill
the four 1/16" holes through the cowl mounting blocks.
Reinstall the cowl and attach it to the fuselage with four
#2 x 3/8" sheet metal screws.
D 2. The gas cap was carved from a dowel, primed, then
painted Cub Yellow. The fuel gauge is simply a piece of
1/16" music wire bent and inserted in a hole drilled through
the middle of the gas cap.
34