Great Planes Piper J-3 Cub 20 Kit - GPMA0158 User Manual
Page 26
D 4. Before we continue, double check all glue joints made
so far and apply extra glue if necessary.
From this point on you will be finishing the outside of the
fuselage, so you'll want to use some care to prevent
dents and "dings." You could invest a few dollars in a
Robart Super Stand or cut an old styrofoam ice chest or
cardboard box to fit the fuselage. Foam padding in the
cradle will prevent unnecessary hanger rash.
D 4. Using medium CA, glue the tapered balsa tail wedge
in position where the rear of the fuselage sides meet.
D 1. Use a sanding block to sand the bottom edges of the
fuselage flat to accept the bottom sheeting. Remove any
excess glue that may interfere with the sheeting.
D 5. If you are planning to install the optional Great Planes
20-size Sport Floats, now is the time to add the die-cut 1/8"
birch ply aft float mounting plate (included with the floats).
See the plans for its location. We strongly encourage you to
put your Cub on floats someday - it's a thing of beauty.
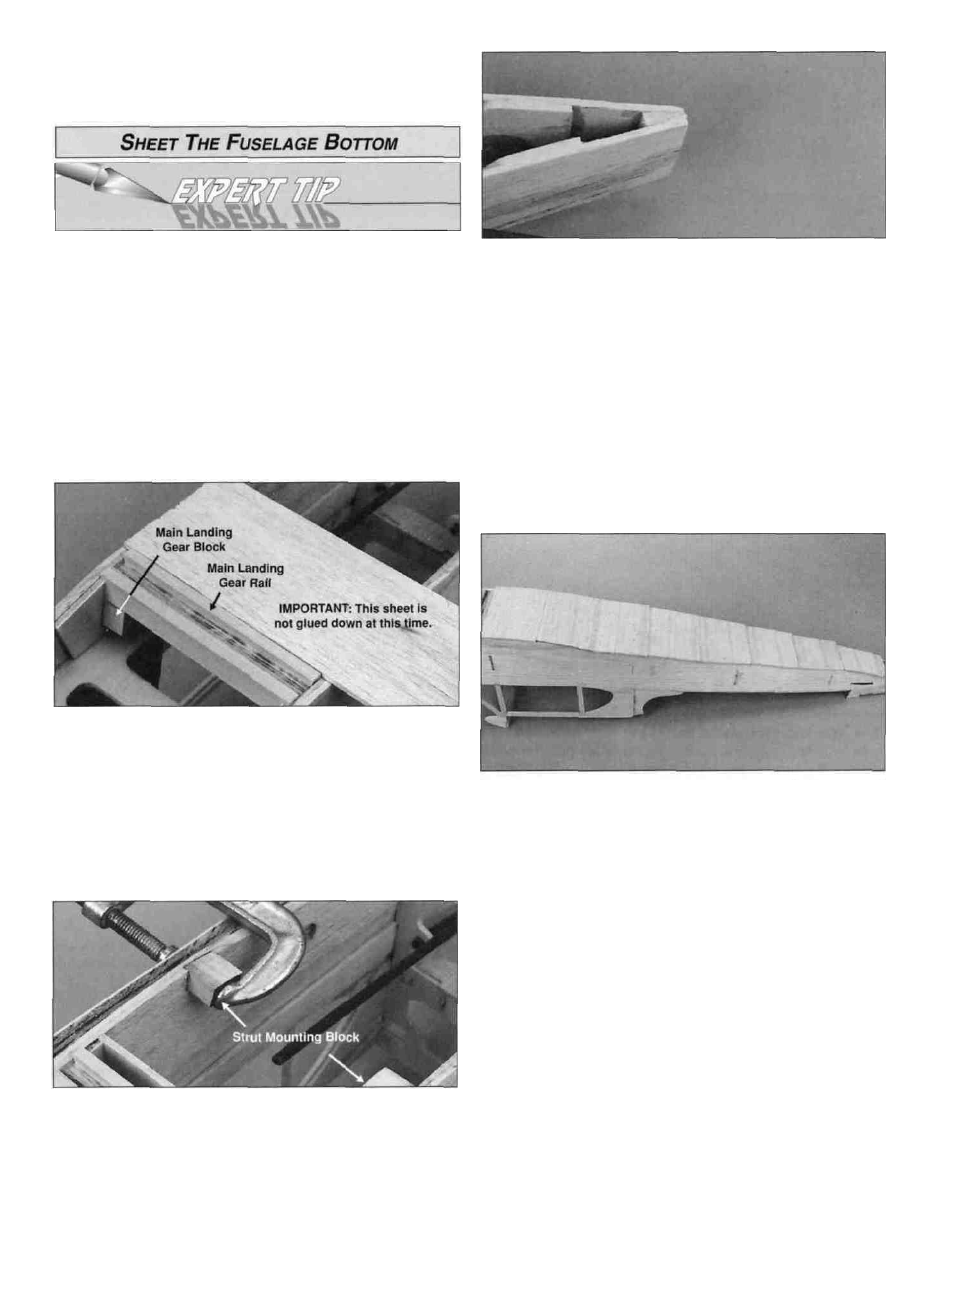
D 2. Test fit the 5/8" x 3/4" x 1/2" hardwood main
landing gear blocks and main landing gear rail into the
landing gear doublers. Place a piece of 3/32" sheeting next
to the main landing gear rail. The main landing gear rail
should be flush with the 3/32" sheeting. If it is not, adjust
the main landing gear blocks slightly. Glue the main
landing gear blocks and main landing gear rail in place
with 6-minute epoxy.
D 3. Glue the two 3/8" x 5/8" x 5/8" hardwood strut
mounting blocks in the notches in the lower fuselage
doubler with 6-minute epoxy. Make sure the strut mounting
blocks are flush with the bottom of the fuselage sides.
D 6. Sheet the bottom of the fuselage with 3/32" x 3" x 30"
balsa sheet. Apply the sheeting, cross-grain, starting at the
aft edge of the main landing gear rail and working towards
the tail. If an antenna tube was installed earlier, a slot will
need to be cut in the last piece of sheeting before gluing it
on (see photo below). Start the slot approximately 1-1/2"
forward of the aft fuselage joiner. Cut the slot wide enough
and long enough to allow the tubing to exit the fuselage.
Make sure the slot is centered between the fuselage sides.
D 7. Finish sheeting the bottom of the fuselage, starting at
the front of the main landing gear rail and working toward
the front of the fuselage. Glue two scrap pieces of 3/32"
sheeting onto the ends of the main landing gear rail to fill
the area between the forward and aft sheeting. After the
sheeting has been applied, trim the sheeting flush with the
sides of the fuselage and sand a radius on the two bottom
edges per the cross-section on the plans.
26