Great Planes Piper J-3 Cub 20 Kit - GPMA0158 User Manual
Page 21
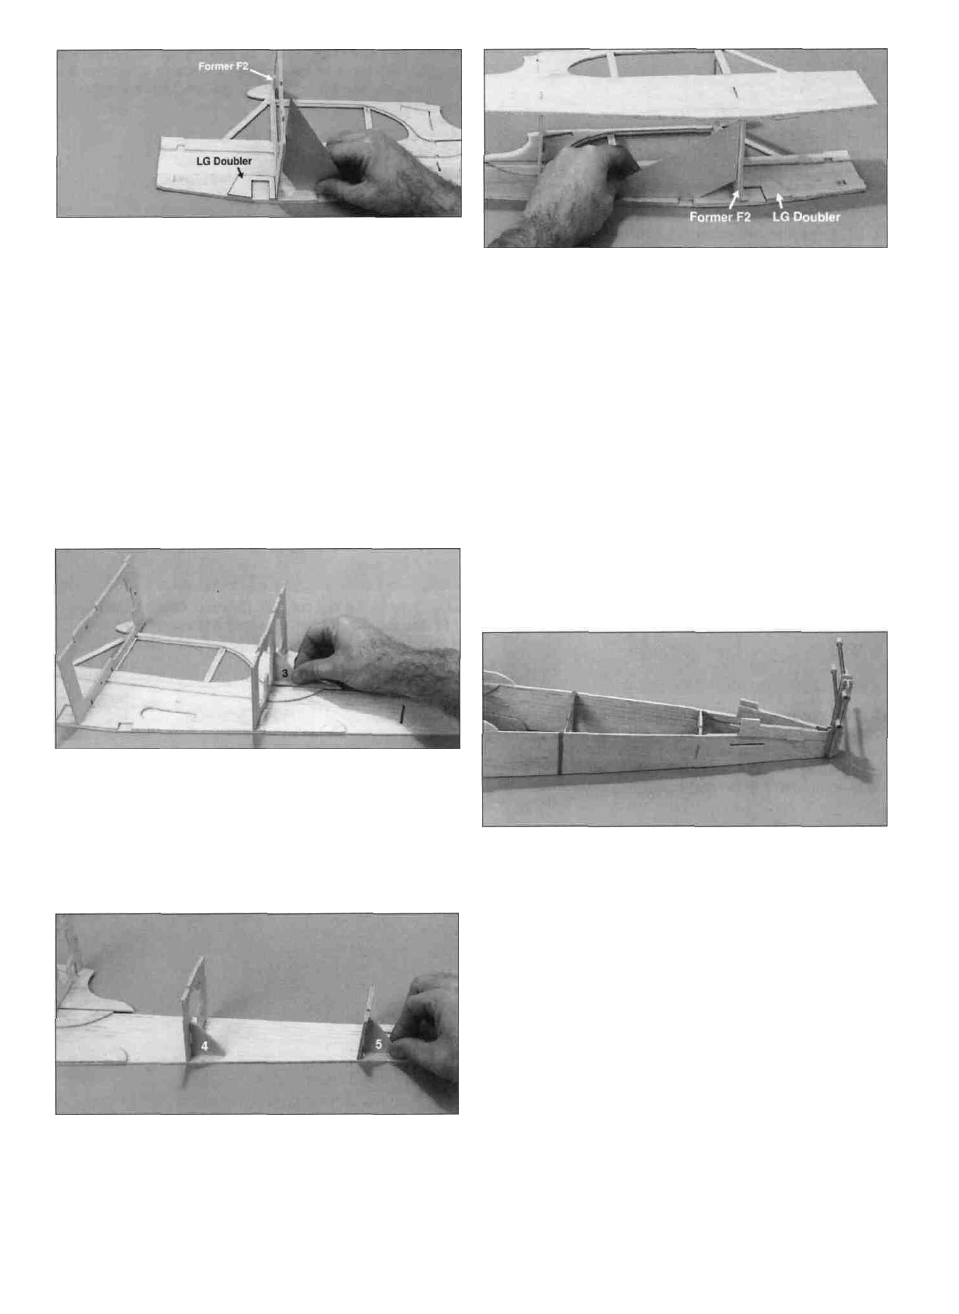
D 3, Install former F2A in the right fuselage side so that
the embossed F2A faces forward. Make sure F2A is
inserted into the notches completely and flush with the
bottom of the fuselage side. Use a carpenter's square or
small draftsman's triangle to hold F2A perpendicular to the
fuselage side. Apply a few drops of thin CA to hold the
former in place, and recheck its alignment as the CA
hardens. Place the die-cut 1/8" ply landing gear doubler
against the front of F2A and flush with the bottom of the
fuselage side. Glue the landing gear doubler to the
fuselage side with thick CA. Apply a small bead of medium
CA to the joint between former F2A and the fuselage side,
to add strength to the joint.
D 6. Join the right fuselage side to the left. Key only former
F2A to the left fuselage side. Do not join the other formers
to the left fuselage side yet. Lay the fuselage on its left
side and glue F2A to the left side of the fuselage. Again,
F2A must be perpendicular to the fuselage side. It is helpful
to prop up the aft end of the right fuselage side while
performing this step.
D 7. Glue the other landing gear doubler to the left
fuselage side, against the front of F2A and flush with the
bottom of the fuselage.
D 4. Glue former F3 to the right fuselage side using the #3
angle gauge, as shown in the photo. The gauge is only
used for assembly and is not glued in place.
D 5. Glue formers F4 and F5 to the right fuselage side
using the corresponding gauges to position each former.
D 8. Key the rest of the formers to the left fuselage side.
Don't use any glue until told to do so. Place a #64
rubber band around the fuselage at former F4. Clamp the
rear of the fuselage together. Lay the fuselage over the top
view of the plan. Push the sides down against your building
board to make sure they are parallel with each other. Make
sure the sides are flush at the aft end, where they
are clamped.
D 9. Using the fuselage top view plan as a reference,
confirm that the fuselage is straight. Securely glue
formers F3, F4 and F5 to the left fuselage side. Do not
glue the fuselage sides together at the aft end. Remove
the clamp and rubber band after the glue has set.
21