Great Planes Piper J-3 Cub 20 Kit - GPMA0158 User Manual
Page 17
D 1. Once more, look for any excess epoxy that will
interfere with the center section wing sheeting. Sand or cut
any excess epoxy off.
D 2. Locate the three pieces of 1/16" x 2-1/2" x 24" balsa
center section wing sheeting. Cut them into six
9-1/2" lengths.
D 3. Sheet the bottom of the wing first. Begin with the rear
sheet, then add the middle section, then the front. Also,
the bottom sheeting does not cover the main spar, but is
flush with it. Mark the location of the aileron servo tray on
the rear and middle sheets. Trim the sheets to blend into
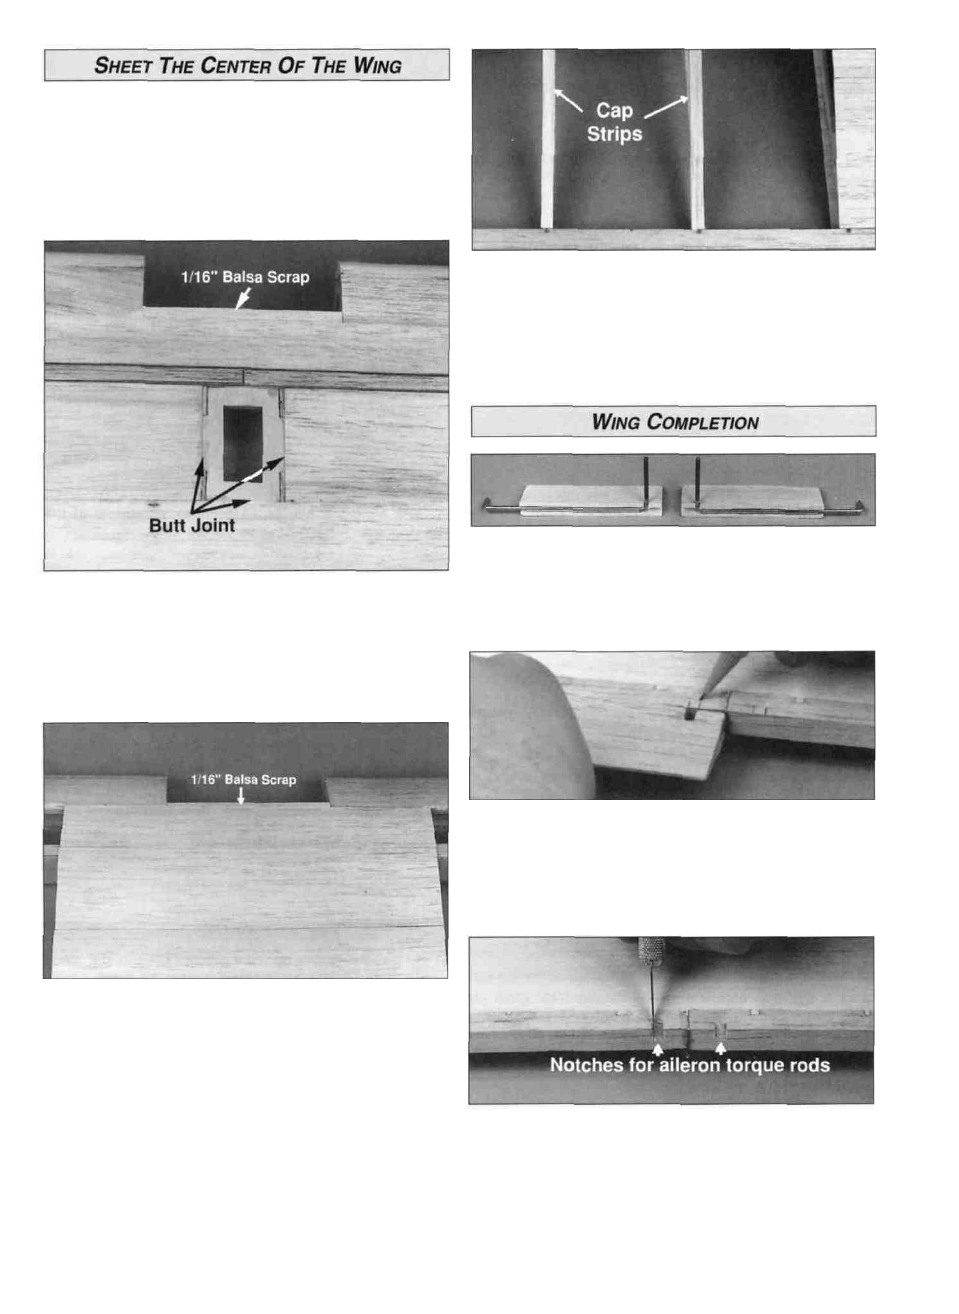
the aileron servo tray. Add a strip of 1/16" balsa scrap
over the forward spars and the plywood LE joiner.
D 4. Sheet the top center section. Again, sheet the rear
section first, then the middle, then the front. The seam
between the front and middle section sheeting should be
made over the main spar. Like the bottom, add a strip of
1/16" balsa scrap over the forward spars and plywood
leading edge joiner.
D 5. After both the top and bottom sheeting is installed,
use a T-bar or sanding block to even the edges of the
sheeting 1/8" past the R3 ribs.
D 6. From the 1/16" x 3/16" x 24" balsa sticks, cut, then
glue the cap strips to the top of all R4 and R5 ribs with
medium CA. These cap strips run from the leading edge
sheeting to the TE.
D 7. Lightly mark a centerline from the TE toward the LE
on the top sheeting of the wing.
D D 1. Position the tapered and grooved 1-1/8" x 3-3/8"
hardwood wing center TE pieces over the plans and mark
the location of the aileron torque rod exits. Cut a notch in
the bottom forward edge of both pieces as shown in
the photo.
D D 2. Sand a slight angle on the inboard edge of the
wing center TE to match the dihedral angle to permit the
two pieces to butt together without a gap. While holding the
wing center TE against the aft edge of the wing, aligned
with the wing centerline, mark the torque rod notches on
the bottom of the wing.
D D 3. Cut shallow notches at both torque rod locations on
the bottom aft edge of the wing to allow the torque rods to
swing forward.
17