Great Planes Piper J-3 Cub 20 Kit - GPMA0158 User Manual
Page 28
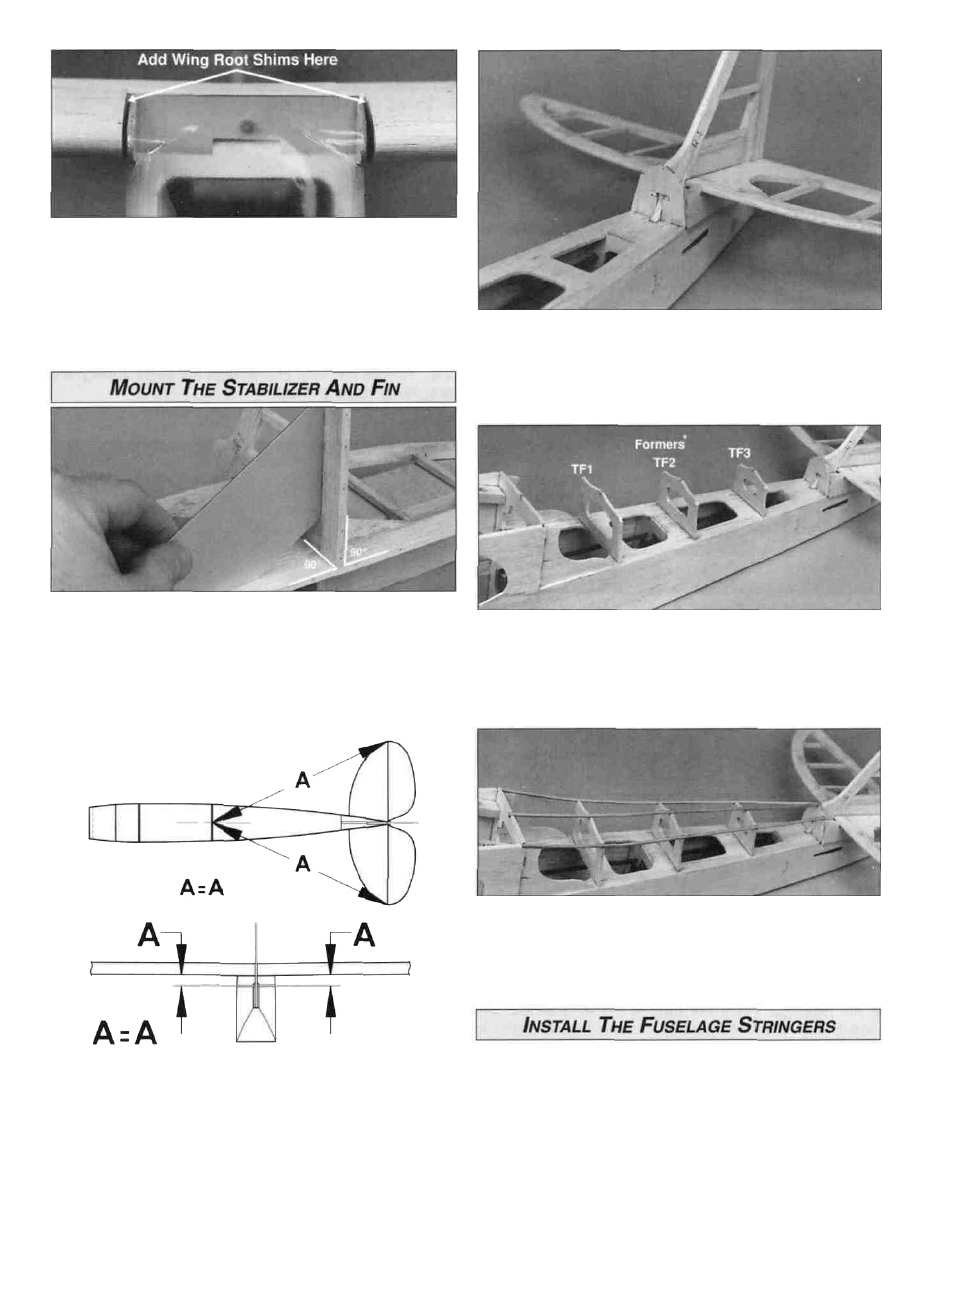
D 7. Note the gap between the LE of the wing and the
windshield. Install the 3/16" x 1-5/8" x 1-5/8" wing root
shims and sand them to reduce the gap to 1/32" on
each side.
D 8. Remove the wing and glue the root shims to the wing
with thin CA and sand them to the contour of the LE.
D 3. Check that the fin leading edge R1 is securely glued
to the aft fuselage deck and the stabilizer deck. Add thick
CA where necessary, then glue the turtle deck former TF4
in position.
D 1. Slide the fin post through the slot in the stabilizer and
make sure the fin base will meet the stabilizer. You may cut
a notch in the aft edge of the fin LE to get it to fit - do not
cut a notch in the stabilizer LE. Using a 90 degree triangle
to keep the fin perpendicular to the stabilizer and stabilizer
TE. Securely glue the fin in position with 30-minute epoxy.
D 4. Glue the remaining die-cut 1/8" balsa turtle deck
formers TF3, TF2, TF1 in position perpendicular to the aft
fuselage top.
D 5. Cut the 1/8" x 15" hardwood dowels to fit from the
front edge of former TF3 to the aft edge of former TF4, then
glue them in place.
D 2. Mount the wing to the fuselage. Verify that the
stabilizer is aligned with the wing and the fin is aligned with
the centerline of the fuselage. When this is achieved,
securely glue the stabilizer and fin to the fuselage with
30-minute epoxy. Double-check this alignment while the
epoxy is curing.
D 1. From the two remaining 3/16" x 3/16" x 30" balsa
sticks, cut two to the length shown on the plans for the
fuselage side stringers. Each piece should be
approximately 23-5/8" long. Use the remaining length of
3/16" balsa stick for the front portion of the fuselage side
stringer and cut it approximately 5" long.
28