Great Planes Piper J-3 Cub 20 Kit - GPMA0158 User Manual
Page 11
D 4. Carefully remove all the die-cut 1/16" balsa R1
through R6 wing ribs from the die-cut sheets. Sand the
edges slightly to remove any die-cutting irregularities.
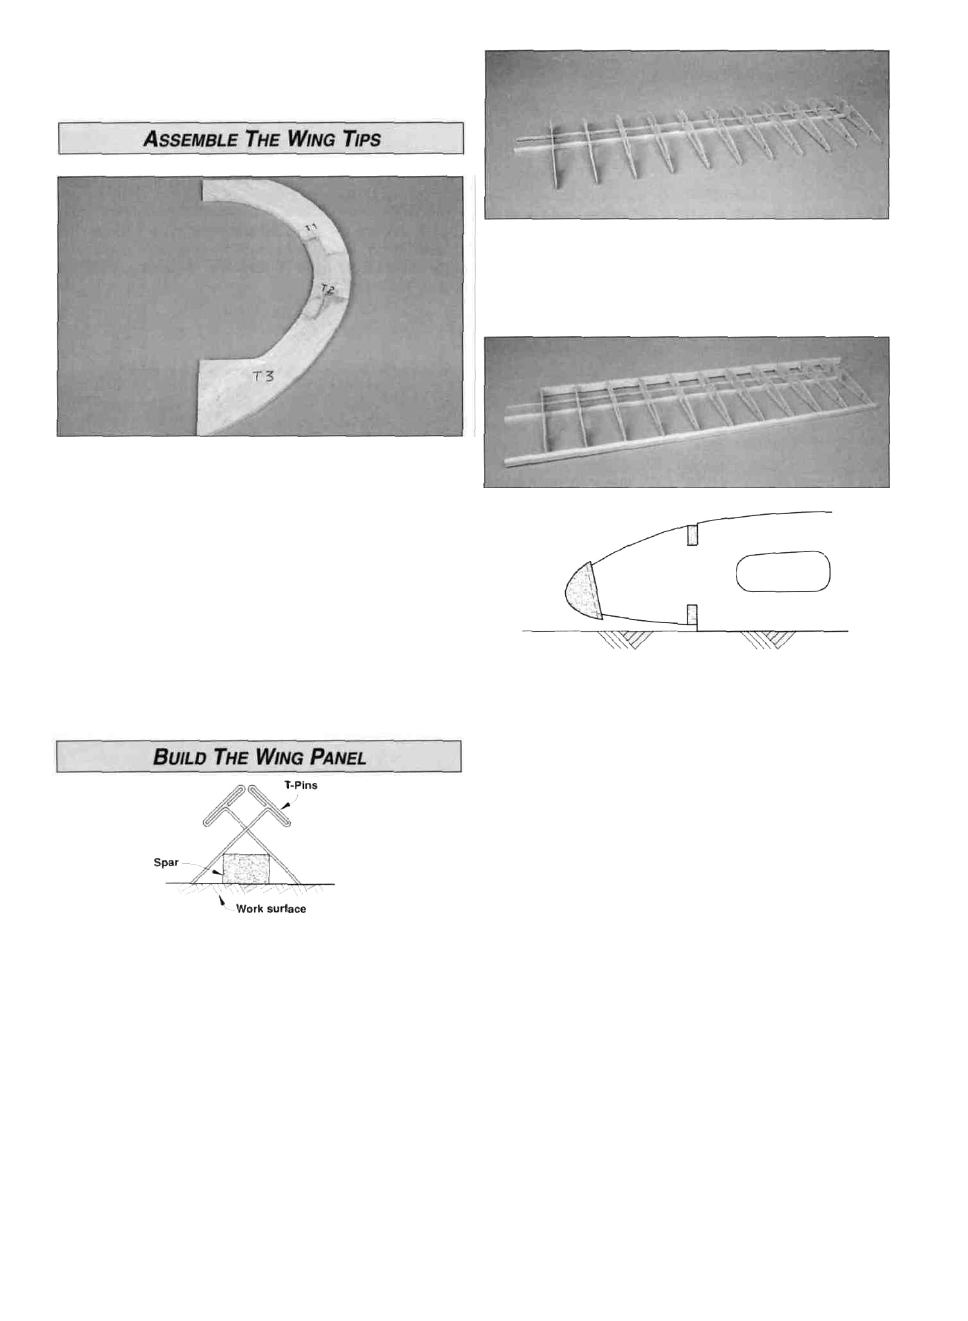
D D 1. Place the die-cut 3/16" balsa wing tip parts T1,T2
and T3 over the plan and check all joints for proper fit.
Make adjustments if necessary. Pin the parts over the plan
and glue them together with thin CA.
D D 2. Remove the wing tip from the building board and
inspect all glue joints. Apply thick CA to any open joints.
D D 3. Place the wing tip on your work surface and lightly
sand both sides smooth with 80-grit sandpaper. Set the
wing tip aside for now.
D D 2. Without gluing, place ribs R2 through R5 on the
spars in their locations as shown on the plans.
D Repeat steps 1 -3 for the other tip.
D D 3. Match the notches in the shaped balsa LE and TE
with the plan. Add the LE and TE to the ribs making sure
each rib is fitted into its respective notch. Center the LE
vertically so there is an equal amount of space above and
below each rib.
D D 4. Pin the TE to the building board. Place a piece of
scrap 1/16" balsa sheet under ribs R2 and R3 at the TE to
center them in the TE. Check that ribs, R4 and R5 are
against the building board.
D D 1. Do not use any glue until step five. For now,
we're just making preparations and familiarizing
ourselves with the layout. Place one of the 1/4" x 5/16" x
27" balsa lower main spars and one of the 1/8" x 3/16" x
27" balsa lower forward spars on the wing plan. Pin only
the main spar down with crossed T-pins as shown in the
sketch. We recommend crossed T-pins at every rib bay (the
space between the ribs). The lower forward spar is for
alignment at this point and will be glued to the ribs later.
NOTE: Align the end of the spars with the outboard edge of
the wing rib R5. Leave the spars' "overhang" at the root
(inboard end) of the wing. We'll trim it off later before joining
the wing halves,
D D 5. Use a small building square or draftsman's triangle
to make sure each rib is vertical to the main spar. Glue the
ribs to the main spar with thin CA.
D D 6. Adjust the LE up or down until all the ribs are
centered in the notches in the LE. Note that the LE is
angled down slightly as shown in the cross section on the
plan. Apply thin CA to each joint between the ribs and
the LE and TE.
11