Great Planes Piper J-3 Cub 20 Kit - GPMA0158 User Manual
Page 12
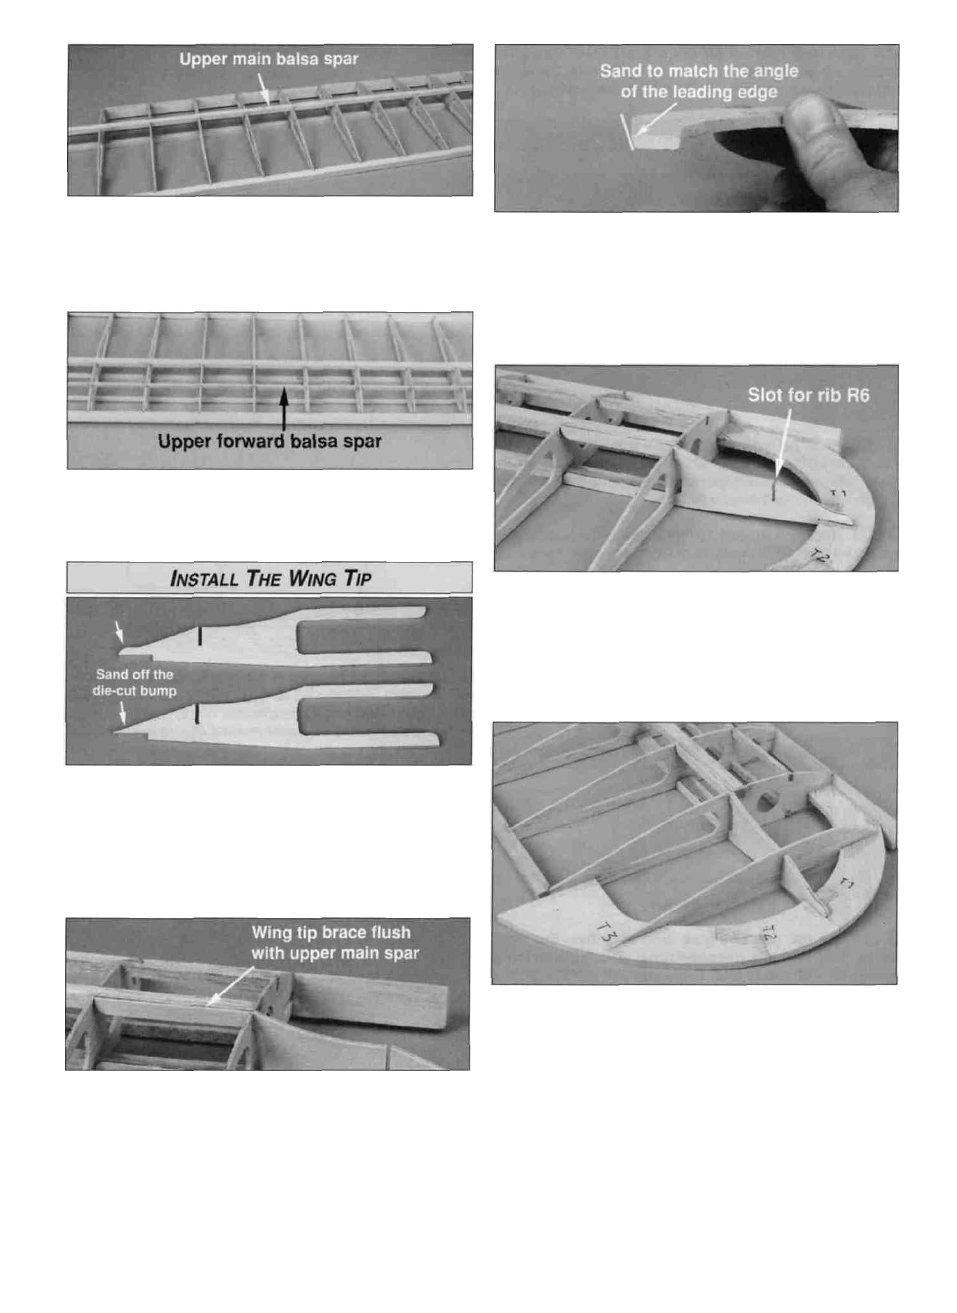
D D 7. Install the 1/4" x 5/16" x 27" upper main spar in
the wing ribs. Check that the top of the main spar is flush
with the top of the ribs. Make sure the end of the upper
main spar is flush with the outboard edge of rib R5. Glue
the main spar to the ribs with thin CA.
D D 3. So that the wing tip can fit properly between the
LE and rib R5, sand the front of the wing tip to match the
angle of the LE. Trim the TE flush with R5 so you can fit the
tip properly in place.
D D 8. Install the 1/8" x 3/16" x 27" upper forward balsa
spar in the wing ribs with one end of the spar flush with the
outboard edge of rib R5. Glue the forward balsa spar to
the ribs with thin CA.
D D 1. Locate the die-cut 1/8" plywood wing tip brace, the
die-cut 1/16" balsa wing tip rib R6, and your previously
assembled wing tip. Notice the plywood wing tip brace has
a small "die-cut bump" at the tip. This is to allow you to
finish the piece to a perfect point where the die-cutter may
have difficulty in this area. Take a minute to sand off the
bump so the profile continues along the intended outline.
D D 4. Insert the front of the wing tip into the slot in rib
R5. The aft end of the wing tip is attached to the TE of
the wing and the side of rib R5, while lying flush on the
building board.
D D 5. Insert rib R6 in the slot in the plywood wing
tip brace.
D D 2. Fit the 1/8" plywood wing tip brace into rib R5. The
top "arm" on the wing tip brace should be flush with the top
of the upper main spar and the slot for rib R6 should be
over the rib location on the plans.
D D 6. Check the fit of all the wing tip parts and sand any
mating edges as needed. Glue the wing tip parts together
and to the wing panel with thin CA.
12