Great Planes Piper J-3 Cub 20 Kit - GPMA0158 User Manual
Page 15
D D 9. Trim off some of the excess sheet past the wing tip
to allow the bottom sheet to make contact with the wing tip.
D D 1. Turn the wing over and install another
1/16" x 1-1/2" x 30" balsa wing LE sheet almost the same
way you installed the top except cut the sheet so it goes to
the aft edge of the forward spar. This time apply thick CA to
the ribs before you add the sheet.
time. It's easier to remove material than it is to add it.
Now that the right wing panel is completed, dust off your
building board and build the left wing panel.
D 1. Locate the die-cut 1/8" birch plywood dihedral brace
(A) and the die-cut 1/8" birch plywood dihedral brace (B).
Measure and draw a vertical centerline on both dihedral
braces. Glue the two dihedral braces together with
30-minute epoxy, lining up the centerlines. Clamp the
braces together and remove any excess epoxy with a
paper towel moistened with rubbing alcohol. While the
epoxy is curing, move onto the next step.
D D 2. Notice on the plan that the LE does not begin to
curve back until outboard of rib R5. Refer to the plan for
the correct shape. A razor plane works well to cleanly
remove material until you get close enough to use
sandpaper. Be careful with the razor plane - take a little
off at a time. Then use 150-grit sandpaper to rough sand
the wing tip to shape.
D D 3. Use a razor saw to cut both forward spars,
both main spars, and the TE on the lines previously drawn.
(See steps 5-7 on page 13).
D D 4. Sand the end of the spars and the trailing edge up
to the lines. Remove only a small amount of material at a
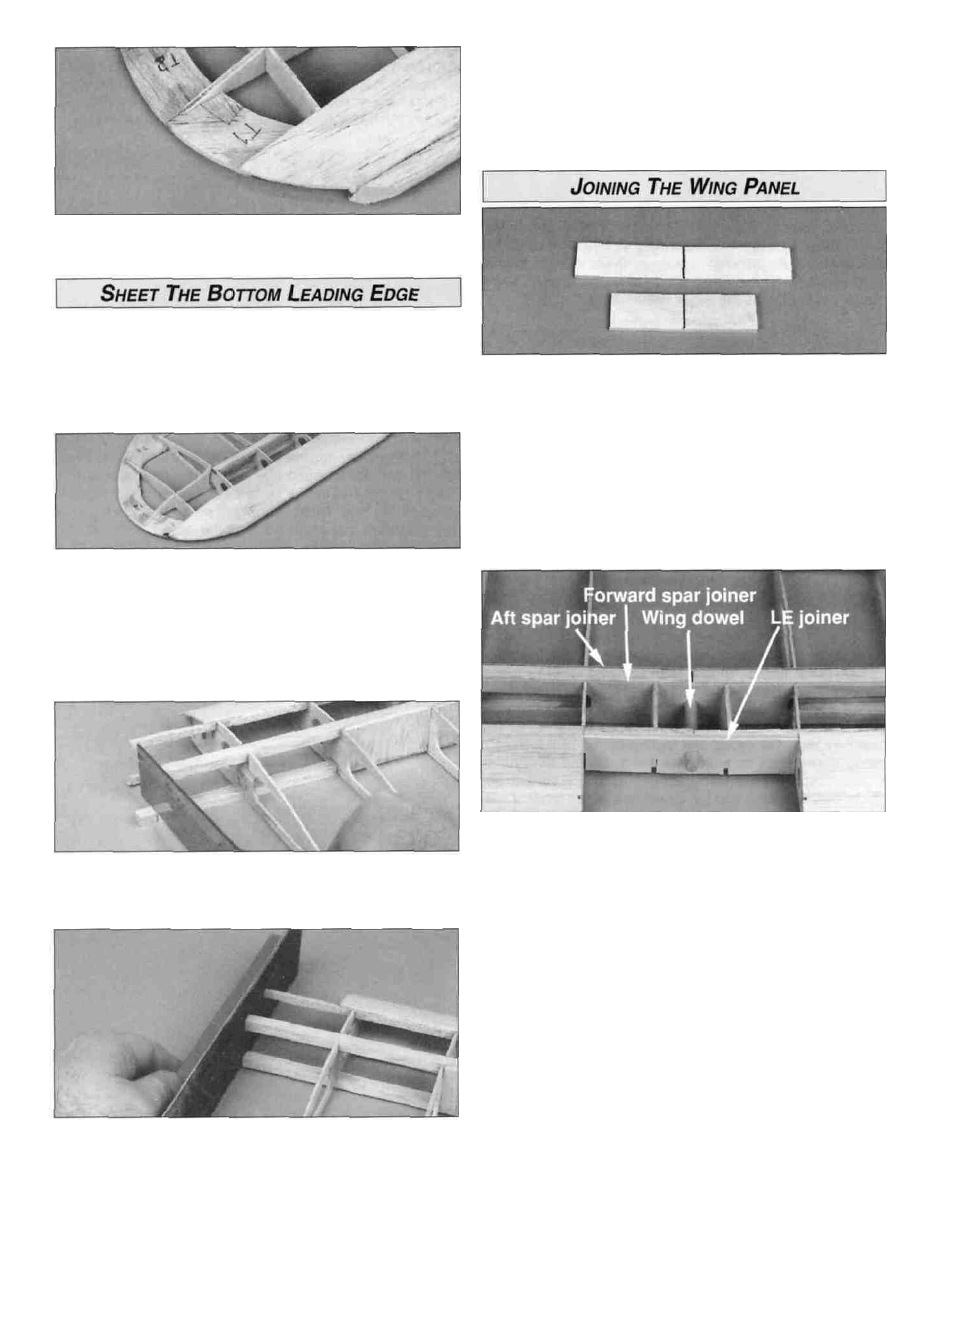
D 2. Without using glue, temporarily join the wing halves
using the die-cut 1/16" birch ply forward and aft spar
joiners and the die-cut 1/8" LE joiner. Also test fit the
die-cut 3/32" balsa sub ribs 1A in front of the forward spar
joiner. You may trim the ends of the forward and aft spar
joiners, but the LE joiner determines the width of the center
section and this should not be changed. With one of the
wing panels lying flat on your work table, prop up rib R5 of
the other panel 15/16" to account for the dihedral. Check
the fit of the spars, joiners and TE. At this time test fit the
1/4" x 1-3/4" wing dowel to check that it is perpendicular to
the leading edge joiner when fully seated into the forward
spar joiner. If you have to make adjustments here, do not
modify the LE joiner but adjust the position of the wing
dowel hole in the front spar joiner instead. Make sure you
have not built any "sweep" into the wing by making the
spars or TE too long or too short. Be sure to maintain the
correct spacing between ribs R2 per the plan so the wing
will fit on the fuselage.
15