Great Planes Piper J-3 Cub 20 Kit - GPMA0158 User Manual
Page 27
D 8. Glue the antenna tube to the bottom sheeting with
thick CA and trim it flush with the sheeting. Apply filler to
blend the area where the antenna tube exits the sheeting.
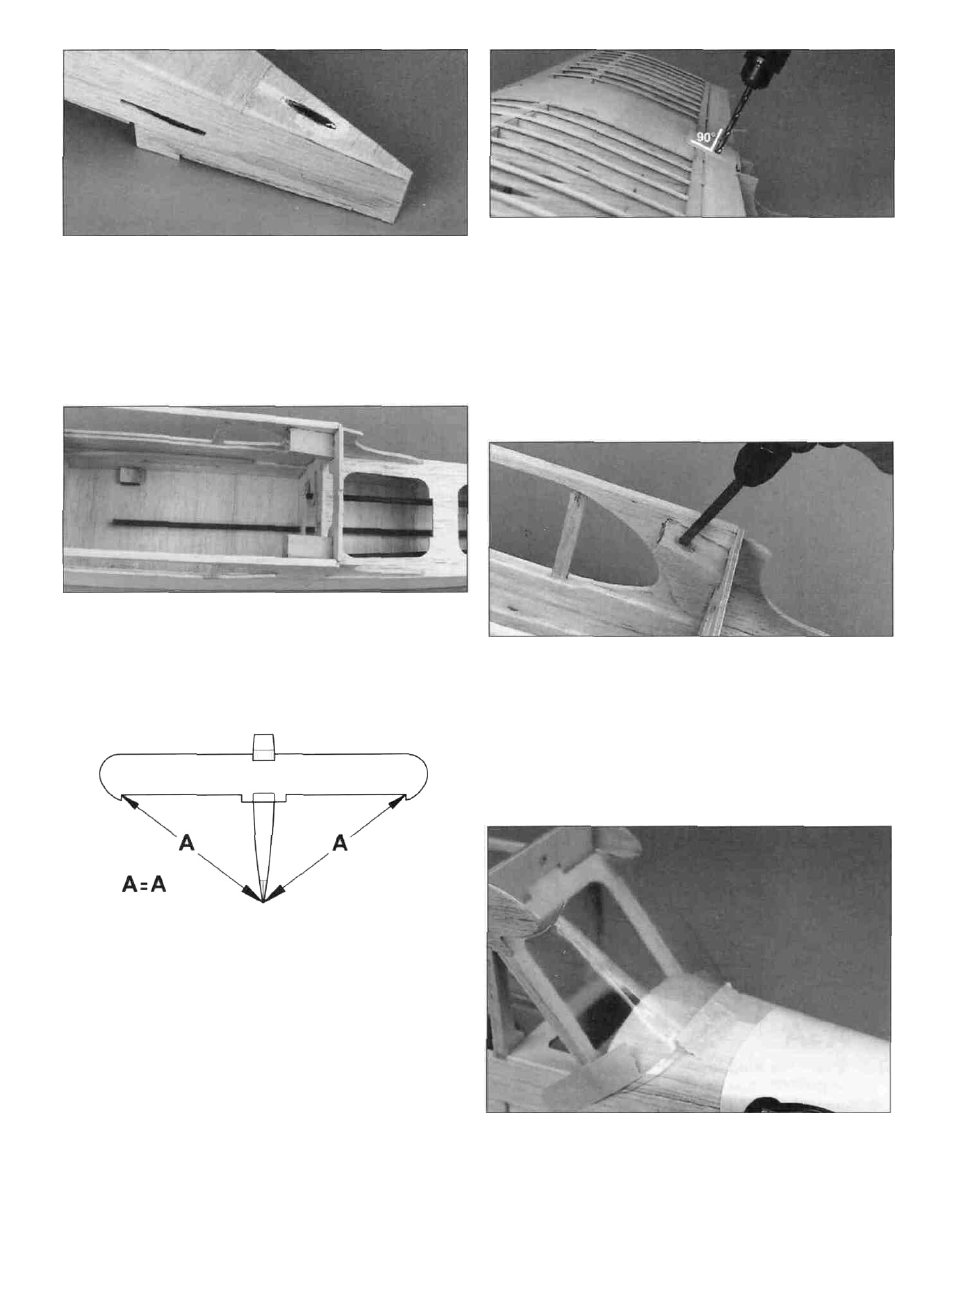
D 3. Tape the wing in position so that it cannot move. Use
a 5/32" (or #25) drill bit to drill a hole through the wing and
wing bolt blocks. Two small 90-degree triangles help you to
align the drill perpendicular to the top surface of the wing.
IMPORTANT: Do not allow the wing to shift during
this procedure.
MOUNT THE WING ON THE FUSELAGE
D 4. Remove the wing and enlarge the holes in only the
wing with a 13/64" drill bit.
D 1. Test fit the 3/8" x 3/4" x 1-1/2" hardwood wing bolt
blocks in the slots in the back of the cabin doubler and
former F3. Glue the blocks in position with 30-minute
epoxy. Use plenty of epoxy for a very secure installation.
D 2. Lightly sand the wing saddle area of the fuselage to
remove any glue bumps or slivers of wood. If you elect to
use wing seating foam tape (this is an option, our Cub 20
uses none) take this into account while mounting your wing
to the fuselage. Place the wing in the wing saddle and
visually align it with the fuselage. Use a tape measure to
measure the distance from the corner of the aileron bay to
the center of the tail post. Then measure the distance from
the other aileron bay and check if the distances are the
same (see diagram). Adjust the wing until both distances
are equal. When the wing is perfectly aligned, make
reference marks on the wing trailing edge and former F3 to
help keep the parts aligned during the next step.
D 5. Use a #10-24 tap to cut threads into the wing bolt
blocks. After cutting the threads, put a couple of drops of
thin CA on the threads in the wing bolt blocks. After the CA
has fully cured, screw the tap back through the holes to
clean up the threads. Bolt the wing to the fuse with two
nylon 10-24 wing bolts and leave it in place for the next
few steps.
D 6. Trim the clear windshield along the embossed "cut
lines," then tape it in position on the front of the cabin.
27