Great Planes Piper J-3 Cub 20 Kit - GPMA0158 User Manual
Page 18
D D 4. To provide better glue adhesion, roughen the nylon
surface of both torque rod tubes with coarse sandpaper.
Clean the nylon tubes with alcohol and a paper towel.
D D 5. Lightly coat the torque rods with petroleum jelly,
then slide the nylon tube back and forth a few times to
lubricate the inside of the tube. This procedure will prevent
the torque rods from being glued to the tube during the
next step.
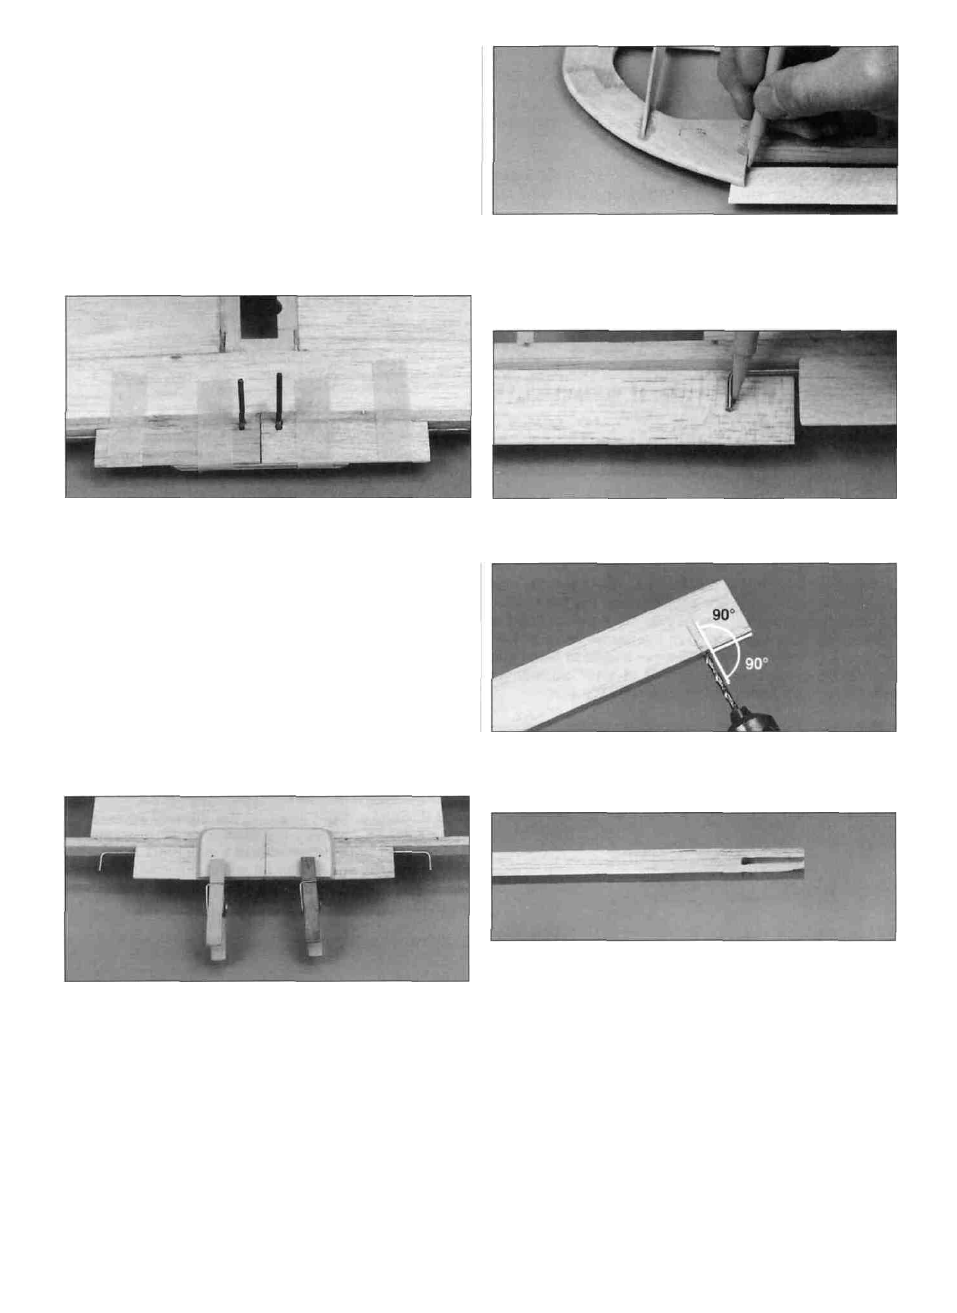
D D 8. While holding a 1-1/8" x 27" balsa aileron against
the inside edge of the wing center TE, draw a line on it that
matches the inside edge of the wing tip TE. Cut the
aileron 1/8" shorter than the TE opening to allow for
covering material.
D D 6. Coat the center section of the nylon bearings with
30-minute epoxy. Then insert the tubes into the grooves of
the wing center TE. Wipe off any epoxy that may squeeze
out with a paper towel. Apply epoxy to the forward edges of
the wing center TE (keep it out of the notches) then glue
them in position as shown on the plans. Use masking tape
to hold the wing center TE in position while the
epoxy cures.
Note: Allow the epoxy to harden completely before
proceeding with step 7.
D D 9. Hold the aileron in position, centered in the
opening, then mark the location of the torque rod arms.
D D 10. Draw a centerline on the forward edge of the
aileron. Drill a 7/64" hole, 3/4" deep, perpendicular to the
forward edge of the aileron to accept the torque rod arm.
D D 7. Draw a centerline on the die-cut 1/16" birch ply
wing plate. Sand a bevel on the front and sides of the
wing plate with 80-grit sandpaper. Leave the aft edge of the
wing plate square. Use 6-minute epoxy to glue the wing
plate in position on the top of the wing. Use the centerline
you drew to align the wing plate with the centerline of the
wing. The aft edge of the wing plate must be flush with the
aft edge of the wing center TE. Clamp the wing plate in
position while the epoxy cures.
D D 11. Cut a groove from the inboard edge of the aileron
to the hole to accept the torque rod. Hint: Use your
sharpened piece of 1/8" brass tubing for this task.
D D 12. Sand the forward edge of the aileron to a "V."
Refer to the cross-section of the wing on the plans for the
desired angle
Well, you are about halfway through the framing stage, so
clean up your workbench, have a soda and let's build
the fuse.
18