Great Planes Piper J-3 Cub 20 Kit - GPMA0158 User Manual
Page 33
D 8 Carefully cut a slit 1/2 deep in the end of the aft wing
strut Install a 1/4" x 1" CA hinge in the slit and secure it to
the wing strut with thin CA Center the CA hinge from the
aft strut over the marked wing strut mounting block on the
fuselage Drill a 1/16" hole through the center of the CA
hinge and the wing strut mounting block Attach the strut to
the fuselage with a #2 x 3/8" sheet metal screw
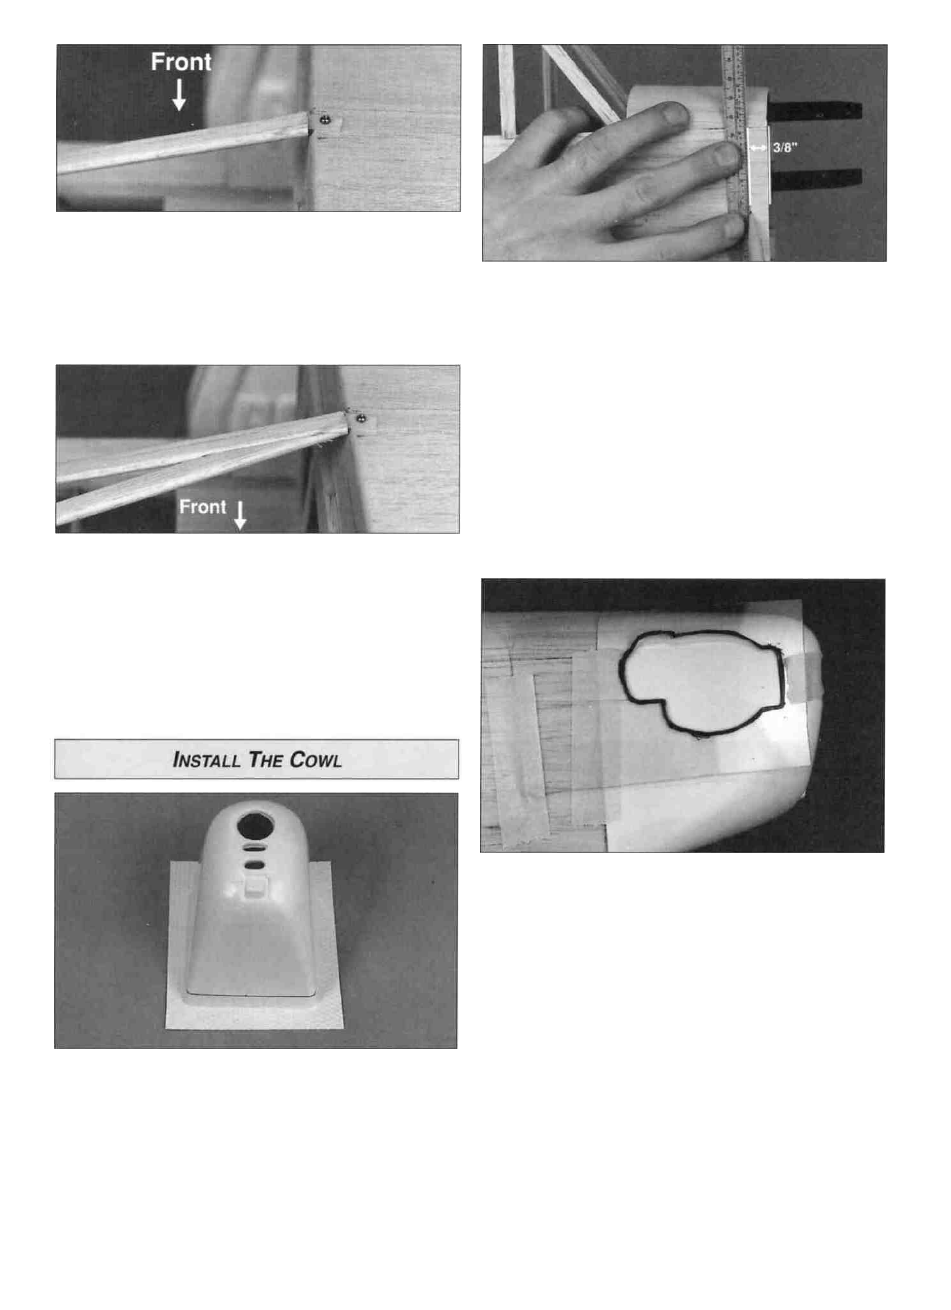
D 2 With a pencil, draw a line around the fuselage 3/8"
from the forward edge of the fuselage sides Without the
engine on the engine mount test fit the cowl on the
fuselage The aft edge of the cowl should be even with the
line Measure from the firewall to the front of the cowl. The
distance must be 4" or slightly less to prevent the propeller
from rubbing on the front of the cowl Trim the aft edge of
the cowl to meet the line on the fuselage Sand the
fuselage to obtain a good fit at the corners of the cowl
When you are satisfied with the fit, remove the cowl and
reinstall the engine.
D 9 Reinstall the forward strut on the wing Test fit the
forward wing strut against the aft strut Trim the forward
wing strut as needed to achieve a good fit Glue the struts
together with thick CA.
D 10 Apply balsa filler in the joint between the two struts to
blend them together Repeat the process for the struts on
the other side
D 1 Using a hobby knife or Lexan® scissors, cut along the
cut lines at the base of the cowl. Cut out the three
openings in the front of the cowl for the air intake and
crankshaft Use a sanding block and 150-grit sandpaper to
smooth out the base of the cowl
D 3 Cut a piece of clear butyrate or thin card stock (not
included) long enough to cover the engine and 3" of the
fuselage Hold the butyrate over the head of the engine and
with a marker draw the outline of the head and any other
parts that will protrude out of the cowl Trim the area from
inside the lines on your pattern Test fit the pattern over the
engine and trim as needed to provide a 1/8" clearance
around the engine After the pattern is trimmed, tape it to
the fuselage Use more pieces of butyrate to locate where
other holes will need to be cut (for example, the needle
valve and muffler) Carefully remove the engine without
disturbing the patterns Reinstall the cowl, lining up the aft
edge of the cowl with the lines on the fuselage Tape the
cowl to the fuselage to prevent it from moving With the
patterns lying on top of the cowl, mark the openings on the
cowl Remove the cowl and trim out the openings
33