Great Planes Learjet 40 Kit - GPMA0439 User Manual
Page 9
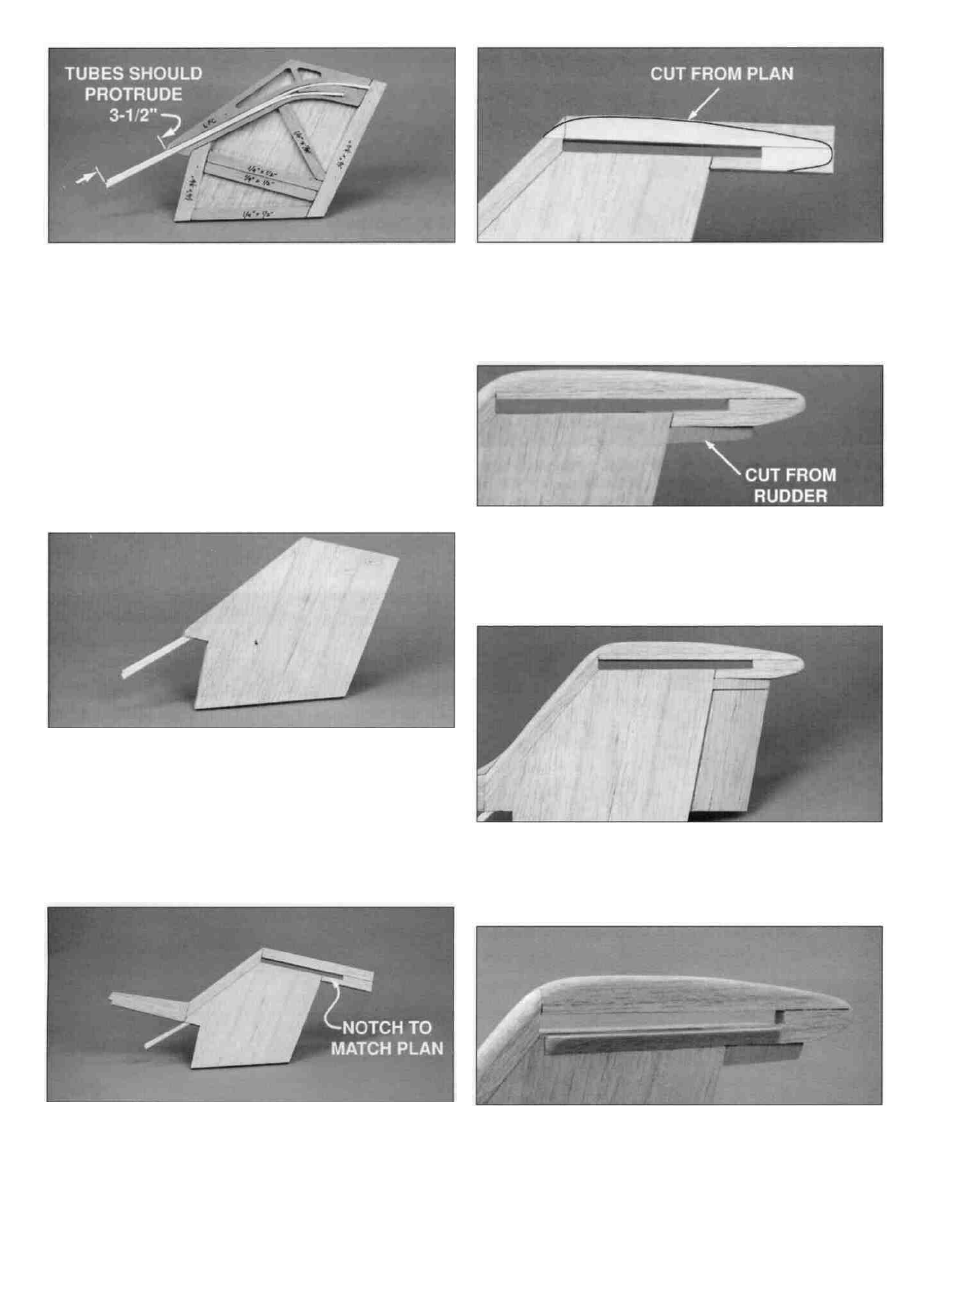
D 4. Cut three pieces of inner pushrod tube to match the
plan. Fit the right elevator cable tube in the top slot of the
fin core, up against the sheeting on the right side, with an
inch or so extending through the sheeting hole.
NOTE: LEAVE 3-1/2" OF ALL THREE TUBES
EXTENDING PAST THE BOTTOM OF THE FIN CORE. Fit
the left elevator cable tube in the same slot on top of the
right one, but have it exit on the left side. Fit the rudder
cable tube in the lower slot in the fin core exiting on the
left side as well. When you're happy with the fit, use thick
CA to hold the tubes in the slots.
D 7. Cut the fin top pattern from the plan, then glue it to
the top of the fin with spray adhesive or rubber cement.
Sand the edges of the fin top to match the pattern. Round
the top of the dorsal fin, front of the leading edge and top of
the fin top.
D 5. Sand the right elevator tube flush with the sheeting,
then pin the fin assembly back on the building board. Add
1/16" balsa sheeting on the open side, fitting the sheeting
around the rudder and left elevator tubes where they exit.
Sand the tubes flush with the sheeting.
D 8. Sand one end of the shaped balsa rudder to match
the angle shown under the stab on the plan. Cut a 3/8"
piece from the sanded end to make the rudder filler. Glue
the 3/8" piece to the bottom of the fin's TE. Cut the rudder
to match the size and shape shown on the plan.
D 9. Sand a "V" on the leading edge (LE) of the rudder to
match the cross-section on the plan. Use masking tape to
temporarily attach the rudder to the fin. The hinges will be
installed after covering.
D 6. Add the 3/8" x 3/4" balsa stick leading edge, trailing
edge (TE), top (notched to match the plan) and shaped
dorsal fin. Remove the assembly from the board.
D 10. Round the ends of two 6" long pieces of 3/8" balsa
tri-stock and glue them to the sides of the fin, flush with the
bottom of the stab slot.
9