Great Planes Learjet 40 Kit - GPMA0439 User Manual
Page 11
D 1. Pin the wing plan to your building board and cover it
with waxed paper.
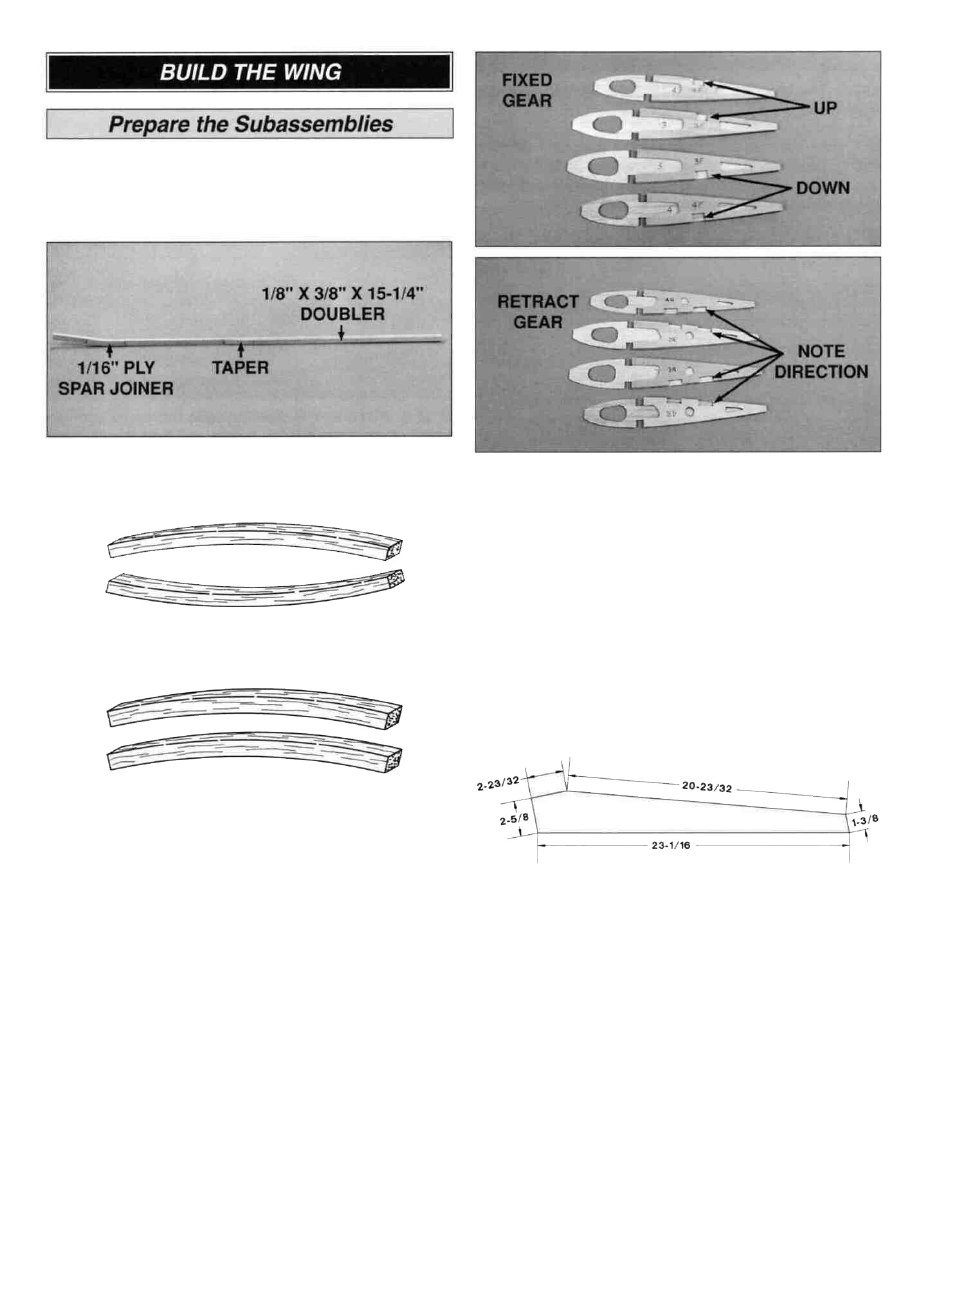
TWO WARPED SPARS INSTALLED
THIS WAY WILL RESULT IN A
STRAIGHT WING
TWO WARPED SPARS INSTALLED
THIS WAY WILL RESULT IN A
WARPED WING
D 5. Decide whether you will be using fixed or retractable
landing gear. The rib doublers required for fixed or retract
gear are different. W-3F and W-4F are used for the fixed
gear and W-3R and W-4R are used for the retract gear.
Glue the appropriate doublers to the W-3 and W-4 ribs,
being sure that you make a left and a right of each one.
Cut the gear block notches out of each rib using the
notches in the doubler as a guide.
D 6. Align the shaped and notched leading edges (LE)
over the plan. Cut the LE in two at the centerline of W-9.
Save both pieces.
D 2. Assemble the spars as follows: Pin one of the 1/4" x
3/8" x 30" balsa main spars down over one wing plan and
trim the outboard end at the centerline of W-9 (save the
off-cut piece for use in a moment). Locate a 1/8" x 3/8" x
15-1/4" balsa spar doubler. Sand 2-1/4" of one end of the
spar doubler to a taper (see plan). Glue the spar doubler to
the inboard end of the main spar so that the untapered end
is flush with the root end of the main spar. Trim the
off-cut piece of 1/4" x 3/8" to match the plan at the outboard
end of the main spar, then glue it in position. Glue the die-
cut 1/16" plywood spar joiner on top of the joint.
D 3. Remove this spar from the plan, then assemble a
second one over the same plan.
D 4. Build two more spars over the plan of the other
wing. This procedure will produce left and right top and
bottom spars.
CUT LE SHEETING AS SHOWN (4 REQUIRED)
D 7. Using the plan and the pattern shown above, cut four
3/32" x 3-1/2" x 30" balsa LE sheets. Note: The aft edge of
the sheets should fall approximately along the middle of
the spar.
D 8. Glue the two die-cut plywood dihedral braces (DB)
together with 6-minute epoxy. Be sure they are perfectly
aligned along all edges. Clamp the pieces together while
the epoxy cures.
D 9. After the DB epoxy has cured, lightly sand the edges
to remove any bumps. Drill a 1/4" hole through the DB
at each of the two punch marks. These holes are for the
wing dowels.
11