Great Planes Learjet 40 Kit - GPMA0439 User Manual
Page 25
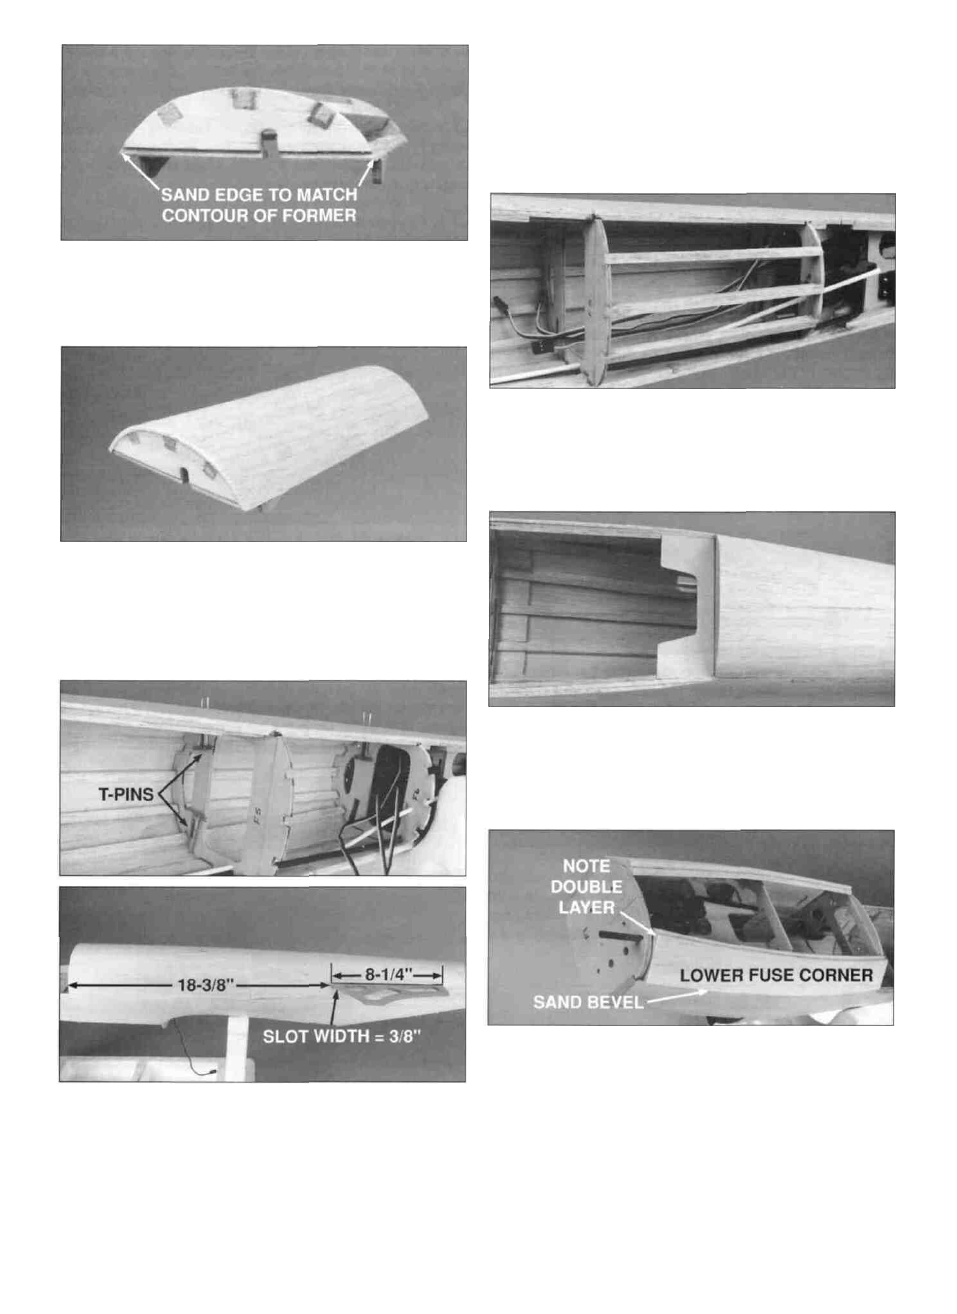
D 34. Remove the hatch from the fuselage and sand the
sides of the hatch base to an angle that matches the
contour of H-1 and H-2. Install three 1/4" x 1/4" x 6-3/4"
balsa stringers, and sand off any rough edges.
D 35. Glue a 3/32" balsa sheet to the outside edge of the
hatch base. Wet the outside of the sheet, bend it around
and trim it to end at the middle of the center stringer. Glue it
in place. Repeat for the other side, then when the sheeting
has dried completely, sand the front and back ends flush
with the hatch formers.
D 36. Locate the dummy engine nacelle pylon positions
by inserting pins through the sheeting from the inside of the
fuse at the notched sections of formers F-5 and F-6.
Remove the pins, then use a straightedge and knife to cut
out the sheeting between the pin marks. Extend the slots
on both sides of the two formers so that the forward edge is
18-3/8" from F-2 and the overall length of the slot is 8-1/4".
Test fit the die-cut ply pylons into the slots and make
adjustments as necessary. IMPORTANT: Both pylons must
be the same distance from F-2. Don't worry about the
thickness of the pylons as we still have to sheet them.
D 37. Glue three 1/4" x 1/4" x 6-3/4" stringers between F-5
and F-6 and sheet this area with moistened 3/32" x 3" x
6-3/4" balsa. After the sheeting has dried thoroughly, install
the hatch and sand the entire rear portion of the fuselage
bottom to shape.
D 38. Fit the 1/4" plywood wing bolt plate in the notches
in the wing saddle triplers, up against F-5. Use 30-minute
epoxy to glue this part in position. Add 1/4" balsa triangle
reinforcements between the wing saddle triplers and the
top of the plate at both ends.
D 39. Fit one die-cut 3/16" balsa lower fuse corner to each
side of the fuselage between F-3 and F-1. Sand an angle on
the convex (curving outward) side so that it will fit flush on
the bottom edge of the fuselage side doubler. Glue these
pieces in place, then fit and glue a second pair of fuse
comers on top of the first. Using four pieces here instead of
two makes the required twist much easier to achieve.
25