Great Planes Learjet 40 Kit - GPMA0439 User Manual
Page 24
D 27 If you would like to use a larger capacity fuel tank than
the recommended 8 ounce size, run two 1/8" aluminum
tubes along the right side of the fuselage from just behind the
nose retract servo tray to the middle of the fuselage
NOTE: In order to obtain reliable engine performance you
will need to install an auxiliary fuel pump to deliver fuel to the
engine The larger tank should be mounted on cross
members (not supplied) in the fuse, centered on the CG
During final assembly connect the tank and engine to the
aluminum tubes with standard fuel tubing
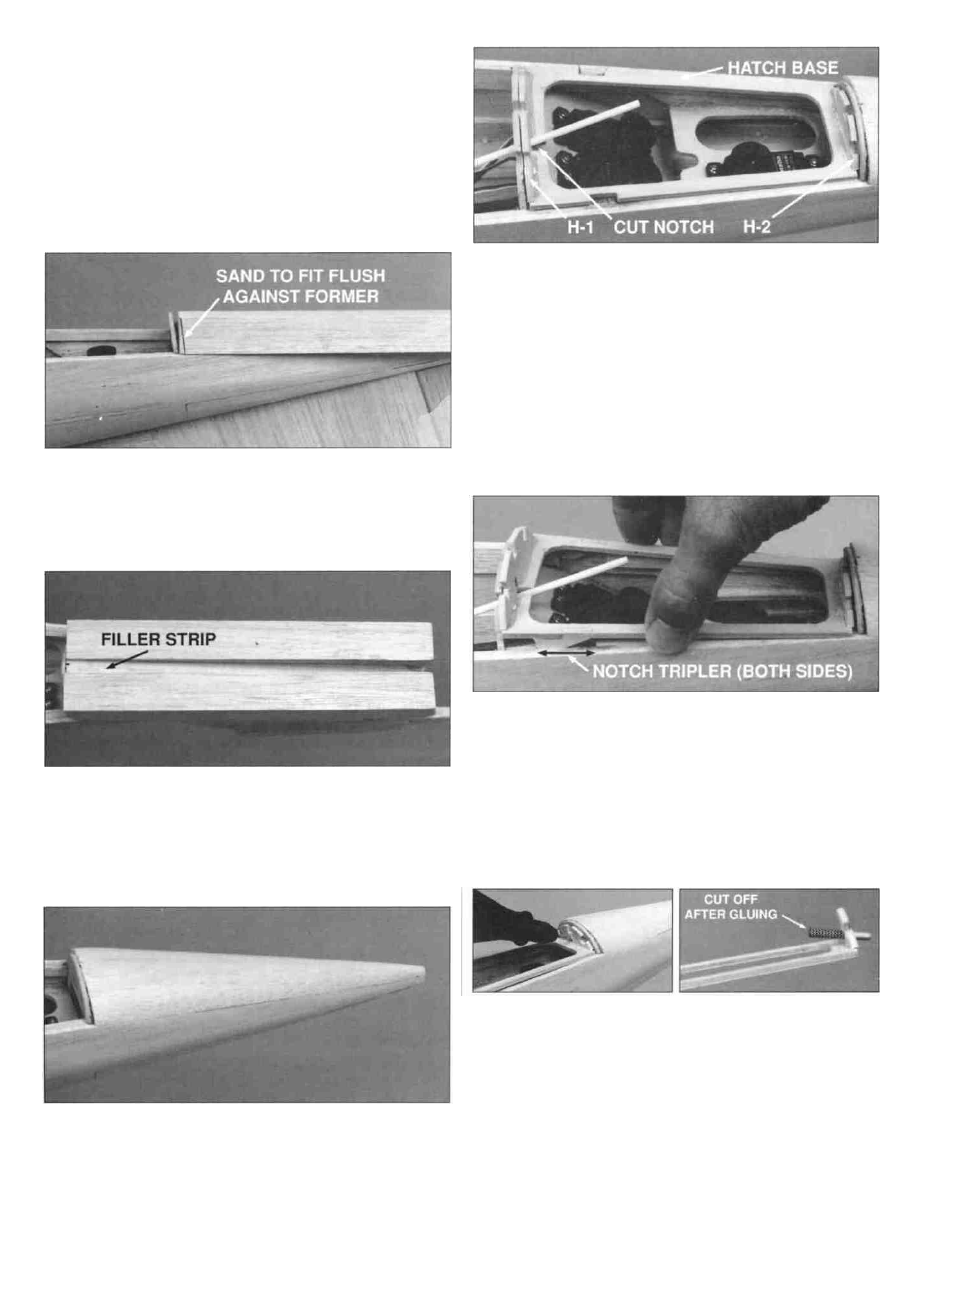
D 31 Put the die-cut 1/8" ply hatch base in place between
F-6 and F-7 Glue the die-cut 1/8 ply hatch formers H-1
and H-2 (make sure punch mark faces forward) to the
hatch base using F-6 and F-7 to set the correct angles Be
careful not to glue the hatch into the fuselage Cut out the
section of the hatch base which corresponds with the notch
in H-1 to allow for the nose wheel pushrod guide tube.
D 28. Insert the vertical fin into its slot in the fuselage.
Carefully check its alignment and pin it in place Fit the rear
bottom blocks in place on either side of the fin and glue
them to the rear of F-7 and the top of the fuselage sides,
but not to the fin.
D 29 Glue a 1/4" x 3/8" x 9-1/2" balsa filler strip between
the rear blocks to fill the gap The filler strip should be flush
with the edge of F-7 and touch the side sheeting at the aft
end of the fuse Remove the fin immediately after this step
to be sure it isn't accidentally glued in place.
D 32 Glue the two die-cut 1/8" ply locking tabs to the
bottom of the hatch with the wide end toward the front Notch
the forward end of the servo compartment tripler to match
the locking tabs, allowing the hatch to seat properly Drill
1/16" pilot holes through the fuse sides into the locking tabs.
Before flying, secure the hatch with two #2 x 3/8" screws.
D 30 Carve and sand the rear bottom blocks to shape
Use the bottom of F-7 and the plan as a guide to the
correct shape (See Expert Tip on page 22 )
D 33 Drill through the punch mark in H-2 into F-7 with a
1/8" bit angled downward at about a 5 degree angle.
Remove the hatch Round one end of the 1/8" x 1" hatch
dowel Insert the dowel into H-2 so that it extends 3/16"
from the rear, then mark it on the inside of H-2 Install the
hatch, then glue the dowel in position to the inside of H-2
using your mark to obtain the correct depth After the CA
has cured, cut off the excess dowel on the inside of
the hatch.
24