Great Planes Learjet 40 Kit - GPMA0439 User Manual
Page 22
D 15. Fit the 1" x 1" x 9-1/2" balsa top aft fuse fairing
blocks in place on both sides of the fin. Mark and sand the
forward ends of the blocks so they fit flush with F-7. Glue
the blocks to the rear of F-7 and the top of the fuselage
sides, but not to the fin. Use glue carefully so that you
don't accidentally glue the fin in place. Remove the fin
immediately after this step.
an Easy-Touch" Bar-Sander will smooth out the lines and
flat spots. Don't try to shave too much wood at one time
and check your work regularly. You can always remove
wood, but it's difficult to put it back.
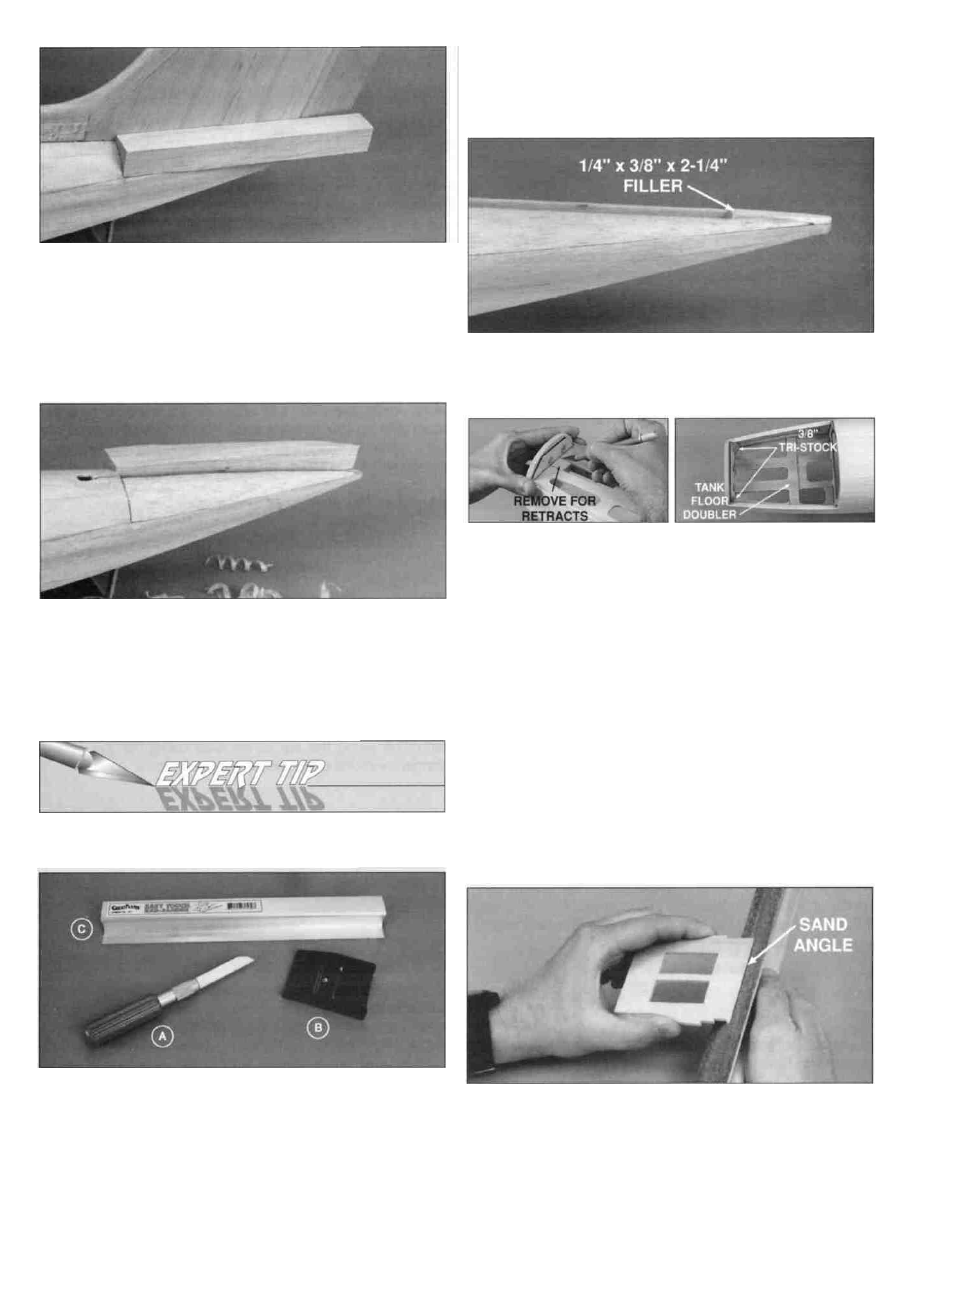
D 17. Glue a the 1/4" x 3/8" x 2-1/4" balsa filler between
the rear top blocks to fill the gap behind the fin.
D 16. Carve and sand the fuselage and fairing blocks to
shape (see Expert Tip that follows). Use the cross sections
on the plan as a guide and make sure there are no flat
surfaces left. This is the key to a fuselage that will appear
round, even if it isn't.
SHAPING BALSA BLOCKS
D 18. If you will be using retracts, cut out the scored part
in the front of the tank floor and install the die-cut 1/8" ply
tank floor doubler (TFD) on the top side.
D 19. Trim and sand 3/8" balsa tri-stock reinforcements
to fit behind the firewall and both sides of the fuse. Glue
them in place.
D 20. Put the fuselage upside-down in a Styrofoam"
cradle* so that you can work on it without marring the top
surfaces. Cut off the support crutch from the bottom
of F-7.
*HINT:A Styrofoam ice chest is cheap and can be cut to fit,
or you can purchase a Robart Super Stand which is
specifically made for this purpose.
A long carving blade in a heavy duty handle (A) is the
best tool to create the rough shape as a large amount of
wood can be easily removed. Once the blocks are
"roughed in," use a razor plane (B) to fine tune the
shape. Finally, coarse, medium, and fine sandpaper on
D 21. Sand a bevel on the wide end of the die-cut 1/8" ply
forward servo tray that corresponds to the angle at F-6
(see side view of fuse plan). Using the bottom view plan as a
guide, glue the forward and the die-cut 1/8" plywood rear
22