Great Planes Learjet 40 Kit - GPMA0439 User Manual
Page 19
D D 7. Hold the tank in position while you carefully drill a
3/32" hole through the center of the mounting blocks and
tank tongue from the bottom of the wing. Try not to drill
through the top of the wing.
D D 8. Enlarge the opening of the entrance hole to 3/16"
diameter x 1/8" deep. This will hide the head of the cap
screw when it's installed.
D 1. Pin the side view fuselage plan to your building board
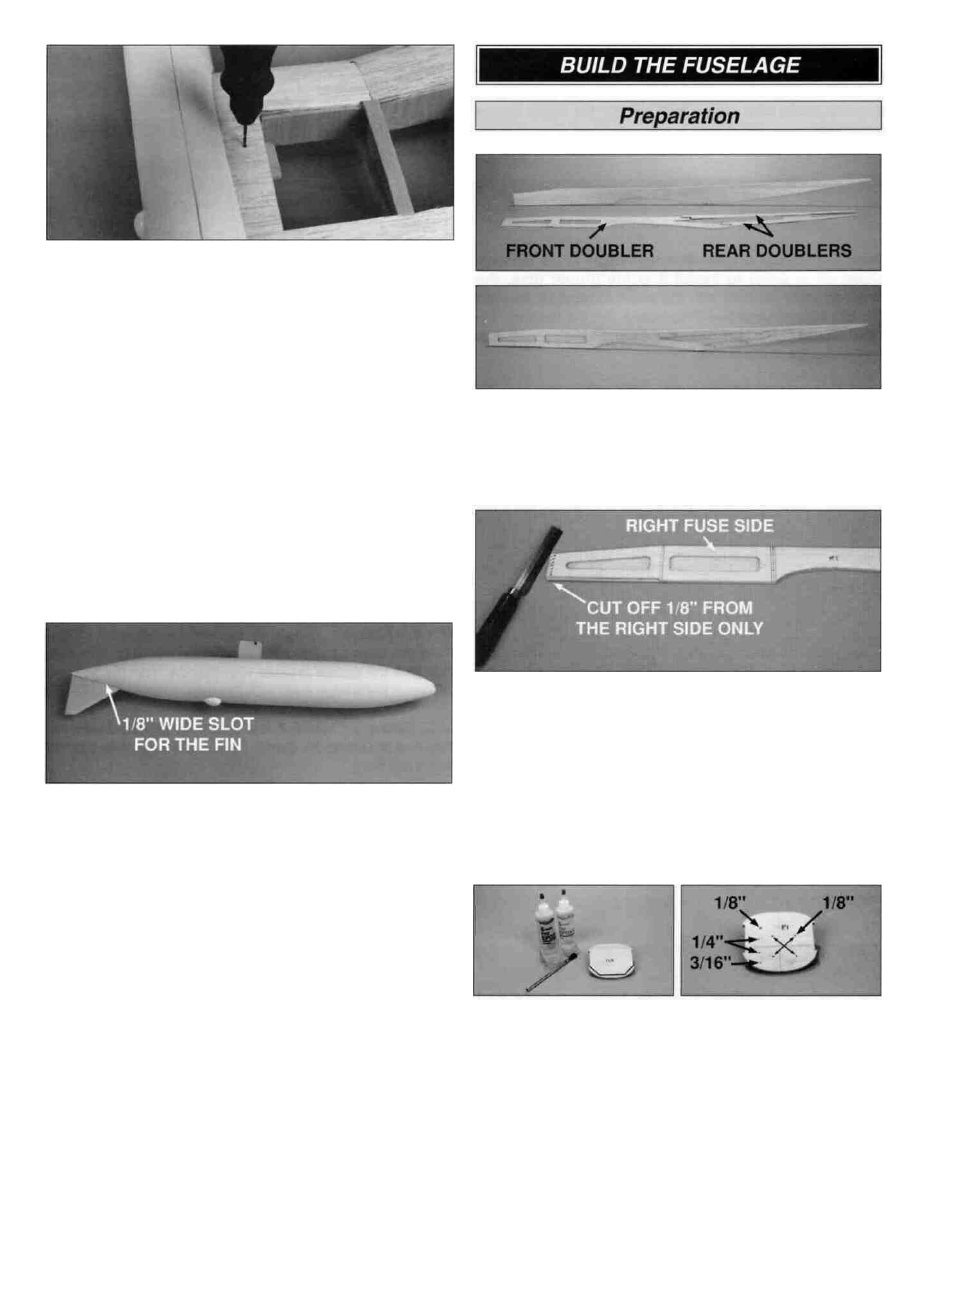
and cover it with waxed paper. Assemble the die-cut 1/8"
balsa front and rear fuselage sides over the plan, then
add the die-cut 1/8" balsa front and rear doublers.
D D 9. Glue the outside of the tip tank to the assembled
inner half.
D 2. Turn the fuselage side upside-down, cover it with
waxed paper, then assemble the fuselage side and its
doublers over it. Remove both sides from the board and
sand them so they match exactly. Cut 1/8" off the front of
the right side only. This will set the proper amount of right
thrust in the firewall.
D D 10. Cut a 1/8" wide slot in the "outside" aft end of the
tip tank centered between the top and bottom edge of the
tank. Test fit the die-cut plywood tip tank fin into the slot.
Round off the LE and TE of the fin with sandpaper.
D 3. Mark the former positions on the inside of both fuselage
sides, then remove the side view plan from the board.
D 11. Glue the fin into the slot at the aft end of the tank,
then repeat steps 2 thru 9 for the other tip tank.
D 12. If you will be painting the tip tanks, fill the joints with
automotive body filler (Bondo®). When the filler has cured,
wet sand the seam smooth.
This completes the assembly of the wing for the time being.
Looks like a jet wing, eh? Clean off your workbench, take a
break, then let's get on with the fuselage. You can sleep later.
D 4. Assemble the three piece firewall (with the punch
marks forward) using 6-minute epoxy. Glue the two F-1s
together and also F-1D to the aft side of the F-1s. Using the
plan and punch marks as guides, carefully drill holes for
the engine mount, fuel lines, throttle cable and, if using fixed
gear, the nosegear steering cable. Mark the top front of the
firewall now, so you won't make a mistake later. Install four
4-40 blind nuts on the back of the firewall assembly.
19