Great Planes Learjet 40 Kit - GPMA0439 User Manual
Page 16
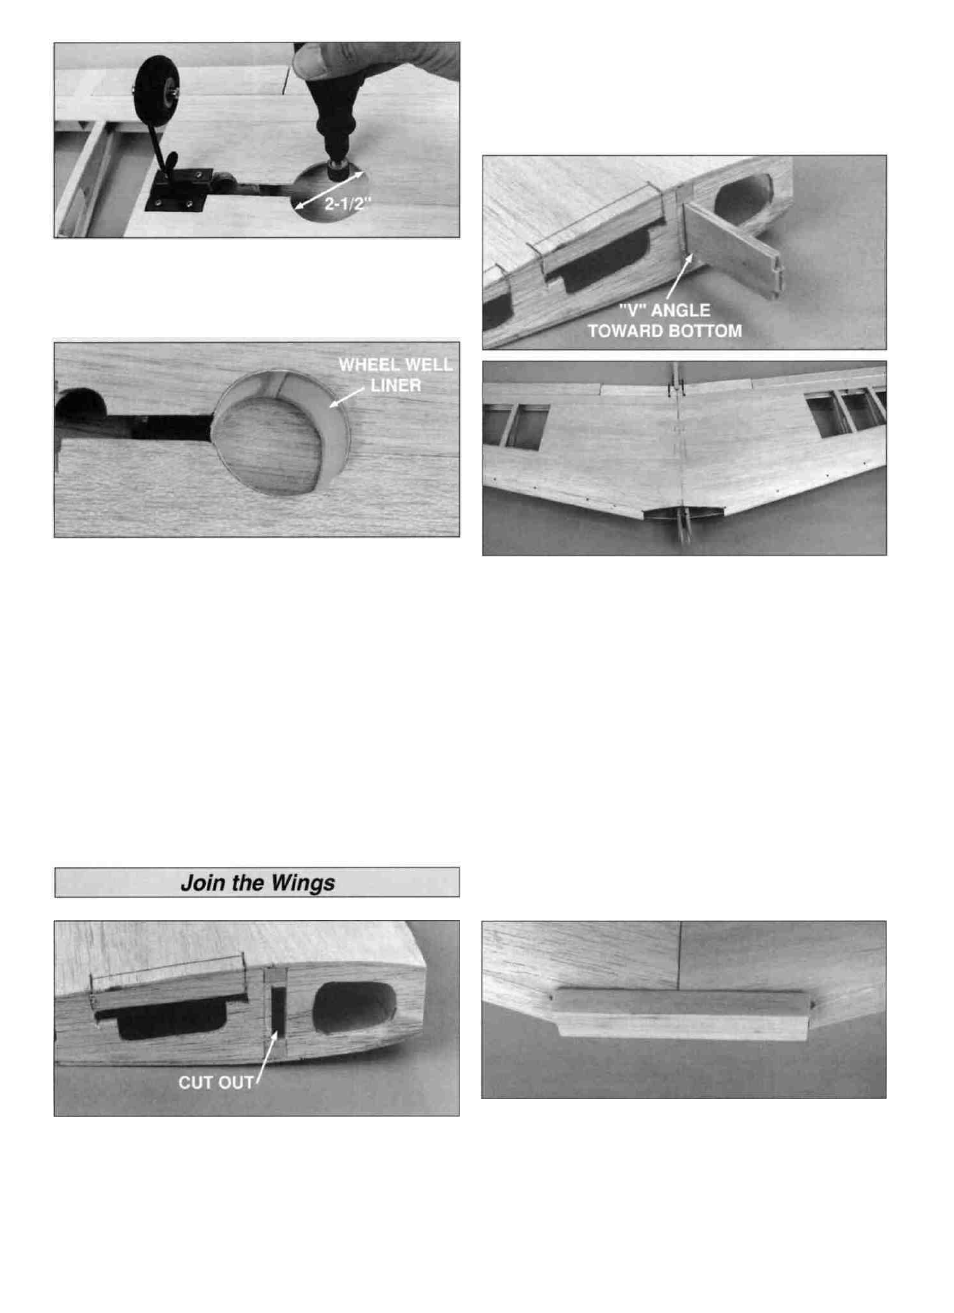
D 7. Slowly retract each strut and wheel, cutting away
the bottom center sheeting and ribs for clearance as you
go. Enlarge the diameter of the wheel well hole to 2-1/2"
keeping the hole centered on the retracted wheel.
D 8. The wheel well liners can be made from proper
sized foam or paper coffee cups, or from vertical grain
1/16" balsa sheeting wrapped around an appropriately
sized glass jar and glued to form a cylinder. Glue the
wheel wells in place, then trim the edges to match the
bottom sheeting.
D 9. Use a 12" long x 1/4" drill bit to drill a hole from the
retract servo opening, through the wheel well liners, to
the retract mechanism.
D 2. If needed, sand the leading edge sheeting even with
the front edge of W-1.
D 3 Before using any glue,trial fit the wings together using
the die-cut plywood dihedral brace (DB). The wing roots
(W-1) should fit together smoothly, and the dihedral brace
should contact both spars and also locks into both W-2s.
The dihedral brace is mounted perpendicular to W-1, not
parallel to the spars (see plan for exact position) Be sure
the "V" shaped edge of the dihedral brace is toward the
bottom of the wing. Apply 30-minute epoxy to the mating
surfaces of the W-1 ribs, dihedral brace and inner edges of
the center TE. Clamp or pin the wings together while the
epoxy cures.
NOTE: When the epoxy has cured, look at (DB) from the
leading edge and add additional epoxy to fill any visible gaps.
D 1 Finish cutting out the partially die-cut section
between the spars on both W-1 ribs.
D 4. Fit and install the 1/2" x 1-7/16" x 5" balsa center
leading edge block. We suggest using a liberal amount of
thick CA when you glue it in position.
16