Great Planes Learjet 40 Kit - GPMA0439 User Manual
Page 29
The following 3 steps are critical to the way your
Learjet flies, so take your time and work carefully.
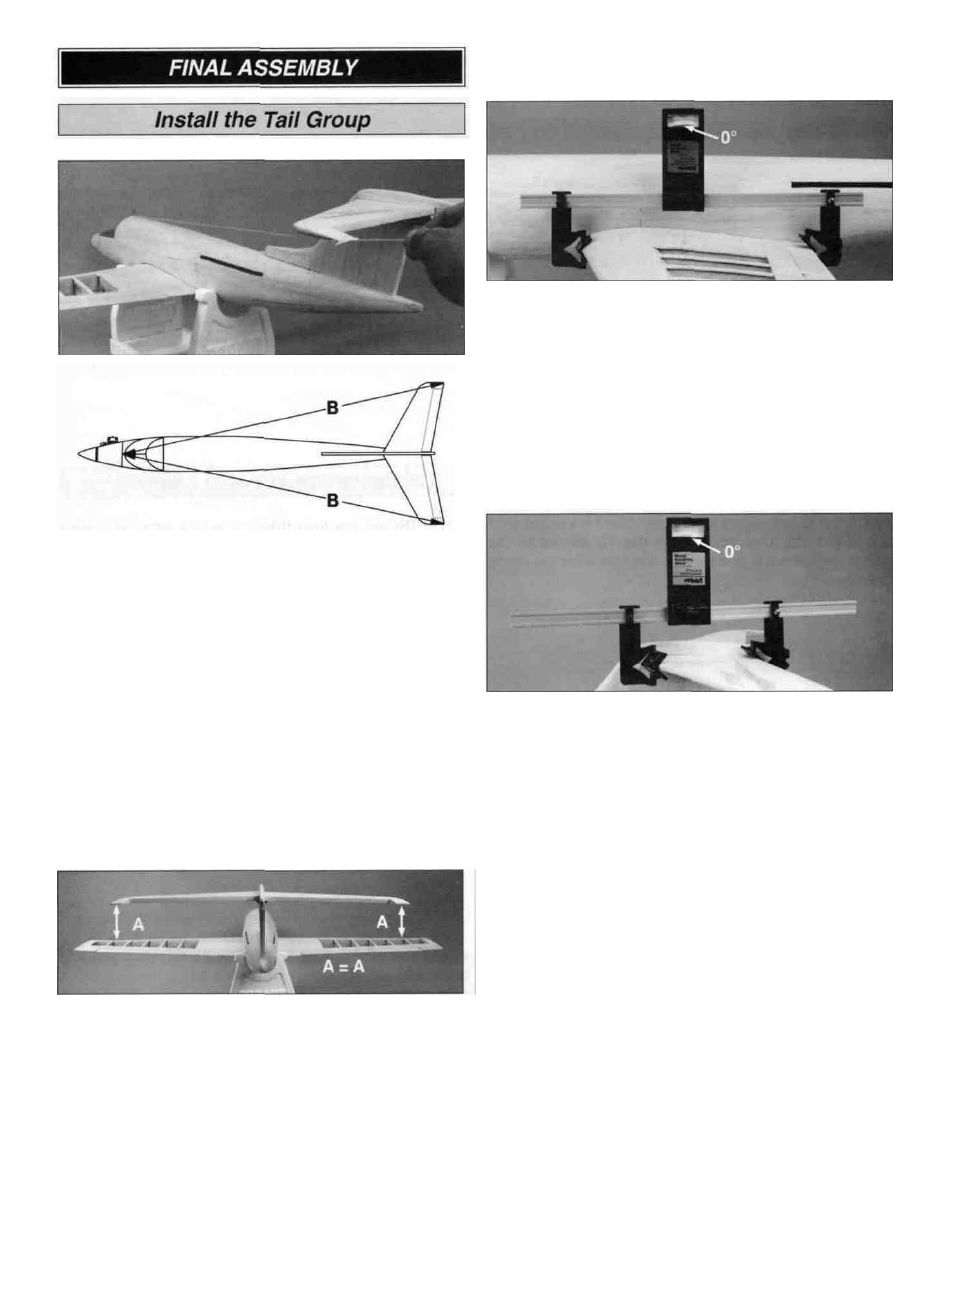
D 1. Mount the wing, then without gluing, insert the fin
into the tail slot. Slide the stab into position, centering it
visually on both sides of the fin. Use string to measure the
distance from each stab tip to a pin centered on top of F-2.
The distance to the pin must be equal from each stab tip.
D 4. Block up your model so that the wing root is level and
has 0 degrees of incidence. We recommend the use of an
incidence meter for this important step. If you can't obtain
an incidence meter, you can accomplish the same objective
if you insert a pin in the center of the leading and trailing
edges, then exactly equalize the distance from the
workbench to the pins.
D 2. Mark the top of the stab with reference lines on both
sides of the fin.
D 3. Position the model so that you can "sight" it several
feet from the front and rear. Look at the relationship
between the stab tips and the top of the wing - the
distance must be equal. If not, sand the high side of the
slot in the fin to correct the situation. When satisfied,
remove the stab, then use 6-minute epoxy to glue it in
position using your reference marks for alignment. Before
the epoxy cures, recheck your alignment from all points
of reference.
D 5. Once the wing angle is set, check the incidence of the
stab - it must be 0 degrees as well. Once again use an
incidence meter or the pin measurement technique. If the
stab does not measure 0 degrees, adjust the angle of the
fin up or down in its slot to remedy the problem. NOTE:
The base of the fin may need to be sanded slightly to allow
enough movement. Sand (or shim) the bottom of the dorsal
fin, if needed, to obtain a good fit with the top of the fuse.
Draw reference lines on the fin (along the top of the fuse)
once the correct angle is established.
D 6. Use 30-minute epoxy to glue the fin into the fin slot at
the marked angle. Be sure to check the incidence angle
once again before the epoxy cures
D 7. Center and glue the shaped 1/4" balsa ventral fin to
the bottom of the fuse flush with the aft end as shown on
the fuse plan.
29