Great Planes Learjet 40 Kit - GPMA0439 User Manual
Page 28
D 3. Bolt the wing to the fuselage using the supplied 1/4" x
2" nylon bolts.
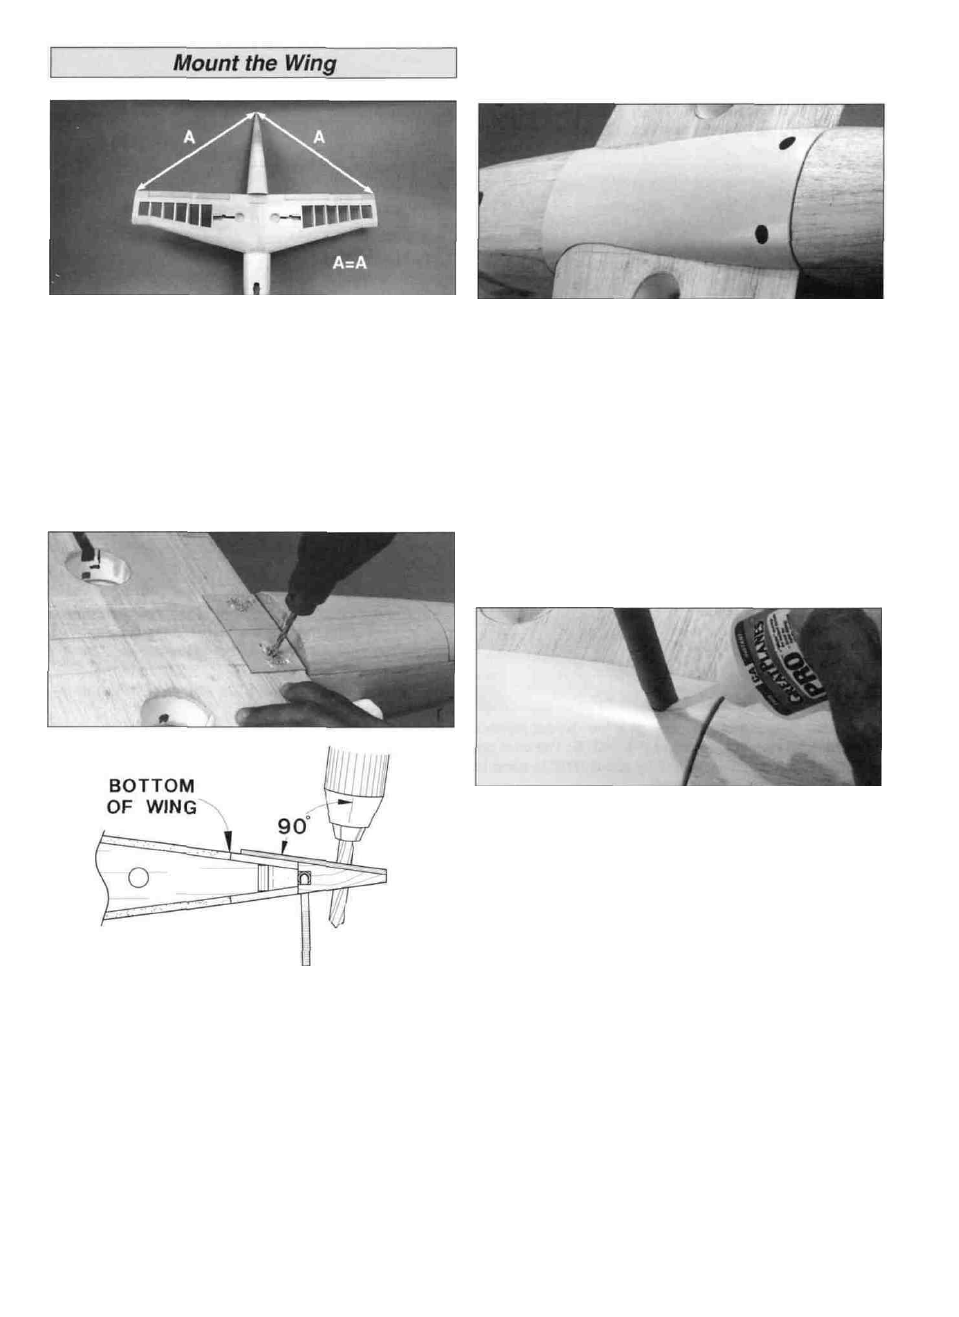
D 1. With the fuselage upside-down in the foam cradle, fit
the wing in the wing saddle. The wing dowels should slide
easily into the holes in F-3D, and there should be no gaps
between the wing and the saddle at the front or the rear.
Check that the wing tips measure the same distance from
the tip of the tail. When the fit is right, mark the center of
the trailing edge on the bottom sheeting as a guide for the
next step.
D 2. Drill through the punch marks in the trailing edge
reinforcing plate with a 13/64" bit. These holes must extend
all the way through the wing and the wing bolt plate and
must be perpendicular to the surface of the wing. Do not
allow the wing to move out of alignment while you are
drilling these holes. Now run a 1/4-20 tap through the
holes. Remove the wing and drill out the holes in the wing
to 1/4". Apply a few drops of thin CA to the threads in the
wing bolt plate, and after the CA has completely cured, run
the tap through them again.
D 4. Trim the plastic belly pan to the embossed perimeter
cut line. Test the belly pan on the wing, then carefully make
adjustments to the edges to obtain a good fit*. Sand a
bevel on the inside of the edges that will contact the
surface of the wing.
* Fill any gap between the fuse formers and belly pan with
left over balsa.
D 5. With the wing mounted on the fuse, glue the belly pan
in position using a mixture of 30-minute epoxy and Top Flite
Microballoon filler (TOPR1090). Use 4 parts of the filler to
1 part of epoxy. Apply a bead of the mixture to the inside
surface of the belly pan, then quickly position the part and
secure it with tape while the epoxy cures. Be careful not to
glue the wing to the fuse.
D 6. Cut out the wing bolt holes on the plastic belly pan
using the cut lines as a guide. Enlarge the holes in the wing
fairing to 1/2" diameter. Insert the supplied 1/2" x 6"
cardboard tube into one of the holes centered on a wing
bolt. Glue the tube to the outside of the belly pan with thin
CA. Do not allow CA to contact the wing bolt or your wing
may become permanently attached. Cut off the tube just
above the surface of the belly pan.
D 7. Repeat step 6 for the other bolt hole. Turn the tube
over to provide a squared off end at the bolt's location. Cut
off the excess tube material.
D 8. Remove the wing bolts, then drip a few drops of thin
CA down the inside of the tubes to attach them to the inside
of the wing. Do not reinstall the wing bolts until you are
sure the CA is fully cured!
D 9. Sand the top edges of the tubes flush with the contour
of the belly pan.
28