Great Planes Learjet 40 Kit - GPMA0439 User Manual
Page 8
30-minute epoxy is used
for extra strength (because
it can penetrate longer) and
where several parts must
be aligned and checked
before it cures. Working
time is about 25 minutes,
handling time 2 hours, and
it's fully cured in 8 hours.
Great Planes Pro" Wood Glue is an Aliphatic resin glue
that works well on all types of wood. It is non-toxic, virtually
odorless and dries clear. Some people are sensitive to CA
and epoxy fumes, so this is a good alternative for general
modeling use. Its only drawback is that it is slow to cure,
requiring the parts to be securely clamped, pinned or taped
while the glue dries.
Okay, you've got your work space ready, your tools are at
hand, and you know how to choose and use the right glue
for the job. Let's get started!
D 1. Unroll the plan sheets. Reroll the plan sheets inside
out to make them lie flat.
D 2. Remove all parts from the box. As you do, determine
the name of each part by comparing it with the plan and the
parts list included with this kit. Using a felt-tip or ball point
pen, lightly write the part name or size on each piece to
avoid confusion later. Use the die-cut patterns shown on
pages 6 and 7 to identify the die-cut parts and mark them
before removing them from the sheet. Save all scraps. If
any of the die-cut parts are difficult to punch out, do not
force them! Instead, cut around the parts with a hobby
knife. After punching out the die-cut parts, use your T-Bar
or sanding block to lightly sand the edges to remove any
die-cutting irregularities.
D 3. As you identify and mark the parts, separate them
into groups, such as fuse (fuselage), wing, fin, stab
(stabilizer), and hardware.
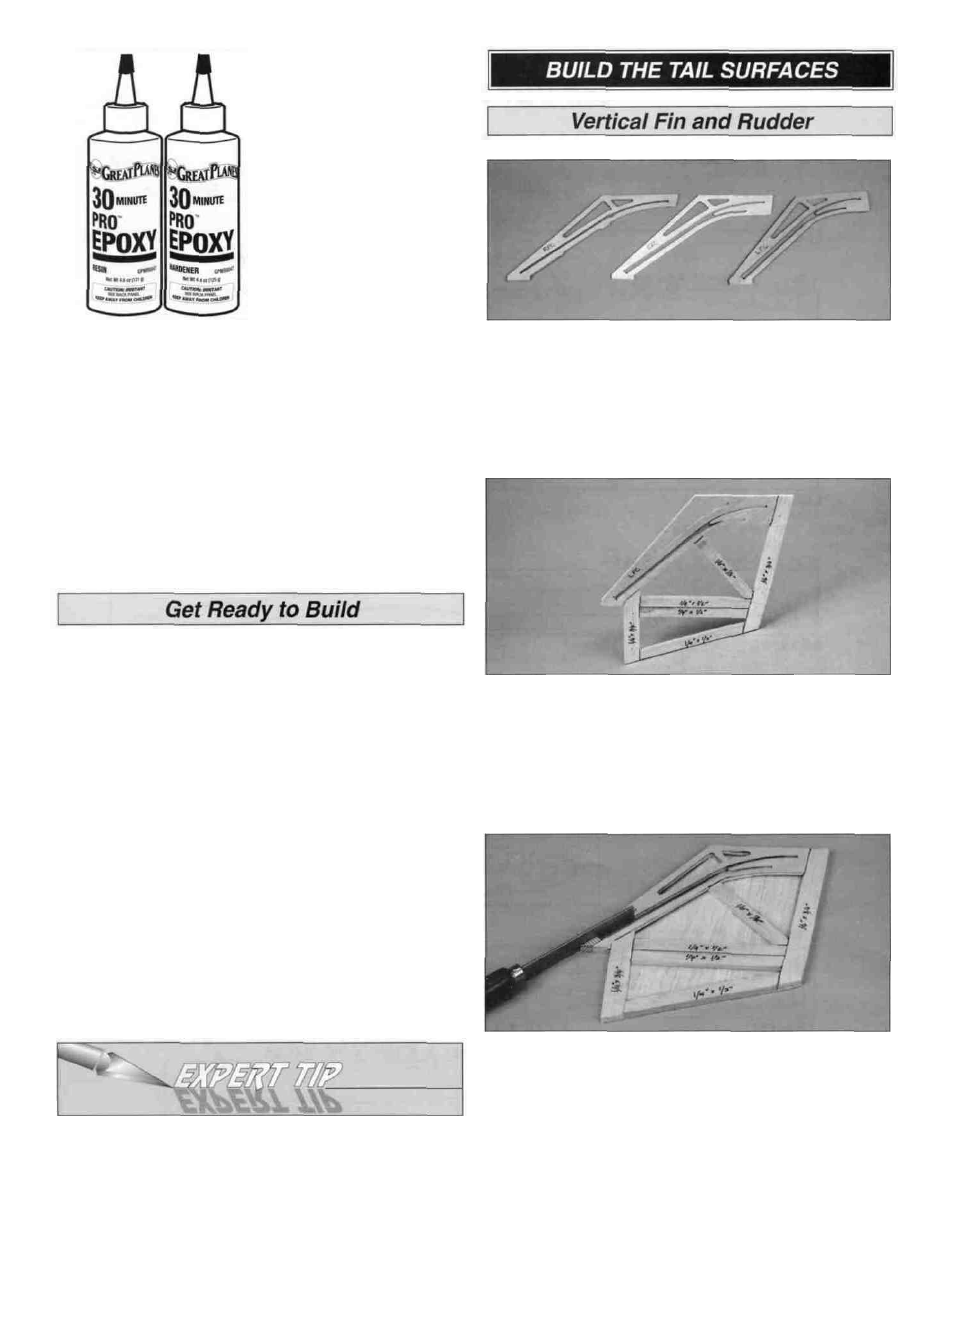
D 1. The fin core is made up of left and right die-cut 1/8"
plywood fin cores (LFC, RFC) and a die-cut 1/16" balsa
center fin core (CFC). Place the fin plan on your building
board and cover it with waxed paper. Place the 1/8" RFC
(with one slot) over the plan and glue the 1/16" center fin
core on top of it. Glue the 1/8" LFC (two slots) on top of the
center fin core.
D 2. Sand the front and top edges of the fin core smooth,
then pin the core over the plan. Assemble the balsa fin
framework from 1/4" x 1/2" and 1/4" x 3/4" balsa sticks on
the core as shown on the plan. Note: The frame is thinner
than the fin core but this will not cause a problem. Do not
install the leading edge, dorsal fin or the 3/8" top and rear
pieces yet.
Zipper-top food storage bags are handy to store your parts
as you sort, identify and separate them into subassemblies.
D 3. Remove the fin from the board, sand both sides
smooth (it's OK if the plywood core is a little thicker than
the balsa framing). Sheet the right side with 1/16" balsa
sheeting. Drill a 1/8" hole through the sheeting at the rear
end of the top slot and elongate the hole to fit the control
cable tubing. Cut away the fin core below the bottom of the
slots as shown on the plan.
8