Great Planes Learjet 40 Kit - GPMA0439 User Manual
Page 33
D 3 Wrap the battery in 1/4" foam, then install it in the
opening in the servo compartment. Connect the battery to
the switch.
D 4 Center all of the trim levers on your transmitter, then
turn on the transmitter and the receiver. Manually center all
of the servo horns.
D 5. Use some scrap balsa to make a tray to support and
secure the receiver.
D 1. With reference to the above sketch, cut 18 hinges
from the supplied 2" x 9" composite hinge material You will
need six hinges for the elevators and two for the rudder.
Each aileron gets four hinges
D 2 Draw a centerline on the TE of the stab and the LE of
the elevators. Do the same for the fin and rudder.
D 3 Use the plan as a guide to mark the locations of the
hinges on all tail components - fin, rudder, stab, elevator,
the wings' TE and the ailerons Refer to the Expert Tip that
follows, then cut matching hinge slits in all parts Do not
use any glue until step 4.
INSTALLING CA HINGES
The hinge material supplied in this kit consists of a
3-Iayer lamination of mylar and polyester It is specially
made for the purpose of hinging model airplane control
surfaces. Properly installed, this type of hinge provides
the best combination of strength, durability and ease of
installation We trust even our best show models to these
hinges, but it is essential to install them correctly.
Please read the following instructions and follow them
carefully to obtain the best results These instructions
may be used to effectively install any of the various
brands of CA hinges.
The most common mistake made by modelers when
installing this type of hinge is not applying a sufficient
amount of glue to fully secure the hinge over its entire
surface area, or, the hinge slots are very tight, restricting
the flow of CA to the back of the hinges This results in
hinges that are only "tack glued" approximately 1/8" to 1/4"
into the hinge slots The following technique has been
developed to help ensure thorough and secure gluing.
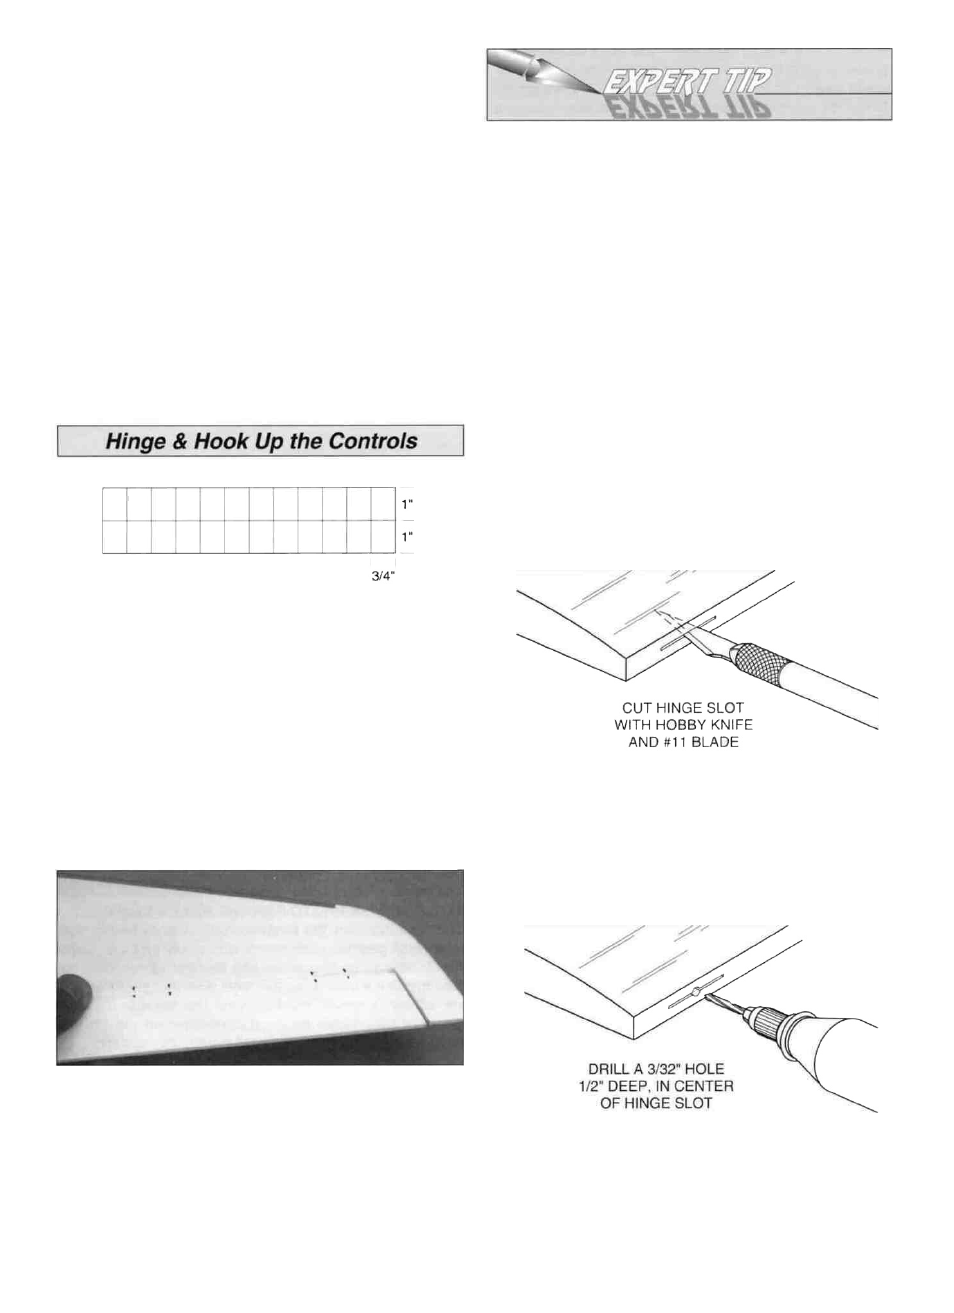
A. Cut the hinge slot using a #11 blade in a standard #1
knife handle The CA hinges provided have a thickness
that fits this type of slot very well Trial fit the hinge into
the slot If the hinge does not slide in easily, work the
knife blade back and forth in the slot a few times to
provide more clearance (it is really the back edge of the
blade that does the work here in widening the slot)
B. Drill a 3/32" hole, 1/2" deep, in the center of the
hinge slot. If you use a Dremel Moto-Tool® for this task, it
33