Great Planes Learjet 40 Kit - GPMA0439 User Manual
Page 12
NOTE: The wings are built UPSIDE DOWN over the
opposite wing plan.
D 1. Start with the wing plan which shows your chosen
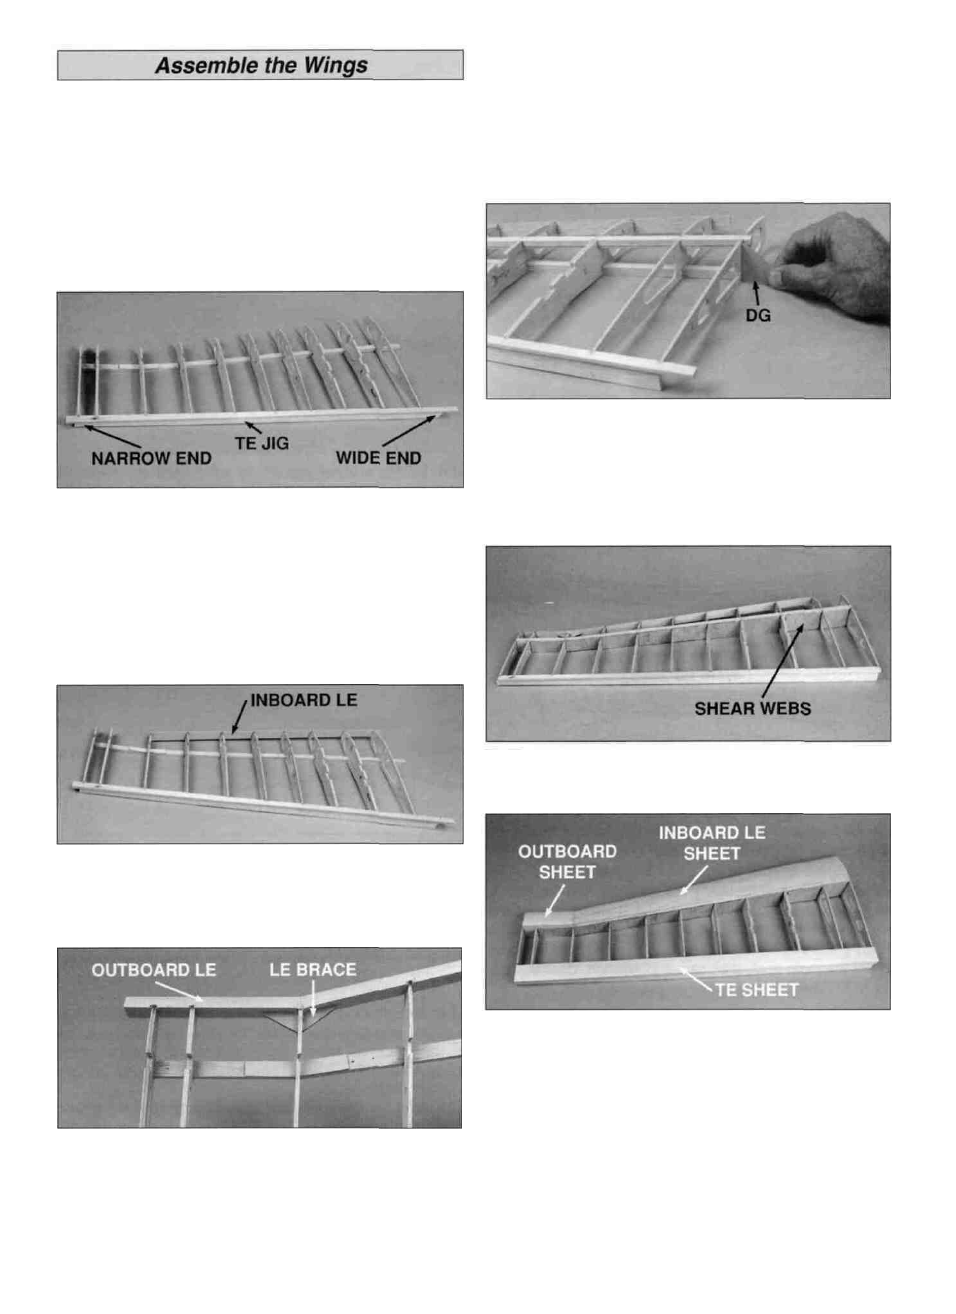
landing gear. Pin the trailing edge support jig to the board
over the plan, under the waxed paper. The wide end of the
jig is positioned at the root end of the wing.
D D 2. Carefully separate the leading and trailing edges
with a hobby knife.
D D 3. Pin the bottom spar down and glue W-2, W-6 and
W-11 to the spar, then glue the shaped and notched
trailing edge to those ribs. The ribs should be centered
vertically on the trailing edge and the trailing edge must be
kept level. (Since the trailing edge is tapered, it does not sit
flat on the support jig.) Pin the trailing edge to the support
jig. Add the rest of the ribs (except W-1). Be sure that the
rib doublers are on the correct side of W-3 and W-4 as
indicated on the plan.
D D 4. Fit the inboard leading edge in place on ribs W-4
through W-9. The leading edge must extend an equal
amount above and below the ribs. Glue the leading edge in
place with thin CA.
D D 5. Sand the outboard leading edge (the short piece
you cut off) to fit against the inboard leading edge, then
glue it in place on the forward edge of ribs W-9 through
W-11. Glue the die cut 1/8" plywood leading edge brace to
the back of the leading edge at W-9.
D D 6. Fit and glue the second spar in position.
D D 7. Place W-1 in position (with the servo opening
pointing toward the building board) and hold the dihedral
gauge against the outer face to set the proper angle. Glue
W-1 in place. Cut both spars and the TE flush with W-1.
Trim the LE flush with W-2.
D D 8. Fit and install 1/16" balsa shear webs in all rib
bays against the aft edges of the spars.
Refer to this photo for next three steps.
D D 9. Lightly sand the top of the ribs, spar and trailing
edge to remove any irregularities. Sand the forward edge
of the 3/32" inboard leading edge sheeting to match the
angle made by the ribs and the leading edge. The aft edge
of the sheet should fall on the centerline of the spar. When
satisfied with the fit, glue it in place.
12