Great Planes Learjet 40 Kit - GPMA0439 User Manual
Page 35
D 10 Insert the nose wheel steering cable into the guide
tube from the nose of the model, all the way into the rudder
servo connector.
D 11. Screw a 1" threaded insert into one end of the plastic
throttle pushrod, then attach a nylon clevis and silicone
retainer to the threaded insert Each part must be screwed
into position with at least 14 revolutions
D 12. Permanently install the engine mount and engine.
D 13 Insert the throttle pushrod into its guide tube (from
the firewall), then connect the clevis to the throttle arm on
the engine Cut off the excess pushrod 1" past the exit from
the guide tube Screw a 4" threaded wire pushrod into the
plastic pushrod 14 turns Pull the pushrod all the way to the
rear, then cut off the excess 1/2" short of F-7 Disconnect
the clevis at the throttle, then slide the wire pushrod into the
connector on the servo horn Reattach the pushrod to
the throttle.
D 14 Screw a 12" threaded wire pushrod 14 revolutions into
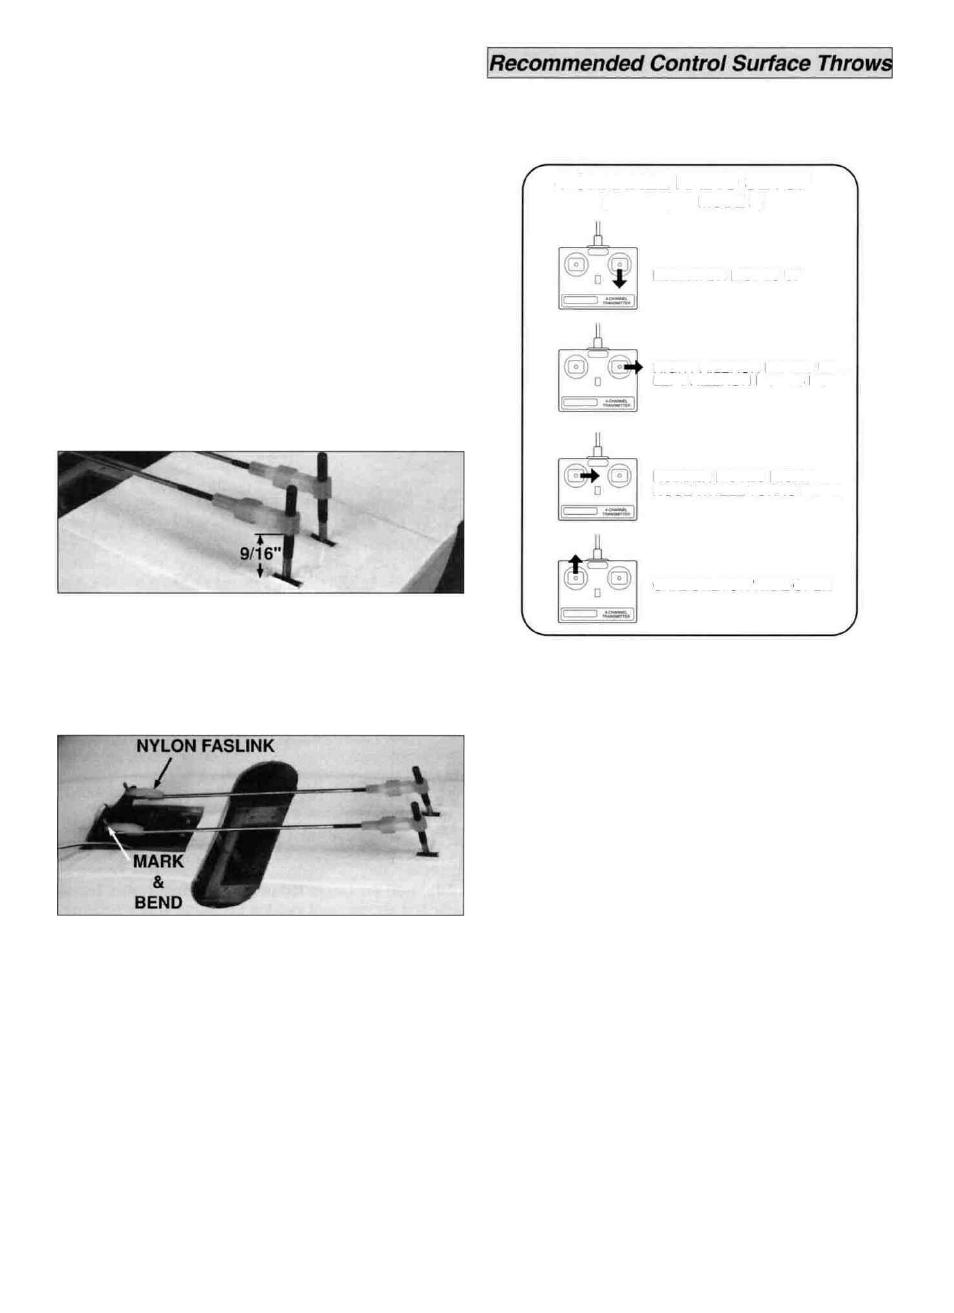
a nylon clevis Snap the clevis into a nylon torque rod horn.
Screw the horn onto an aileron torque rod until the bottom of
the horn is 9/16" above the surface of the wing Repeat the
process for the other pushrod Install a silicone retainer on
each clevis after the servo and throws are adjusted.
Refer to this photo for the next three steps.
D 15 Install the aileron servo as shown on the plan, using
a straight servo horn Center the servo, then with the
ailerons set in a neutral position, mark the pushrod wires
where they intersect the servo horn holes.
D 16 Enlarge the servo horn holes with a 5/64" drill bit
D 17 Make a 90 degree bend in both pushrod wires where
you marked them Cut off the excess wire 3/8" above the
bend Insert the pushrod wires into the servo horn, then
secure them with nylon Faslinks.
NOTE: Throws are measured at the widest part of the
elevator and rudder Make sure the control surfaces move
in the proper direction as illustrated below
ELEVATOR MOVES UP
RIGHT AILERON MOVES UP
LEFT AILERON MOVES DOWN
RUDDER MOVES RIGHT
NOSE WHEEL TURNS RIGHT
CARBURETOR WIDE OPEN
High Rates
Low Rates
1/4" up
1/4" down
3/4" right
3/4" left
3/16" up
3/16" down
5/16" up
5/16" down
ELEVATOR:
1" right
RUDDER:
1" left
1/4" up
1/4" down
AILERONS:
These control surface "throws" are approximate and
provide a good starting point for the first flights with your
Learjet You may wish to change the throws slightly to
provide the smoothness or quickness that you prefer
NOTE: If your radio does not have 'dual rates," then set up
the control surfaces to move at between the high rate and
low rate throws.
IMPORTANT: The balance and surface throws for this
aircraft have been extensively tested. We are confident
that they represent the settings at which the Learjet
flies best. Please set up your aircraft to the
specifications listed above. If, after a few flights, you
would like to adjust the throws to suit your tastes,
that's fine. Too much throw can force the plane into a
stall or unexpected maneuver, so remember... "More is
not better."
4-CHANNEL RADIO SETUP
(STANDARD MODE 2)
35