F. mechanical system, Figure 72, Mike – Kenmore 808353 User Manual
Page 71: Latoh ustrallv results irom attempting to, Door assemblies
Attention! The text in this document has been recognized automatically. To view the original document, you can use the "Original mode".
F. MECHANICAL SYSTEM
Door Assemblies
The door should never require adjustrment^
Misalignment
between the
usually a result of improper positioning of the attach brackets to the counter top Reposition the b a v
g
the door to the tub
A r
f+mfint in irirrsiacp nr fierrease aasket oressure between the door and tub may be made by_ removing
irS»ilhSirs
mike
ICamion
-
Addition
ol shims on a new dishwasher to make latohing easier
may mSn a Sklfter taken a '■ sefl
Bending ol
the
door
latoh ustrallv results Irom attempting to
iatch the door before it is fully dosed
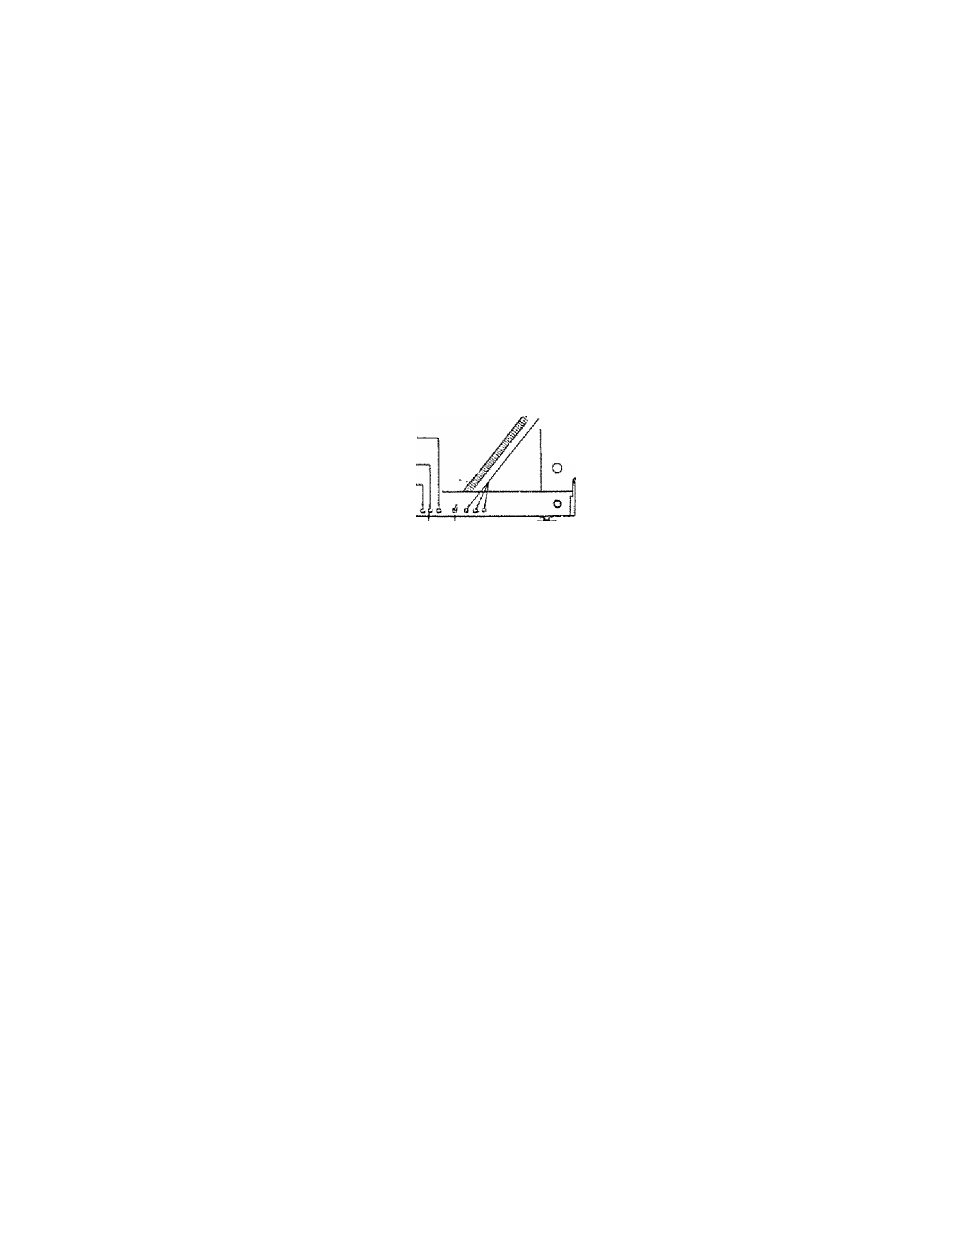
Rnrino tension Ss set at the factory for the standard dishwasher door Too much tension will not allow the door to
bpnng tension s sei ai me iduiui y u
.
j,,
„ .t,„ to fall open when the latch ts released. Spring
remain in the fully opened position Too little tension wii! cause the aoor to upen w. c
tension may require adjusimenl if a wood or metal inserts are added or removed m the door bee rtgure
^Ì6
Ponei
ijj Plywood Panel'
Pre
flnisbed
Steel
Inserí Ponel
tenifion Difcreaiiad
/
lefision Incrttoiedt ‘“Sloriciorcl Setting
FIGURE 72
DifihwoiKer
Front
A
One Piece Outer Door Control Pane!
On some dishwashers the outer door panel and control panel have been combined to
is
removable
from
the
inner
door
without
need
for
disconnecting
wires
This
leaves
the
dishwasher
entire
y
operable
To gain entry to the area behind this piece housing the timer, selector switch, injectors, door switch, thermostat,
etc , proceed as follows and refer to Figure 73i
1 Disconnect power supply to dishwasher
2
Remove the latch knob attachment screw
3
Lower (open} the complete door assembly and remove the six (6)
panel to the inner porcelain door, (NOTE: This step should be done, using clamps or a knee brace to retain
the panel during screw removal i
4
Allow the complete door assembly to close slowly
5
Remove the outer panel and rotate it from the left to the right 180'^ in the upright position
6
Place the outer panel on floor adjacent to the dishwasher in the upright position
7
Check wire connections on all components
8
Proceed with testing and repair
9, Reverse procedure for replacement
NOTE.
If the removal of The access panel is likely, it should be done prior to outer panel removal
6 8