Figure 71, Voltage checks, Physically – Kenmore 808353 User Manual
Page 69
Attention! The text in this document has been recognized automatically. To view the original document, you can use the "Original mode".
Voltage Checks
CAUTION
,,
When making voltage checks, remember that the machine is connected to a live power source^ Use
extreme caution to lot
physically
touch any bare contacts or wmng terminals when making voltage
checks.
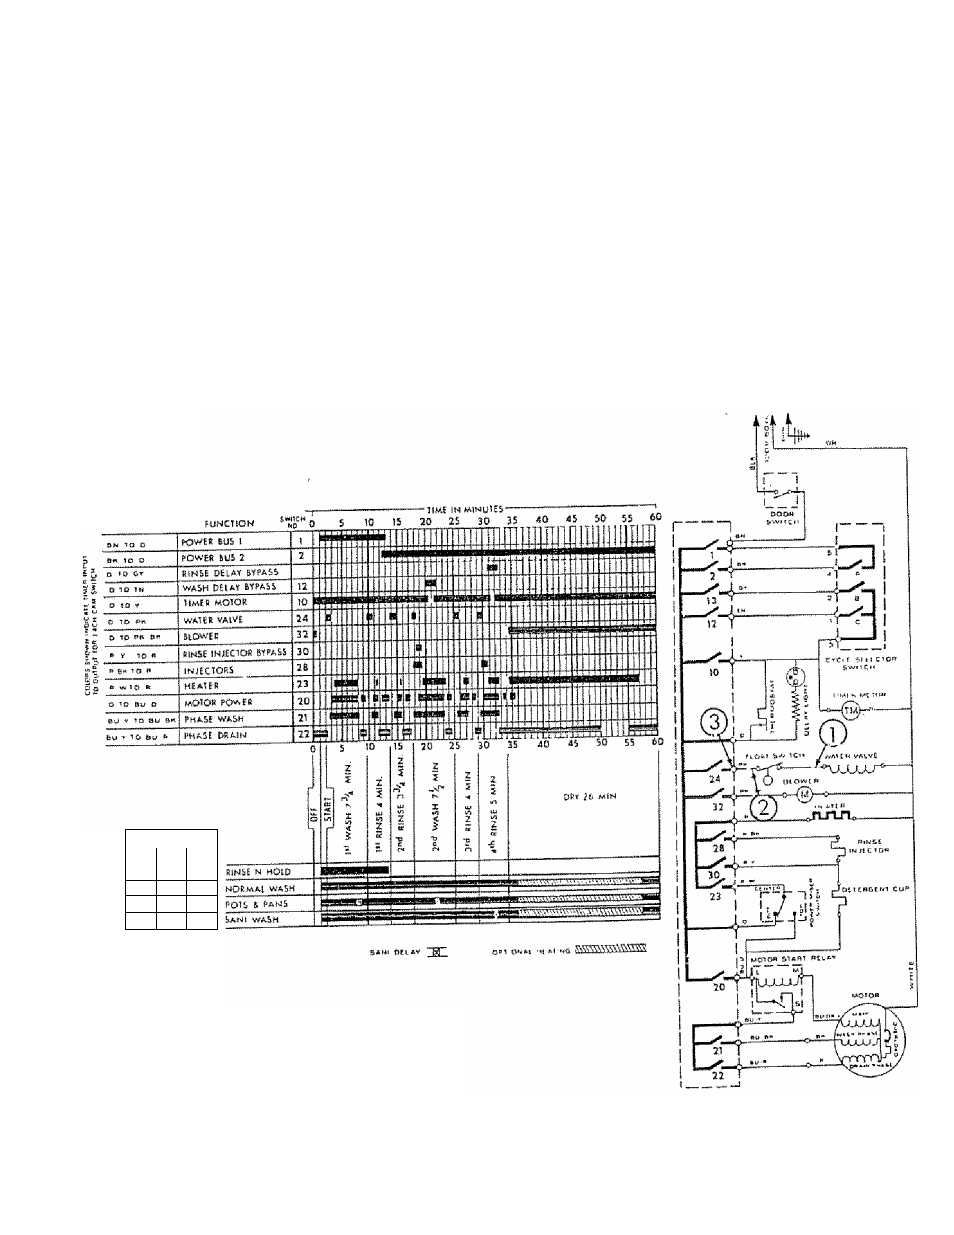
When all the previous steps (or normal operation have been checked and the machine still does not id!, turn to the wirmg
loram and Ester »nfchli which is usually packed in the machine console Using a voltmeter set on a sc_a e that wid
^ i I ïiri
1
on yn!i Ç rnnnerî one lead to s white (common) terminal and the other lead to point — 1 indicated
measure at least 120 volts AC, CO
nf
i
H
o
rurip snr!
i
H
p
door switch closed 120 volts AC should be present,
in Figure 71 With the timer set to a fill portion oUhe
If these two
A sHcîHi humrning sound shouid siso bo pres6nt which indicstês that th€ ^ rt
i
a« noracîarv
conditions are present, check for blockage or a stuck plunger within the fill valve Clean or replace the valve as necessa y
If 120 volts AC is not present move the lead to point = 2 shown on Figure 71, No voltage at this point would indicate
a broken or
disconSectefwire; or a defective timer . If 120 Volts AC is present, the float switch is defective or the wire
between the float switch anti water value is defective
eoioB coo£
isjwcîtCHvV
A
fc.^
C
O
X
X
X
X
X
X
X
o
X
0
X
FIGURE 71
6 8