Sysex verify, Sysex verify -69 – Elektron Machinedrum User Manual
Page 77
GLOBAL SETTINGS
69
2.
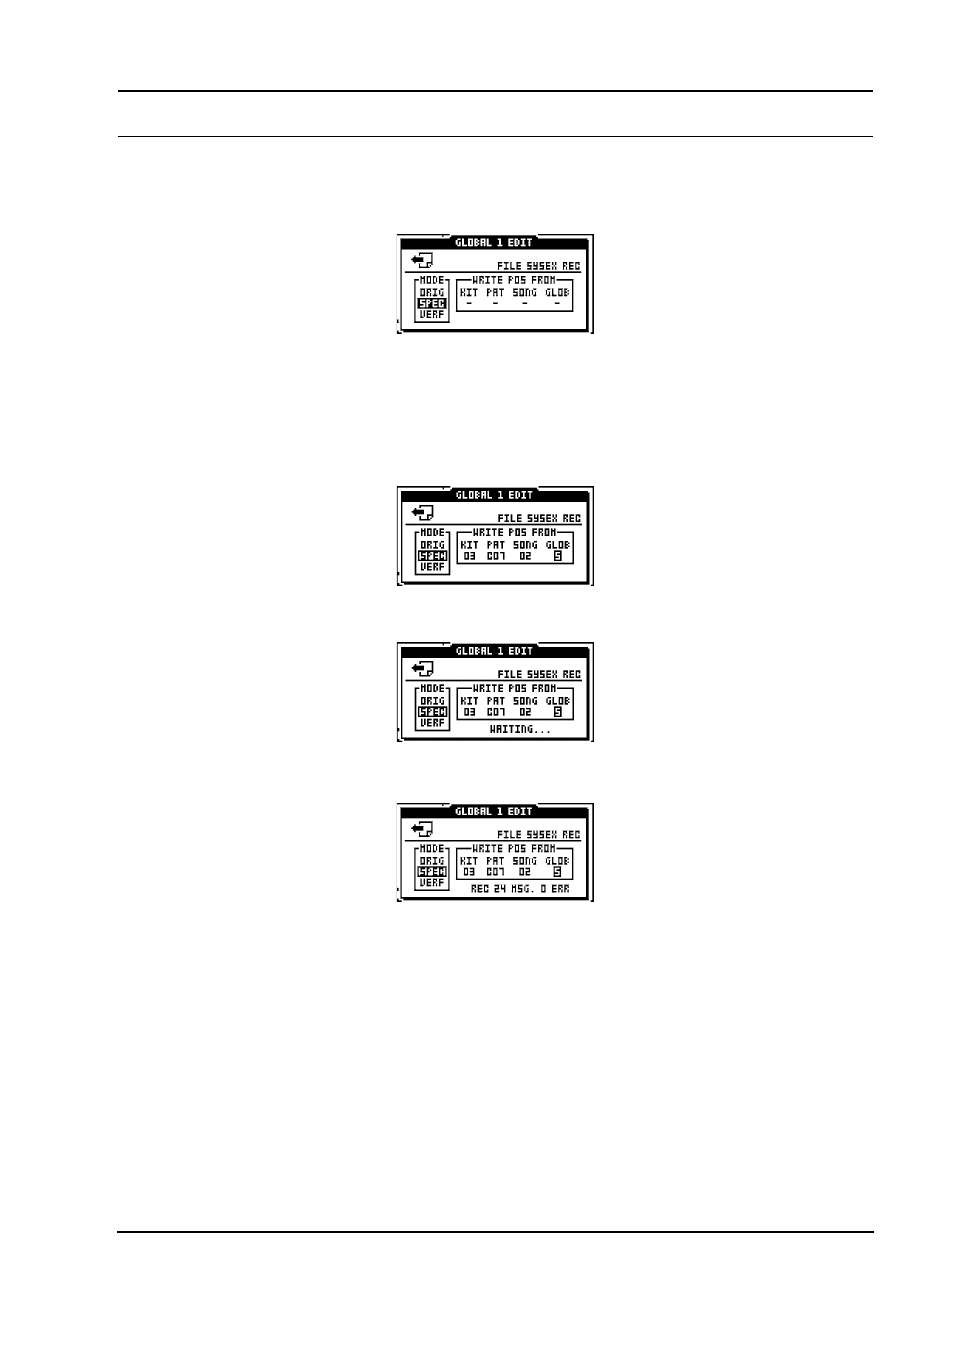
Select the FILE row in the GLOBAL EDIT menu. Then select SYSEX REC and press
[ENTER/YES].
3.
Select the SPEC receive method using the [UP] and [DOWN] arrow keys.
4.
Move to the box to the right where you can select the starting position for the sysex data
that you will send to the Machinedrum. The first position, KIT, is the kit number that you
wish to start from. The second, PAT, is the pattern start position. The third, SONG, is the
song start position, and finally there is GLOB, which is the global setting start slot. You
set the parameters with the [UP] and [DOWN] keys. You can leave the other parameters
blank and only specify the KIT parameter if, for instance, you only want to transfer kits.
Columns which are not specified are treated as they would be in ORIG mode.
5.
Press [ENTER/YES] to start receiving data. The message “WAITING...” shows up in the
menu.
6.
Now initiate the data send from the sending device.
7.
A message is shown on screen for each chunk of data received.
SYSEX VERIFY
When the verify function receives a sysex dump it will check if the dump contains any
errors. Since it is only a diagnostics tool, it will not overwrite any already existing data
inside the Machinedrum.
1.
Make sure that you have connected the Machinedrum MIDI IN port to the MIDI OUT port
of the device that is sending the sysex data.
2.
Select the FILE row in the GLOBAL EDIT menu. Then select SYSEX REC and press
[ENTER/YES].