6 network configuration, 1 network, 2 sub stream – COP-USA DVR2304SE-B User Manual
Page 39
Digital Video Recorder User Manual
33
4.6 Network Configuration
Network configuration includes five submenus: network, sub stream, Email, server and other settings.
4.6.1 Network
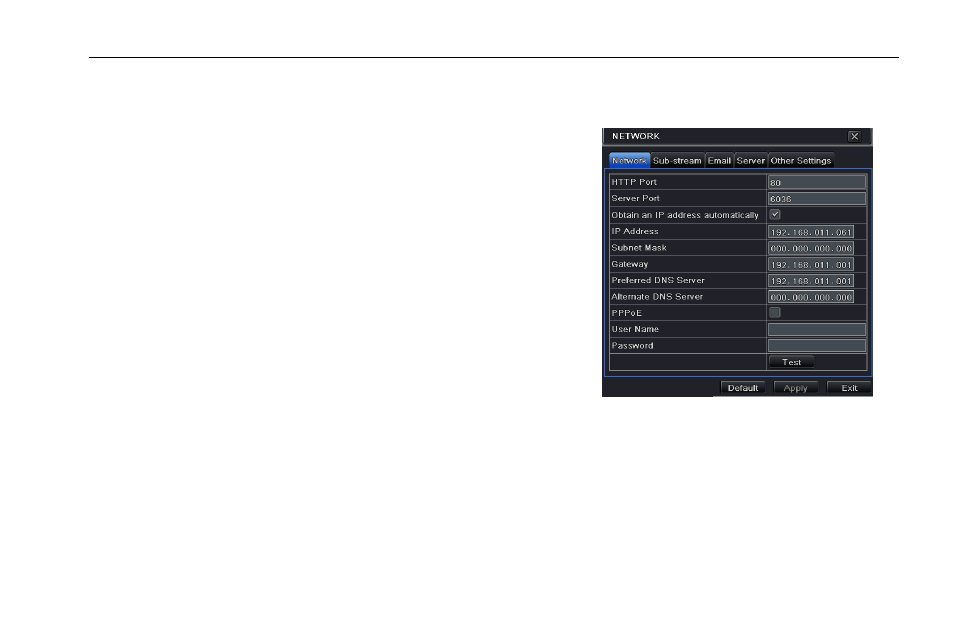
Step 1: Enter into MenuSetupNetwork tab. Refer to Fig 4-29:
Step 2: HTTP port: the default value is 80. If the value changed, user needs to add the
port number when typing IP address in IE address blank .i.e. set HTTP port to 82, IP
address user needs to input that addressinto IE browser
Server port: Communication port.
Step 3: Select the way to connect Internet. If you have a DHCP server running and
would like your DVR to automatically obtain an IP address and other network
settings from that server, check the checkbox beside "Obtain an IP address
automatically". Then the device will distribute IP address, subnet mask, and gateway
IP and DNS server. If you want to configure your own settings, please input the IP
address, Subnet mask, Gateway DNS server manually. You can also check the PPOE
checkbox to enable this feature and then enter username and password. Once the
setup is completed, your DVR will automatically dial up into your network.
Fig 4-29 Network Configuration-Network
Step 4: No matter what kinds of way to connect internet, you should test the effectiveness of the network by clicking “Test” button after
you setup the network.
Step 5: If the network is well connected, please click “Apply” button to save settings.
4.6.2 Sub Stream
Step 1: Enter into MenuSetupNetworkSub Stream tab. Refer to Fig 4-30:
Step 2: Select fps, resolution, quality, encode and max bit rate
Step 3: Select “All” to setup all channels with the same parameters.