7 handling the syringe pump, 1 calibrating the syringe pump, 2 selecting a pre-calibrated syringe – BUCHI Encapsulator B-395 Pro User Manual
Page 45: Handling the syringe pump, 6 .7 handling the syringe pump
6 Operation
45
B-395 Pro
Operation Manual, Version C
6 .7
Handling the syringe pump
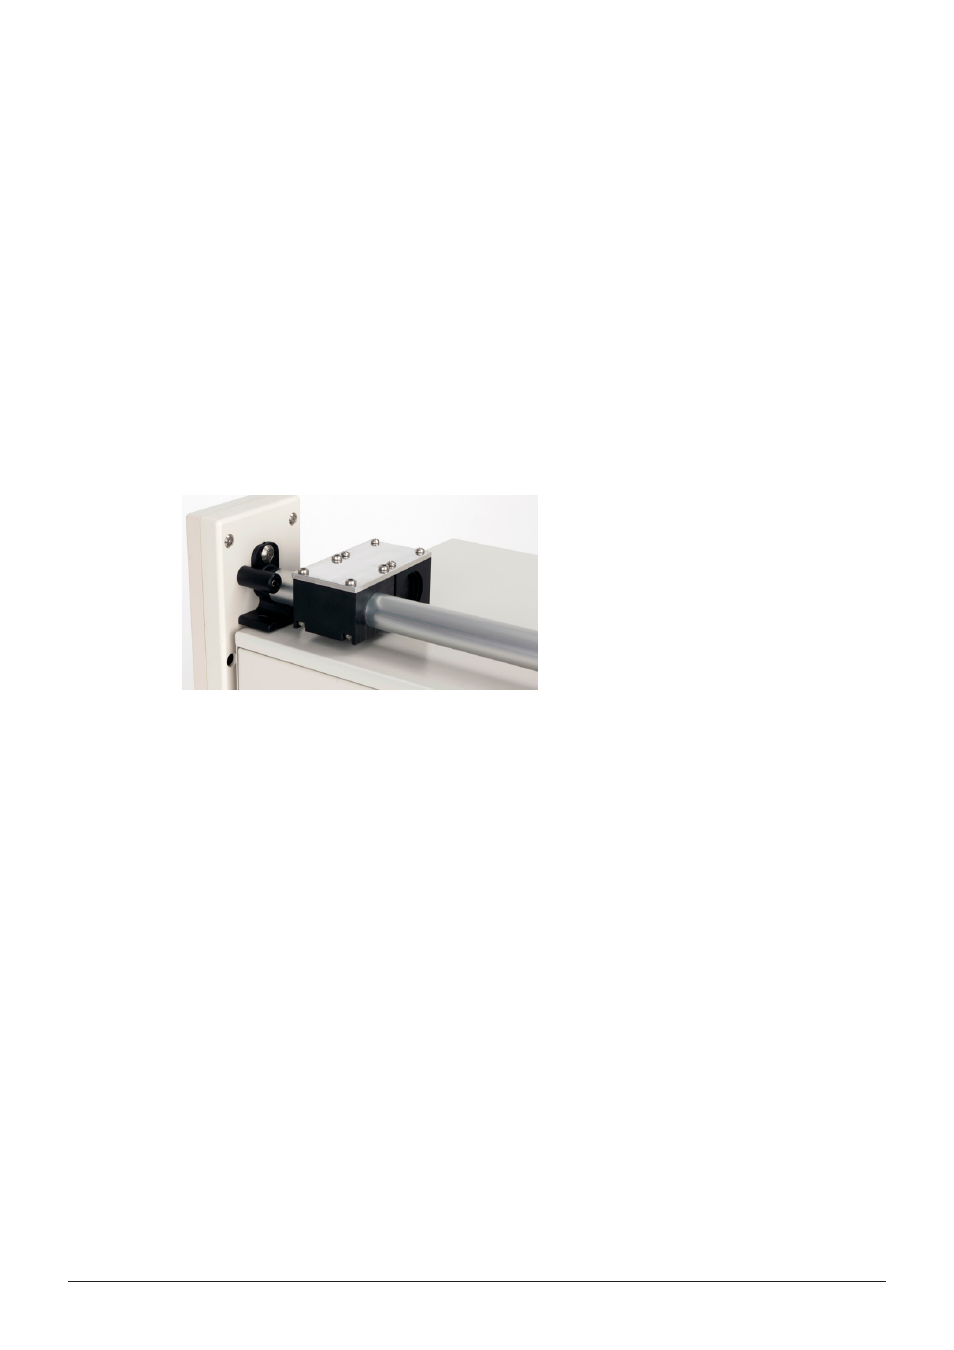
When the syringe pump is used the first time after switching on the control unit, press the “home”
button on the lower touch screen to move the pump arm back. Let the arm move completely
back until it touches the end knob microswitch (see figure 6-3) where it stops itself. In this way, the
computer of the control unit recognizes the exact position of the syringe arm. Attach the filled syringe
(we recommend using plastic syringes with a luer lock system) to the bead producing unit.
Let the syringe arm move forward by starting the pump (see screen 6-10). By pressing the “turbo”
button, the arm moves at double speed. You might increase this forward speed by temporarily setting
higher pumping rates. Reduce the speed as the pump arm approaches the syringe plunger. Stop the
pump as the arm touches the syringe plunger. Set the desired liquid flow rate (see screen 6-10). Start
pumping by pressing the on/off button. To prime the system, press the “turbo” button – the pump
moves at double speed – until a continuous liquid jet is formed at the nozzle, then press again on the
“turbo” button to move back to the preset value. If needed, adjust the pumping speed to get clearly
separated beads in the light of the stroboscope.
Figure 6-3: Syringe pump end knob
6 .7 .1
Calibrating the syringe pump
Fill the syringe with water or with the immobilization mixture and attach it to the bead producing unit.
Weigh a container for collecting the liquid pumped for 1 minute and start pumping. Set the pumping
rate to obtain good bead formation. Start the calibration procedure by pressing the “cal mL/min”
button (see screen 6-10). Choose the appropriate syringe size (see screen 6-11).
Press the “on/off” button (see screen 6-12) and collect the liquid coming from the nozzle in the pre-
weighed container for 60 seconds. The last three seconds are announced by a sound. One second
after the last sound, the pump stops automatically. Weight the pumped liquid. Insert the value (see
screen 6-13) and store the value. This type of syringe is now calibrated.
6 .7 .2
Selecting a pre-calibrated syringe
The calibrated syringe types can be recalled as needed. Stop the pump, press the “cal mL/min”
button (see screen 6-10) and you will be forwarded to screen 6-15. Select the appropriate syringe and
you will be forwarded to the start menu. The selection is done.