Troubleshooting, Care and maintenance – Panasonic KX-P6100 User Manual
Page 32
Attention! The text in this document has been recognized automatically. To view the original document, you can use the "Original mode".
Care and Maintenance
Troubleshooting
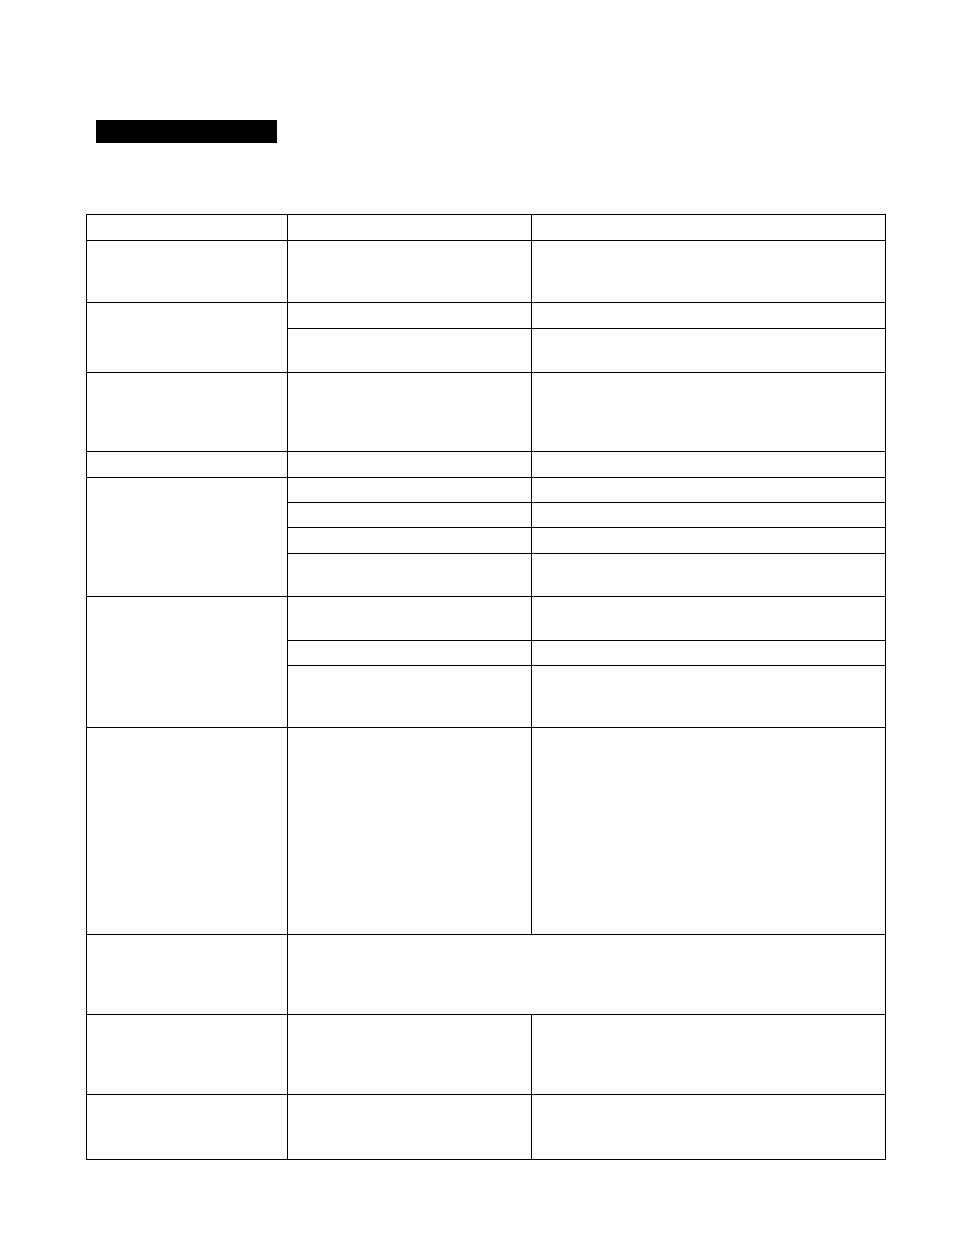
Many problems associated with the printer can be traced to improper setup or cabling. The following table will assist
you in identifying and correcting some of the more common problems.
Trouble
Possible Cause
Corrective Action
Printer not printing and
neither indicator is
lit/blinking
No AC power
Check power cord.
Power on but printer not
printing data
Interface cable not connected
Check interface cable.
Improper cable is connected
Replace the cable with the one whose all pins
have been connected.
Paper jams occur
continually
The paper size selected through
the GDI Mode, PCL Mode or
software application is different
from the installed paper size
Select the correct paper size through the GDI
Mode {^ P. 18), PCL Mode ( i®" P. 24), or
application.
Stains on paper
Dirty paper path
Clean paper path ( P. 31).
Vertical line on paper
Dirty paper path
Clean paper path ( P. 31).
Dirty tungsten wire
Clean tungsten wire ( P. 31).
Scratch on drum
Replace process unit.
Scratch on fuser roller
Replace fuser. The printer requires service by an
Authorized Panasonic Service Center.
Very faint print
Toner may be empty
Shake the Process Unit or refill the toner in the
Process Unit {P. 35).
Print density not adjusted
Select the proper print density ( P. 29).
Abnormal transfer corona
current
Replace the transfer corona. The printer requires
service by an Authorized Panasonic Service
Center.
Printout is raggedy
Screen fonts may be selected
Replace the screen fonts with TrueType fonts. To
show only TrueType fonts in applications, follow
the procedure below.
1. Double click the Main icon in the Program
Manager.
2. Double click the Control Panel icon.
3. Double click the Fonts icon.
4. Click [TrueType).
5. Select “Show Only TrueType Fonts in
Applications”, and click |OK| to
exit the TrueType dialog box.
Paper jam has occured
Follow the instructions displayed on the screen. If you need additional help, click the
Show Me button for animated help. If stains appear on the back of the printed paper
after a paper jam is cleared, it is recommended that you run several test prints
{ P. 15 ‘Testing the Printer”).
Ejected paper is caught
between the paper
support and the output
tray
There is a space between the
output tray and the paper
support
Slide the paper support down and then extend it
again to remove the space (ns^StepI on page12).
DOS application file
cannot be printed
Operation in the Background is
not effective
Disable the Exclusive in the Execution field on the
PIF Editor or start the DOS application from the
MS-DOS prompt of the Windows.
32